Things You'll Need
Utility knife
Nail puller
Drill
Phillips driving bit
Drywall mud
6-inch putty knife
Sanding sponge
Primer
Paintbrush
Tape measure
Hacksaw
4-foot level
Cardboard
Hole saw
Construction adhesive
Caulk gun
Latex caulk
Shower wall panels last many years if they receive the proper care. However, eventually, even with the best care, they begin to collect rust stains and become yellowed and dingy looking. Replacing your shower wall panels gives your entire bathroom a fresh, new look. Purchase replacement shower wall panels from your local home builder's store. Panels come in full sections, which you hang on the wall. All you need to do before installation is measure and cut the panel for the proper showerhead, faucet and shelving locations.
Step 1
Turn off the main water supply to the shower. Remove the shower faucet and head, according to the manufacturer's directions. Cut through the caulk running across the current shower wall panel's top edge, bottom edge and along both sides, using a utility knife.
Video of the Day
Step 2
Pull out any nails securing the shower walls in place, using a nail puller. If screws secure the walls in place, back them out with a drill and Phillips driving bit. Some wall panels will have neither nails nor screws and are held in place with adhesive. Pull the old shower wall panels off the wall slowly, to avoid causing a lot of damage.
Step 3
Scoop up some drywall mud with a 6-inch putty knife. Spread a thin layer of the mud over any areas that received damage. Allow the drywall mud to dry, then sand it smooth with a sanding sponge. Paint the patched areas with primer and wait for the primer to dry.
Step 4
Measure your tub's length, width and height. Transfer these measurements to the supplied trim pieces. Cut the trim pieces to the appropriate lengths, using a hacksaw. Peel the paper backing off one trim piece. Position it over the seam where the tub meets the wall and press it onto the wall. Repeat with the remaining trim pieces.
Step 5
Hold a 4-foot level on the wall, at one of the tub's outer corners. Line up the level's outer edge with the trim pieces outer edge. Position the level so it stands straight up from this point and draw a light line on the wall. Move the level to the tub's other outer corner and repeat this step.
Step 6
Cut a piece of cardboard to the same size as the shower wall panel, which will be installed over the faucet and showerhead. Hold the cardboard on the wall, in the same way the tile will be placed, and line up the outer edge with the pencil line you made in Step 5. Use a utility knife to cut the faucet and showerhead holes out of the cardboard.
Step 7
Lay the cardboard template over the appropriate shower wall panel. Trace around the holes with a pencil. Measure the holes' diameters. Use a hole saw of the same diameter to cut each hole out of the shower wall panel. Lift the panel up to the wall to check that all the holes line up.
Step 8
Place a tube of construction adhesive in a caulk gun. Some shower wall manufacturer's supply their own adhesive for you to use. Apply a bead of caulk around the back wall panel's edges, approximately 1 inch in from the foam tape. Run additional beads up and down along the back of the shower wall panel.
Step 9
Peel the paper off the foam tape. Lift the panel up to the wall. Line up the outer edge with the pencil line you made in Step 5. Run your hands over the panel to press it firmly into place.
Step 10
Install the front wall panel next -- the panel with the holes cut in it. Apply the caulk the same way you did on the previous wall panel. Place a continuous bead of caulk around each hole, about 1 inch from the edge. Line up the panel's outer edge with the pencil line and press it onto the wall.
Step 11
Measure the distance between the two panels and divide it by two. Transfer this measurement to the tub's lip on the side wall. Measure the side panel's length and divide by two. Mark this center point on the side panel's bottom edge.
Step 12
Apply adhesive to side panel's back side, the same way you did on the previous two panels. Peel off the foam tape's paper backing. Lift the panel up to the wall and angle the top edge out toward you. Line up the center line on the panel with the center line on the tub. Set the bottom edge in place, then push the panel up against the wall. Rub the panel firmly, with your hands, to set it in place.
Step 13
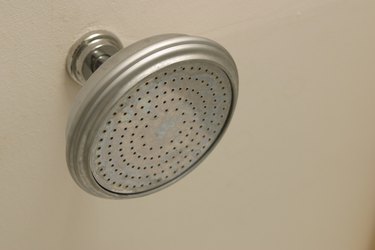
Install the tub faucet and showerhead, according to the manufacturer's directions. Apply a bead of latex caulk around the seams where the wall panels meet each other and where they meet the tub. Smooth the caulk bead lightly with your little finger.
Video of the Day