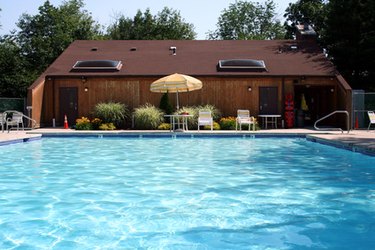
Installing a pool in your yard can offer a number of great benefits. Swimming provides a relaxing escape from day-to-day life and can be a great form of aerobic exercise as well. Unfortunately, many people are turned off by the high cost required to install an in-ground pool. In addition to materials and maintenance, installing an in-ground pool requires extensive labor, which is often too difficult or complex to be done without the aid of professionals. Thankfully, it is possible to have the benefits of an in-ground pool at the cost of an above-ground pool if you're willing to spend some extra time and effort to properly prepare it.
Video of the Day
Things You'll Need
Shovel
Sand Or Soil For Packing
Level
Sod Cutter
Tape Measure
Rake
Backhoe Or Similar Digging Tool
Step 1
Determine the size of your pool. Mark off a space in your yard for the pool that is 3 feet wider in diameter than the pool itself.
Video of the Day
Step 2
Decide on the desired height for your pool. You'll want to have the walls of the pool at least 1 foot above ground level. This will prevent a number of problems, including flooding, dirty water, and difficult access to plumbing controls.
Step 3
Use your sod cutter to remove any vegetation in the area around the pool. Be wary of large root sections that can erode your pool foundation.
Step 4
Dig out the marked radius, measuring your depth periodically to ensure the desired rim height.
Step 5
Rake the foundation so that the soil is generally level across the entire area. When the foundation has been thoroughly raked, begin laying out the bottom rail of the pool bed. If your pool uses additional buttresses for depth or shaping, consult the user manual or ground plan to ensure proper placement.
Step 6
Lock the bottom railing in place, using the connector feet. Carefully measure and level the railing to ensure everything is properly fitted and placed.
Step 7
Unravel the pool wall and begin locking it into the railing. It is advisable to have a second person installing the frame at the same time to ensure that the frame is correctly positioned. This will also make it easier to locate gaps or twists that could cause structural integrity problems in the future.
Step 8
Bolt down the pool wall and begin to attach the top rail. If you are using sand to level the pool base, pour it into the center and rake it out to the edges.
Step 9
Install the pool lining once the sand has been raked into place. It will be easiest to install the lining from the outside of the pool, as footprints can displace sections of the lining. When the lining has been properly fitted, begin filling the pool with water.
Step 10
Observe the pool as it fills, keeping an eye out for any last-minute problems with twisting or frame gaps. Do not attempt to back-fill the outside of the pool until it has been filled at least 80 percent. Packing the outside edge before filling the pool can cause the walls to rupture and collapse due to uneven pressure loads. Remember that the water level should always be higher than the dirt.
Step 11
Install all remaining plumbing fixtures once the pool has been filled 80 90 percent. You should be able to use your pool for swimming as soon as the water treatment is added.
Warning
Be aware that the warranty of many above-ground pools will be voided if the pool is installed in-ground. You may wish to refer to the documentation that accompanied your pool kit before attempting installation.