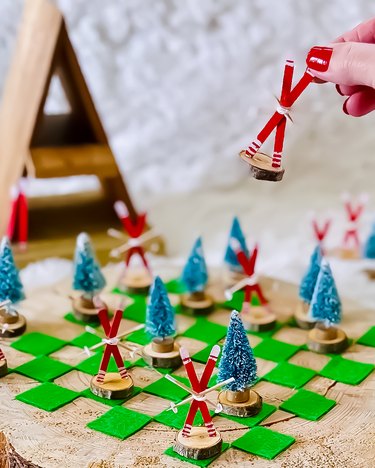
Let's take a thrilling downhill ride into the world of crafting with our latest project: a Ski Chalet Checkerboard! Remember those old ski chalets where we used to sip hot cocoa after a long day on the slopes? Those cozy spots are about to get a playful makeover. With game pieces that are cute as a button, like handmade mini skis and adorable little bottle brushes, this isn't just a DIY project—it's a nostalgic trip back to the good ol' days. So, ready to slalom your way into some crafty fun? Let's do it!
Video: Ski Chalet Checkerboard
Video of the Day
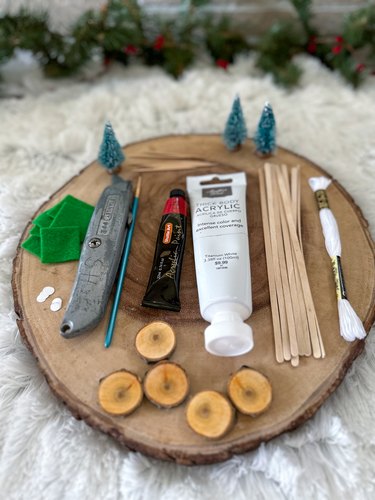
Things You'll Need
Slim wooden stir sticks
Utility knife
Paint and small paintbrushes
Round wooden toothpicks
Paper punch
White paper
Hot glue gun
Embroidery thread
Small wooden discs
12 small bottle brush trees
Round wooden live-edge trivet
Felt
1. Create 12 miniature pairs of retro skis
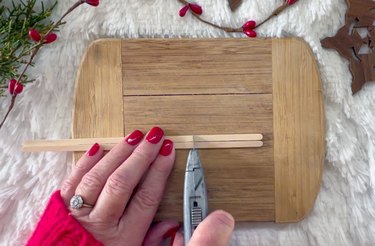
Use a sharp utility knife to cut 24 2 1/4-in. pieces from the wooden stir sticks. The rounded edges will become the tips of the skis.
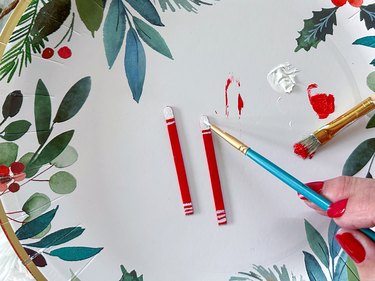
It's time to add some color to our little ski buddies. We went with a bright, Rudolph-the-red-nosed-reindeer kind of red to give our board a dash of that vintage yuletide vibe. But hey, maybe you're feeling more in tune with the Grinch today? Go green! Or perhaps you fancy channeling your inner Olaf? Ice blue it is! Once you've chosen your base color, add a couple of white accents here and there. Think of them as marshmallows in your hot cocoa—they just add that extra bit of sweetness.
2. Craft the ski poles
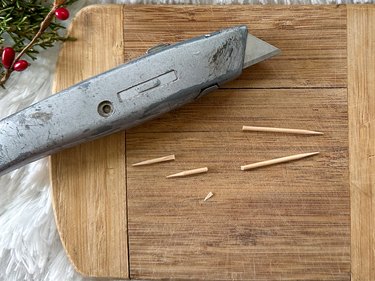
Cut 24 toothpicks to 1 3/4 in. with a sharp utility knife to become the miniature ski poles.
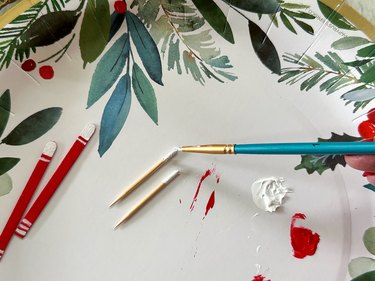
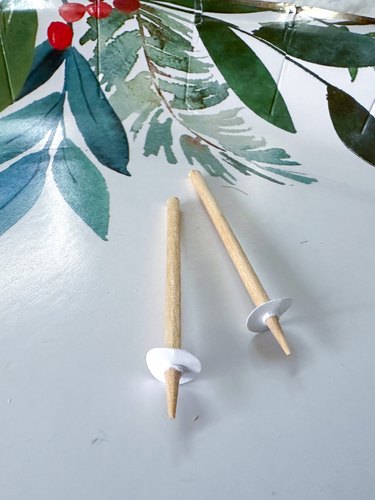
Paint the pole tops to represent the handles and then slip a hole-punched white paper circle over the sharp tip for the basket. Voila! A pair of ski poles.
3. Make the checker pieces

Crisscross the skis and poles and then connect them all together with a hot glue gun. Wrap some embroidery thread around the middle to tie it all together. Next, attach the 12 little pairs of skis to the wooden discs. If you're lucky enough to own a miter saw and have access to a branch, feel free to cut your own. Otherwise, you can purchase sets of wooden discs on Amazon or Etsy.
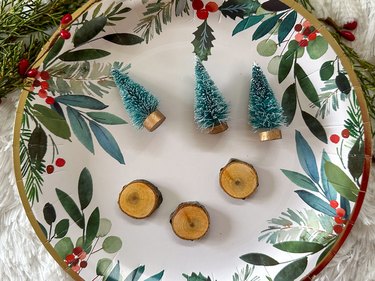
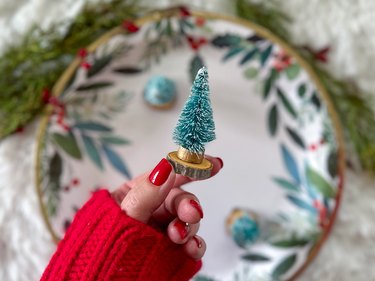
Attach the 12 bottle brushes to the wooden discs with a hot glue gun for the opposing team to use.
4. Create the checkerboard
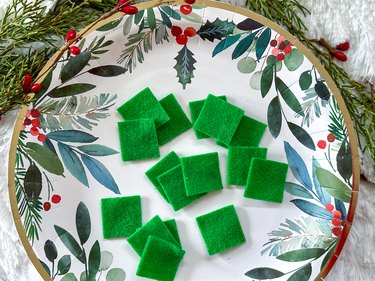
You'll need 64 pieces of felt, each cut into a 1 1/4-in. square.
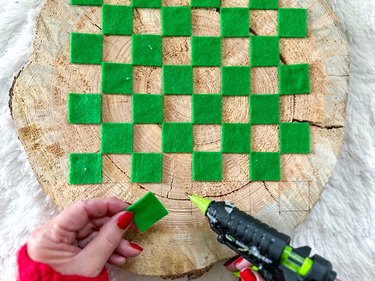
Now, let's get these felt squares onto your wooden live-edge trivet in a classic checkerboard pattern. If you're one of those lucky people who owns a chainsaw and just so happens to have a few logs lying around, then hey, feel free to slice and sand away!
But what if you don't have logs or a chainsaw? No sweat! You might have some scrap wood lying around that your table saw has been eyeing. If not, Amazon and Etsy are bursting with options.
If you're feeling extra artsy, why not paint the town red—or rather, the checkerboard? Grab some painter's tape or a stencil and let your creativity run wild.