
With Thanksgiving on the horizon, you've probably got menus and shopping on the mind. And, hey, so do we! But if you're looking to make Thanksgiving more meaningful this year, be sure to add a gratitude project—such as this easy DIY Thanksgiving wreath—to your autumn to-do list.
This home decor tutorial is easy and kid-friendly. You'll simply trim card stock into small sheets, then write down something you're grateful for on each one. Next, roll the sheets into scrolls and arrange them on a wreath in a gradient pattern. The result is a beautiful fall wreath that represents what Thanksgiving is all about.
Video of the Day
As if that weren't enough, it also makes for a stellar group activity. Lay out paper and markers, then have guests or family members write down what they're grateful for. (Adults can write for the little ones, if needed!) Once the Thanksgiving wreath is complete, you'll have a keepsake that doubles as fall decor.
Besides, who says you need to stick to traditional burlap or floral wreaths during the holidays? With this simple tutorial, you'll be able to give thanks while creating Thanksgiving decor that strays from the norm.
Let's get making!
Video: A Gratitude Wreath for an Especially Thankful Thanksgiving
Things You'll Need
Grapevine wreath
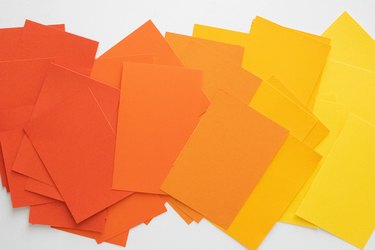
Burnt orange card stock
Orange card stock
Light orange card stock
Marigold yellow card stock
Yellow card stock
Paper cutter or scissors
Black marker
Clear tape
Hot glue gun
Faux green leaves

Tip
Of course, you’re not limited to shades of orange and yellow. Feel free to use your favorite palette of autumn colors for your wreath.
1. Cut card stock sheets

Using a paper cutter, trim card stock into sheets measuring 4 in. by 6 in. If you don't have a paper cutter, feel free to use a pair of scissors.
Don't worry if measurements aren't exact. It won't be noticeable after papers are rolled.
Tip
You can make sheets larger or smaller, depending on the size of your wreath. Sheets can even be different sizes for a more randomized look.
2. Add gratitude messages

With a black marker, write down something you're thankful for on one sheet. Be sure to write along the bottom third of each sheet so it's visible when paper is rolled up.
Tip
If your paper is a darker shade, use a gold or silver metallic marker.

Continue until all sheets are filled.
3. Roll papers

Carefully roll each sheet into a scroll. Secure edges with clear tape.

Tip
Thicker card stock might be difficult to roll without creasing. One trick is to wrap paper around a cylindrical object, which you then remove, then tighten the roll.
4. Glue paper scrolls to wreath
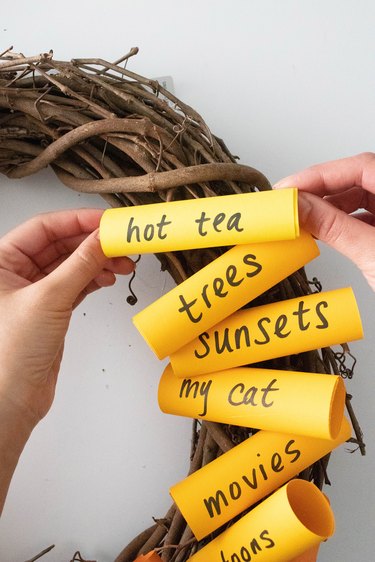
Using hot glue, add scrolls to wreath in a gradient pattern (light to dark or vice versa). For each color, scrolls can be arranged randomly or in a structured pattern.
5. Add faux greenery

Trim faux green leaves with scissors. Tuck into grapevine wreath at equal intervals. Any type of greenery goes, from eucalyptus to oak leaves, depending on your style.
How to Customize Your Gratitude Wreath
As with all DIY wreaths, anything goes! Here are alternative supplies and extra embellishments for personalizing your creation:
- Burlap wreath: Try swapping the grapevine wreath for a foam wreath wrapped in burlap.
- Dried wheat: Instead of greenery, use dried wheat to create a harvest wreath.
- Pine cones: Transform your wreath by hot-gluing pine cones in random spots.
- Foam gourds: For a charming take on the typical pumpkin wreath, hot-glue mini foam pumpkins. Mini foam gourds, such as squash, also work well.
- Acorns: If you’re lucky enough to find acorns outside, why not add a few to your wreath?
- Faux flowers: Add small faux flowers for an instant flower wreath. Another option is to glue one large flower on the wreath, then glue paper scrolls around it. Peonies, hydrangeas and sunflowers are lovely options.
- Faux fall leaves: To emphasize the orange-yellow color palette, hot-glue faux fall foliage. Alternatively, if you chose a darker color palette, faux fall leaves can add a pop of color.
- Christmas wreath: Gratitude isn’t limited to Thanksgiving! You can easily adapt this DIY for the Christmas season by using a winter holiday color palette.
6. Hang wreath

To display the piece, place a wreath hanger on your door and hang. Love it!
Tip
This wreath also works well as a conversational centerpiece. Simply add it to the center of your table, then display LED candles in the middle.
Although this wreath will look great as front door decor, bear in mind that it's made of paper. Use it as a front door wreath only if you have a storm door to protect it. Otherwise, consider displaying it indoors or temporarily on dry days during the fall season.
This year, we're grateful for fun crafts!