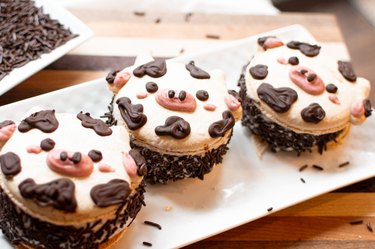
If you're a fan of ice cream sandwiches, here's something new and udder-ly delicious. These adorable cow macaron cookies are simple to make, even if you're a beginner at character macarons. Our cow macaron template, included in this tutorial, only requires white-colored batter, and all details are added post-bake using melted chocolate, so there's no need to worry about splitting macaron batter into an array of colors. Easy, indeed!
Video: Udder-ly Adorable Cow Macaron Ice Cream Sandwiches
Video of the Day
After baking and decorating cow macarons, you'll sandwich shells together with store-bought ice cream. This part is pretty fun. You simply select a pint of ice cream, slice the entire thing (container and all!) into slabs and place slabs between macaron cookies. Macaron sandwiches are then rolled into chocolate sprinkles, and that's it! You've got huge, chewy macarons stuffed with your favorite ice cream for the ultimate summertime (or anytime) treat.
Moo-ve over, traditional ice cream sandwiches! It's time to whip up something fresh.
Quick Recipe Overview
SERVING SIZE: 3 cow macarons (~3.9 x 3.2 in.)
PREP TIME: 30 minutes
DRYING TIME: 1–2 hours
COOK TIME: 25–30 minutes
DECORATING TIME: 10 minutes
TOTAL TIME: 2–3 hours
Part 1: Make French Macaron Shells
Things You'll Need
Baking sheet
Parchment paper or silicone mat
1 large piping bag
Scissors
Hand mixer or stand mixer fitted with whisk attachment
Large mixing bowl or bowl of a stand mixer
Rubber spatula
Toothpick or cookie scribe
50 g egg whites
40 g granulated sugar
60 g almond flour
50 g powdered sugar
Purple gel food coloring (optional)
1. Whip egg whites and granulated sugar
Tip
Set up tools and measure out all ingredients first. This will help you move through the recipe seamlessly.
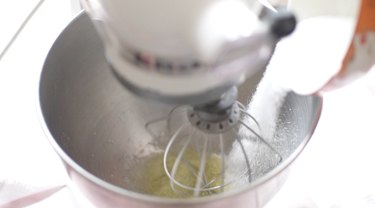
Whip egg whites on medium speed until foamy. Slowly add in granulated sugar in 1/3 portions while whisking on medium-high speed.
2. Beat eggs until stiff peaks form
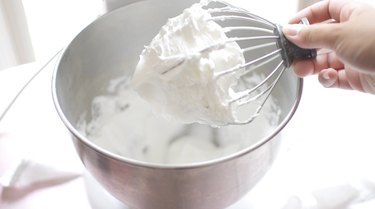
Continue whisking until stiff peaks form and a thick, glossy meringue emerges, as pictured above. This should take at least five more minutes.
Tip
Meringue should ball up onto the whisk. When whisk and bowl are held upside down, meringue should not move.
3. Fold in dry ingredients
Tip
If you want whiter macarons, add a very small amount of purple food coloring. This will counter the yellow color from almond flour.
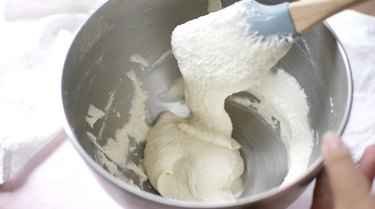
Sift powdered sugar and almond flour into meringue. Using a rubber spatula, fold dry ingredients into meringue, scraping sides and bottom of bowl often.
Mix until batter reaches a thick, glossy consistency and comes off spatula in continuous ribbons. The batter coming off spatula should melt back into remainder of batter in bowl within 20-30 seconds. Transfer to a piping bag and snip a medium tip using scissors.
4. Pipe cow design
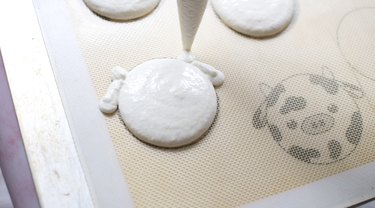
Use our cow macaron template as a guide underneath parchment paper or a silicone mat to pipe design. Pipe heads first and then ears and horns.
Tip
Use a cookie scribe or toothpick to pop any air bubbles.
5. Pipe backs of macarons
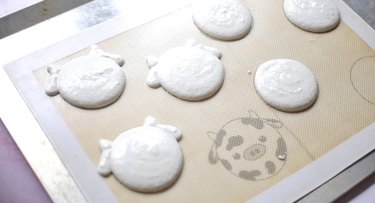
Use remaining macaron batter to pipe back of each macaron.
Remove all templates and let macarons sit out between one and two hours or until macarons are dry to the touch. If the room is humid, this step might take longer.
6. Bake macarons
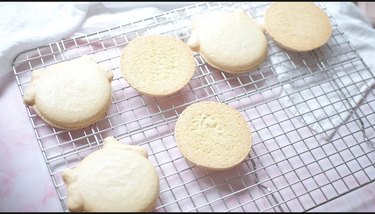
Bake macarons one batch at a time at 325°F for 10 minutes and then flip. Drop temperature to 300°F so macarons don't brown too quickly. Then, bake for another 15 to 20 minutes.
To test if they're done, poke the side of one macaron. If it wiggles, they need more time. Let cool completely on a tray and then match macaron shell pairs.
Part 2: Decorate Cows
Things You'll Need
Macaron shells
2 medium microwave-safe bowls
2 small piping bags
Scissors
6 Tbsp. milk or dark chocolate chips
3 Tbsp. white chocolate chips
Oil-based pink food coloring
1. Add snouts, ears and blush
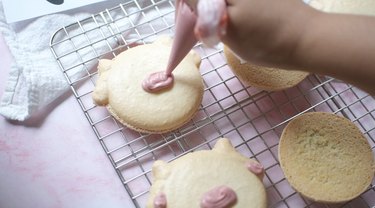
Add white chocolate chips to a microwave-safe bowl. Microwave at 30-second intervals, stirring in between, until chocolate has melted. Transfer to small piping bag and snip a medium tip with scissors.
Stir oil-based pink food coloring into remainder of melted white chocolate and then transfer to a piping bag. Use this for snouts, ears and blush.
2. Pipe on spots, eyes and nostrils
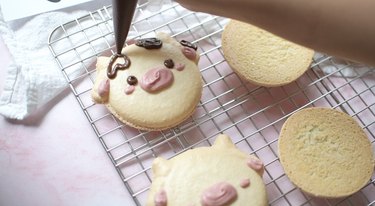
Add milk or dark chocolate chips to a microwave-safe bowl. Microwave at 30-second intervals, stirring in between, until chocolate has melted. Transfer to a small piping bag and snip a small to medium tip with scissors.
Use this to pipe on spots, eyes and nostrils.
Part 3: Assemble Ice Cream Sandwiches
Things You'll Need
Macaron shells
Cutting board
Serrated knife
Large bowl
1 pint cookies and cream ice cream
Chocolate sprinkles
1. Cut ice cream pint into slabs
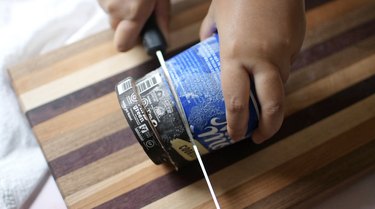
Tip
Make sure to work quickly and in a cool environment for these steps or the ice cream will melt quickly!
Place ice cream pint on its side atop a cutting board. Use serrated knife to cut into three thick slices.
2. Sandwich macaron shells
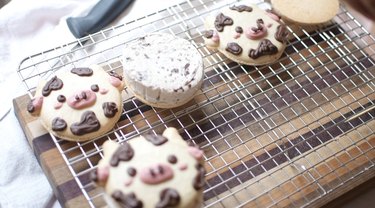
Place ice cream slab on bottom macaron shell. Top with matching shell.
3. Roll macarons in chocolate sprinkles
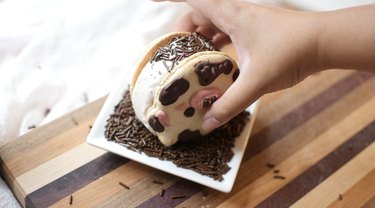
Add chocolate sprinkles to a large bowl. Roll macaron ice cream sandwiches into sprinkles, covering all sides of ice cream.
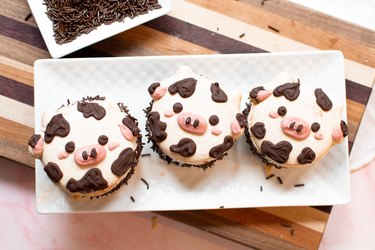
Enjoy! If you're not eating these adorably delicious treats immediately, store them in an airtight container in the freezer for up to one month. You can also plastic-wrap them for easier on-the-go ice cream sandwiches.
With these beautiful bites, you'll be enjoying a sugar rush in no time. Every member of your farm—err, family—will be lining up to dig in!