
Let's face it: Decluttering probably isn't your idea of a good time. And, in a cruel twist of fate, putting off much-needed decluttering often creates a cycle of stress that makes it even harder to tackle future organizational projects. Thankfully, there are experts among us who literally declutter for a living—and we were lucky enough to chat with one.
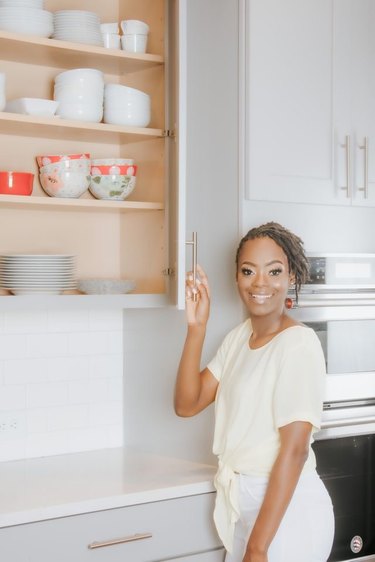
Kenika Williams, owner of Atlanta-based organizing company Tidied by K, has helped hundreds of clients banish household clutter. "Decluttering can be overwhelming," says Kenika. "I try to simplify it for everyone and let them know it's attainable." This dedication to accessible organization inspired Kenika's free downloadable The Power of 30 guide, which she calls her blueprint. The step-by-step plan is designed to ease frazzled nerves by advising clients to focus on one room at a time over the course of seven days, spending just 30 minutes each day decluttering different zones within that room. In about eight weeks, Kenika says, people can declutter the entire home.
Video of the Day
Video of the Day
How I Became an Organization Pro
Kenika’s affinity for organization began during her early childhood years. “My grandma struggled with chronic disorganization and was on the hoarding spectrum," she says. "I found so much joy in decluttering her home, but she hated every aspect of it. It wasn’t because she was lazy. I think she was completely overwhelmed and didn’t know where to start.” As an adult, Kenika now understands that she was watching her grandmother's internal struggles manifest in a physical environment—and this understanding shapes her work with clients today.
With that in mind, Kenika walked us through a weeklong process for tackling one of the most used (and, gulp, messy) rooms in any home: the kitchen. Although it may seem like a huge project to start with, Kenika breaks it down into one easy-to-tackle decluttering task for every day of the week. So you don't have to do everything at once. With Kenika's guidance below, we'll start with the fridge and work our way to the pantry!
So get ready to employ The Power of 30 to breathe new life into your kitchen and unearth an organizational system that actually sticks. Ready, set, declutter!
Decluttering Toolkit
You really don't need much to start decluttering, but it is helpful to have the following items on hand:
- Four storage bins to separate items to keep, donate, sell and discard
- Labels for storage bins (these can be found in Kenika's The Power of 30 guide)
- A timer (any kitchen timer or even the timer on your phone will do)
1. Sunday: Refrigerator & Freezer
Mindset: "Moldy oldies, make your exit!"
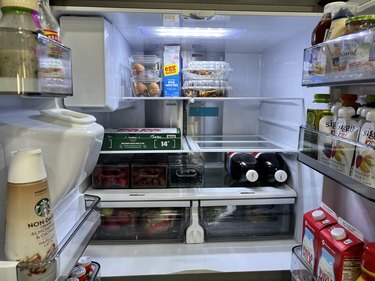
To start, set your timer for 30 minutes—make sure not to forget this step each day! Kenika suggests pulling everything out of your refrigerator and freezer. Toss old veggies, mystery meals in Tupperware, items with expired dates and anything else that's iffy. If you find food that's not expired but hasn't been used after a considerable amount of time, donate it (if it's unopened) or dispose of it. Don't get hung up on cleaning the fridge itself, Kenika says. "You can wipe down food storage containers and shelves, but I try to keep decluttering and organizing separate."
Wait...I'm Not Supposed to Clean?
Not now. There's a time and a place for scrubbing and polishing, but Kenika's method is all about cutting down on unused items and making space—cleaning happens down the road. She explains, "Decluttering is getting rid of the stuff that’s expired, no good or just for the trash."
Tip
When tackling any decluttering project, establish your goals first so you don’t get stuck in hypotheticals ("I'll use this when..."). This can help you better make objective decisions about what’s staying or going.
2. Monday: Utensils Drawer
Mindset: "Keep the best, donate the rest."
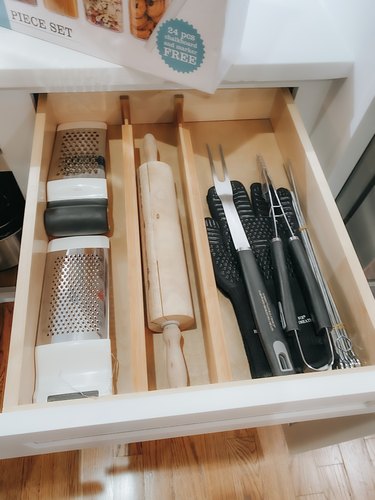
Kitchen cutlery in the utensils drawer should be examined for dull blades, rust or duplicates. If it takes numerous attempts to get your kitchen drawers closed because they're jam-packed with silverware, Kenika says it's time to reassess needs. "Cooking utensils that have melted plastic and gadgets you're not even sure how to use should be donated," she explains. "Chances are, if you've never cored an apple, you won't start now." However, if your only spatula gets frequent use despite being on its last leg, keep it because it serves a need. "Just make a mental or written note that you need to purchase a new one," Kenika says.
Tip
If you complete any of the zones in less than the allotted 30 minutes, use that time to read a book or meditate. If you're feeling calm and want to continue, feel free to move to another zone during the remaining time. Above all, try to avoid letting yourself become overwhelmed. The point is to feel good while decluttering.
3. Tuesday: Plates, Bowls & Cups
Mindset: "Two per person."
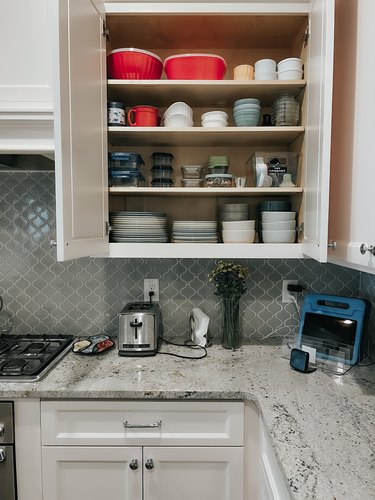
Kenika suggests keeping two of each item per person in the house—toddlers might be the only exception because they often have multiple dishware sets. Keep sets that are easily stackable in your kitchen cabinet. Sometimes it's hard to get rid of the first cup your kid drank from, so utilize an upper cabinet for sentimental items like this. If you don't have enough cabinet space to keep two of each item per person, maximize vertical space with shelf risers or dividers. Interior cabinet doors also can be used for hanging items. However, if you've done all you can to increase your kitchen cabinet space and simply don't have room for the "two per person" rule, honor the limitations of your space so that it's not overly crowded.
Tip
If items don’t fit into a "love," "use" or "need" category, it's time to say goodbye!
4. Wednesday: Bakeware Storage
Mindset: "B2B (Bakeware to Borrow)."

Kenika says, "If you're not an avid baker, chuck the baking sheet you've had since college." Instead, raid a family member's bakeware when you're planning to bake so you can retain that prime cabinet real estate for something else. If you do love to bake, think about creating easy access to bakeware items by using smart storage solutions like dividers.
Tip
Take before and after pictures to track your progress—you'll feel even more accomplished when you're done.
5. Thursday: Pots, Pans & Appliances
Mindset: "No lid? Get rid!"
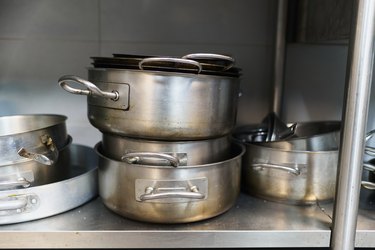
If you have a heap of lids with no bottoms, let them go. Pots without lids or cookware with loose handles (which is a hazard) can be replaced when you're able to purchase a full set. For small appliances (think toaster ovens, coffee makers and blenders), assess whether you have more than one item for the same purpose. "If you have a Crock-Pot and an Instant Pot, consider whether you need both," Kenika advises. "If you definitely use one more than the other, chances are you can do without the lesser used appliance and donate it." While shopping for future kitchen items, consider where a small appliance will fit into your space before bringing it home—especially if you have a small kitchen and minimal counter space.
Tip
While creating a pile of donation items, designate one drop zone area for your "donate" bin. When the bin is full, go ahead and donate by scheduling a pickup or dropping them off at a thrift store. However, if you’re a person who might be tempted to "shop" your donations and pull items back out, get them out of the house right away.
6. Friday & Saturday: The Pantry
Mindset: "Reach the finish line!"
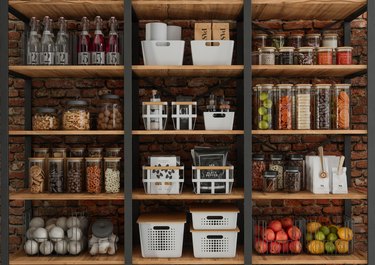
"I reserve two days for pantry organization because pantries tend to be bigger spaces within the kitchen," Kenika explains. If your pantry is on the smaller side or you store most food in kitchen cabinets, pull everything out and arrange it on the countertop. Alternatively, break the space into smaller "quarter" zones if you're working with a walk-in pantry. That way, you won't create a bigger mess or feel rushed when 25 minutes have slipped away and you still have a counter full of pantry items. Once you've decluttered, you'll be pleasantly surprised at how much kitchen storage space remains. Kitchen organization solutions like a lazy Susan for spices, canisters for loose take-out condiments, a shelf for dish towels and sponges or a caddy for cleaning supplies are helpful.
Remember: The Power of 30 is designed to be tackled at your individual speed and endurance level. Though Kenika's guide sets aside one week for kitchen organization, it might take you longer—and that's okay! "Don't move on to a different area of the home until you fully declutter the kitchen. You'll start creating unfinished things," Kenika says. Tackling one room without falling victim to exhaustion or frustration is a major win that will set you up for decluttering the rest of your living space.
A more efficient home awaits, so take a deep breath and dive in—30 minutes at a time.