With the return of Y2K-inspired and early 2000s fashion, beaded bags are everywhere. From handmade Etsy creations to high-end pieces from designers like Susan Alexandra, there are endless beaded purse styles to choose from. If you want to get in on the latest accessory craze without a massive investment, crafting your own handmade beaded bag is surprisingly budget-friendly—and today's beaded bag tutorial is beginner-friendly too.
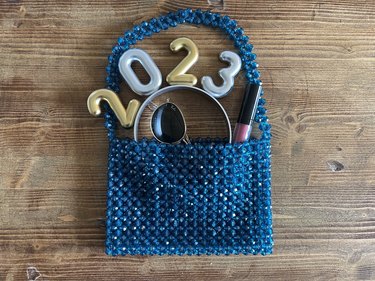
As a collector of beaded bags, I've always wanted to create my own DIY version, so I took the leap and created a straightforward tutorial for the prettiest make-your-own beaded bag around. This how-to uses a simple technique with classic plastic-faceted beads, but you can certainly opt for pearls or other bead types. The result is a millennium-inspired evening bag that's big enough to fit your smartphone, keys and credit card.
Video of the Day
Video of the Day
Let's get beading!
Things You'll Need

How to make a DIY Beaded Purse:
1. Choose beads and prepare materials
The beauty of a beaded bag is that you can make one with virtually any bead style and size. However, I find that classic 8 mm faceted beads are the easiest to work with and provide the same effect as trendy designer bags, like Susan Alexandra's. For this project, I used these 8 mm faceted plastic beads, but I've also made bags with The Beadery 8 mm faceted beads from Amazon and loved the outcome. (The Beadery beads only come with 900 pieces, so if you choose this option, purchase two bags.)
In addition to beads, gather fishing line and scissors. Tweezers might also come in handy when it comes time to tie the project and hide fishing line tails.
Tip
When choosing beads for a DIY beaded bag project, stick with plastic or wood beads. Clay and glass beads are fragile and could result in a broken purse down the road.

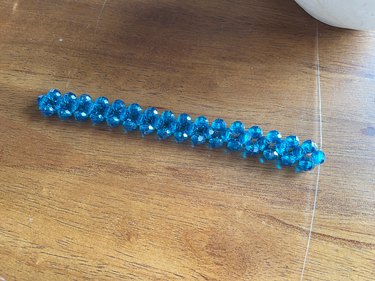
2. Bead the first row
To create the first beaded row, cut a long piece of fishing line (about 3 yards), fold it in half so there are two tails and thread three beads onto the line. Take a fourth bead and insert the left tail into the hole (pointing toward the right tail). Then, insert the right tail into the hole (pointing toward the left tail) to create a crisscross inside the bead. Hold the two tails together so each side remains relatively even and pull the bead down toward the three sitting at the center of the line. This method creates a diamond shape from the beads and forms the pattern followed throughout.
Next, add one bead to each tail (left and right) followed by a third bead with the two tails crossing over each other inside the bead. Continue until the row has 17 center beads.
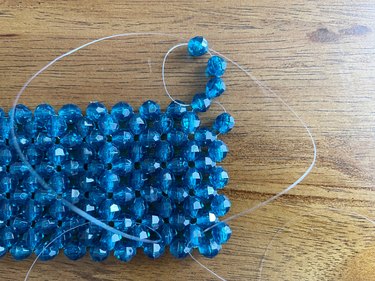
3. Bead a second row
Once there are 17 center beads in the first row, string two beads onto the left tail and one bead onto the right tail. Insert the left tail into the bead on the right to create a crisscross. This is the same method used for the middle bead, but instead of meeting in the middle, the strings meet on the right side to start a new row.
Flip your work and add two beads to the right tail (closest to the end you just finished) and one bead to the left tail. Cross the right tail into the bead on the left and pull tight. From here, each row is created with two beads instead of three. Insert the left tail into the bead on the bottom left (this is the side bead from the previous row) to anchor the fishing line and create an L-shape with the tails.
Next, add one bead to the right tail and one to the left. Thread the right tail into the left bead and pull tight to create the diamond shape. Repeat these steps by threading the left tail into the next bead on the bottom left, adding one bead to each tail side and threading the right tail into the bead added to the left until there is only one middle bead left to attach.

4. End the second row and start a third row
To end the second row (and all other rows from here on), insert the left tail into the bead on the bottom left and string one bead on both the left and right tails. Instead of inserting the right tail into the left bead like the previous steps, insert the left tail into the bead on the right and pull tight. This will bring the tails up to the next row. If you crochet, this technique can be compared to chain stitching one at the end of a row to bring your yarn up to the height of the new row.
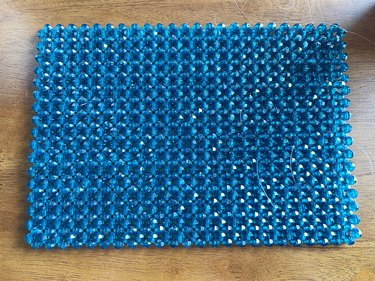
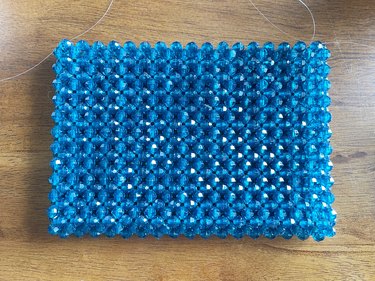
5. Bead a large rectangle
The centerpiece of this DIY purse project is a beaded rectangle that measures 23 rows long and 18 middle beads wide. To create the large rectangle, follow steps three and four until you have a rectangle of this size. To finish the rectangle, tie off the fishing line in a simple knot. I like to tie this knot three times for added strength and security.
Wait—What If I Run Out of Fishing Line?
We hear you. Working with extensive fishing lines can get messy, which is why we prefer to keep the line around 3 feet long and attach more as needed. When the line gets too short to work with, tie string over a center bead three times to create a sturdy knot.
Once tied off, cut a new piece of fishing line and thread it through the center bead, keeping tails as even with each other as possible. Take the left-hand tail and thread it through the next bead on the left (from the previous row). Pick up from where you left off by adding one bead to the right tail and one to the left tail and threading that right tail into the left-hand bead.
Starting a new line at the very end is tricky. If the string starts to get shorter as you reach the end, tie it off sooner than later. It’s okay if the tails are a little long since you cut them at the end.
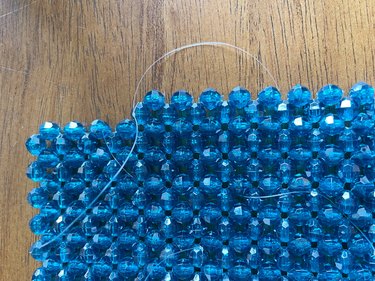
6. Stitch up sides
Once the rectangle is completed, fold it in half. Cut a new piece of string measuring about 2 feet long and thread it up through the two bottom side beads. Add one bead to the left tail and thread the right tail to create a crisscross effect. Then, thread the left tail into the next bead on the left and the right tail into the next bead on the left. Add another center bead using this crisscross technique and continue until the entire side is closed up. Tie off your work and repeat this on the bag's second side.
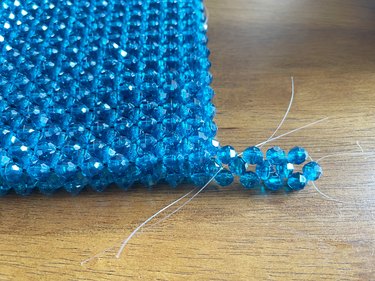
7. Attach beaded bag handle
To attach a handle, cut 1 yard of fishing wire and thread it into the top middle bead on the side of the bag (either side will work). Then, add one bead to the left tail and one to the right, followed by a center bead (using the crisscross technique). Continue adding one bead to the left and one to the right along with a center bead until the handle has 36 center beads, not including the first bead. Tie off the handle by inserting the left tail into the top center bead on the other side of the bag followed by the right tail with a crisscross effect. Finally, tie three knots to secure it in place.
Tip
To make this bag a crossbody or shoulder bag, keep adding bead rows until you've reached the desired length. Follow the steps above to attach the beaded bag handle.
8. Cut fishing line tails
When the bag is complete, cut any excess fishing line tails and use your fingers or tweezers to tuck the shorter tails into other beads to camouflage them.
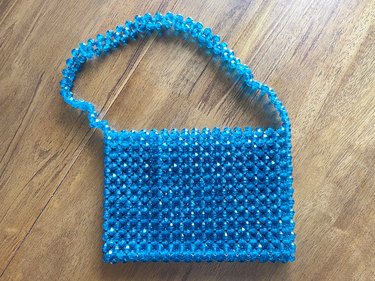
In a snap and a sparkle, your DIY beaded bag is complete! You'll be emulating early 2000s nostalgia in no time at all.