If you've been searching for a way to help your family pass the time 'til Santa arrives, look no further than our DIY Christmas Advent calendar. It makes counting down to the holiday a delight and treats your loved ones to a whole season of surprises. Best of all, our cheery Christmas countdown calendar repurposes everyday items, so there's no need to spend a fortune this holiday season. Just reuse some things you may already have around the house. Plus, it doubles as a beautiful Christmas decoration. Win-win!
So, dig out a few brown paper bags, a little of last season's wrapping paper and some twine and hopefully, this tutorial will have you singing, "Oh, what fun it is to make an Advent calendar!" in no time.
Video of the Day
Video of the Day
Part 1: Make treat envelopes
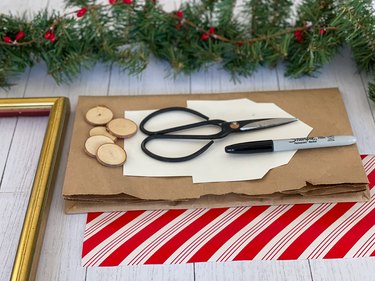
Things You'll Need
Brown paper grocery bags, scrapbook paper or construction paper
Opened envelope for a template
Marker
Scissors
Glue stick
Wrapping paper
Greenery
Round tag or wooden disc
Number stickers (optional)
Hot glue gun
White paint
Paintbrush
Repurposed or thrift store frame
Pliers
Twine
Staple gun
Mini wooden clothespins
How to make treat envelopes:
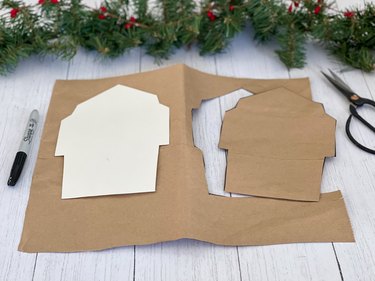
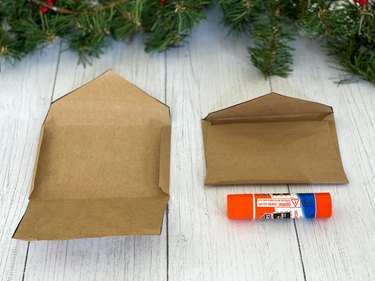
1. Use a regular envelope as your template
Open a small envelope to create a template for your paper bag envelopes. Trace around the template onto brown paper bags and cut out 25 mini envelopes. Fold in the side tabs and fold up the bottom of the envelope. Place some glue on the side tabs and adhere the bottom of the envelope. Fold down the top of the envelope and just crease it—don't glue.
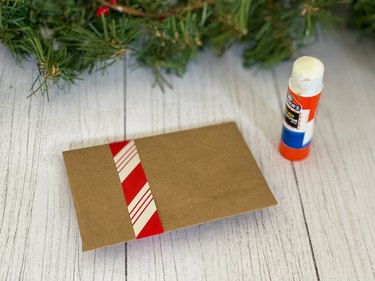
2. Decorate the envelope
Cut a 3/4-inch strip of wrapping paper. Wrap it around the envelope and adhere it with a glue stick.

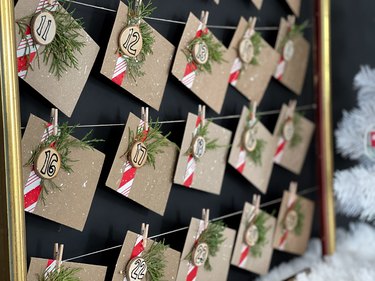
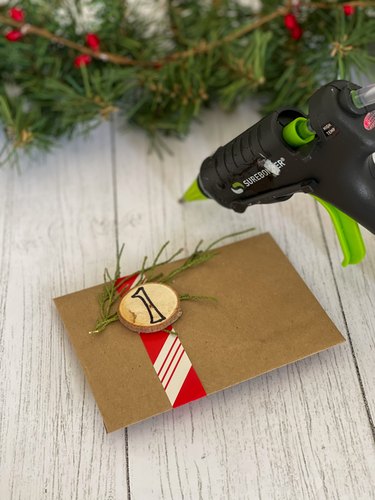
Use a hot glue gun to attach a small piece of greenery and a number. Hot glue the greenery first and then place the number disc over the greenery and hot glue it in place. The greenery can either be faux or real. If you plan on making these envelopes reusable, a faux piece of greenery would work best. However, if it's important to you to use things you might have around the house already, then by all means head outdoors with your clippers and clip some beautiful greenery. (It'll add a nice holiday aroma too!)
Tip
To make this project completely out of recycled items, you can create your own wooden discs using a tree branch and a miter saw.
3. Adhere numbers 1 through 25 on the envelopes
If you're lucky enough to have beautiful handwriting, you can simply use a pen to create your own numbers. If your penmanship leaves something to be desired, you can use a stencil, sticker or die-cutting machine to create the numbers. The numbers can be placed on a purchased round wooden disc or a paper tag.
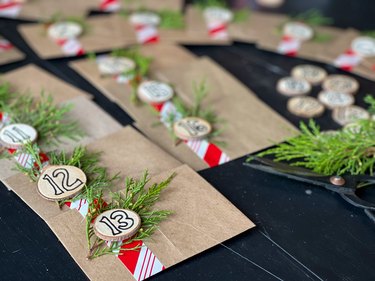
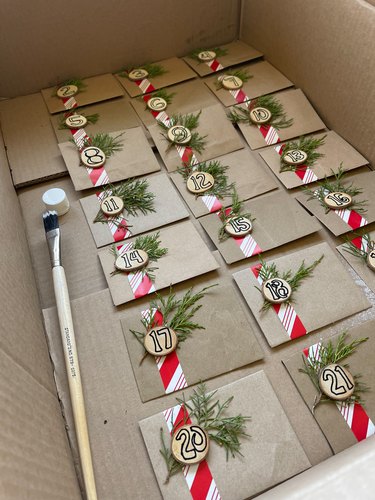
4. Splatter paint on the envelopes
To give your envelope pouches a "just snowed on" look, place the envelopes face up in a large box and splatter white paint on them. Just load a small brush with paint, hold it over the envelopes and use your finger to flick the brush, creating very small splatters.

Part 2: Assemble the Advent calendar
How to assemble the Advent calendar:
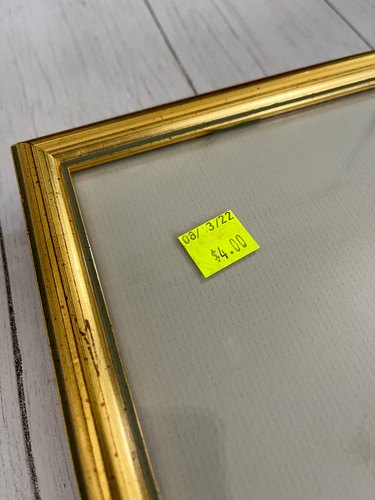
1. Purchase or recycle a frame
Put on your thrifty pants and head to the nearest thrift store to find an inexpensive frame to use for this project. Thrift shops are loaded with old, outdated wall art with wonderful frames to be reused. If the frame isn't the color you'd like it to be, a can of gold, silver, black or white spray paint will work wonders. Or, even thriftier, just use a frame you might already have.
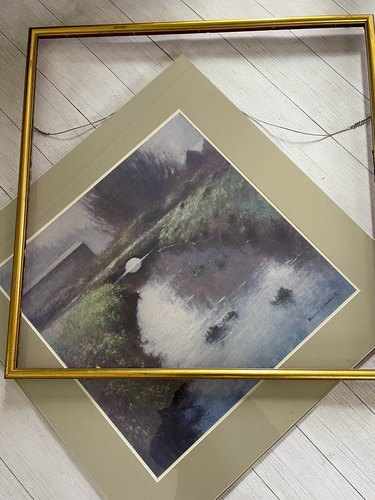
2. Carefully remove the artwork and the glass from the frame
Most artwork is attached to the frame with small brad nails. Use a pair of pliers to carefully remove them before you pull out the artwork and glass.
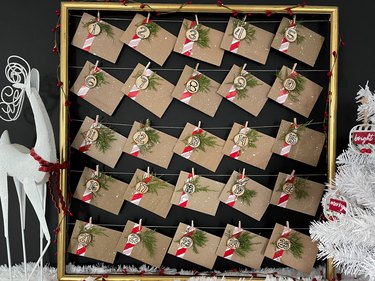
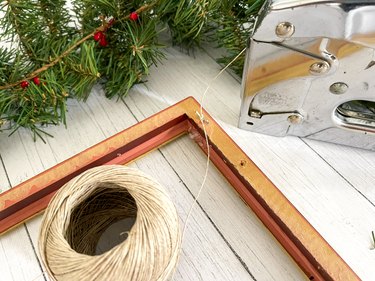
3. Attach twine “clotheslines” across the frame
Turn over the frame and use a staple gun to attach five equally spaced "clotheslines" across the frame. Determining where each clothesline will go may take a little math. (Yikes, but we know you can do it!) Just measure the side of the frame from the place you'd like to put the first clothesline to the bottom of the frame opening. Then, divide this distance by 5. This will give you the distance between each "clothesline." For example, if the distance from the first clothesline to the bottom of the frame opening is 25 inches, divide 25 by 5, which equals 5. The distance between each line will be 5 inches.
4. Fill each envelope with a special treat
Here are a few Advent calendar ideas for fillers: holiday stickers, small notebooks, gift cards, small toys or Legos. Any goodies that are semiflat and will fit into the envelope will work. You could even print your own coupons for some kind of a special event. Spending time together doing Christmas activities can be a gift in itself and might even start some new Christmas traditions. The loved ones in your life might like baking or decorating cookies with you, reading an extra book at bedtime, going to a holiday movie together, performing an act of kindness, staying up 30 minutes longer, engaging in some sort of a Christmas craft activity or taking a trip to an ice cream shop just to name a few gift coupon ideas.
After you fill each envelope with a goody or a coupon, clip each envelope to the clotheslines and add a few embellishments and holiday decor, like pompoms or small Christmas trees. Open one envelope each day to help pass the (what can be excruciatingly long) time until Christmas morning!

Happy holidays!