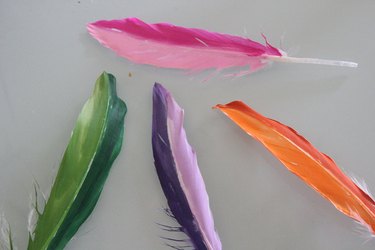
Feathers are currently one of the hottest trends, whether in home décor, fashion or accessories. Thanks to their prominence in movies and television shows, like "Where the Crawdads Sing," "Bridgerton" and even the evergreen chestnut "Forrest Gump," everything's coming up feathers. Feathers are inexpensive and readily available, so they are perfect for crafters to include in a variety of DIY projects. One easy DIY feather craft is to paint them. Here's a tutorial on painting feathers three different ways, and we'll be featuring the finished feathers in a beautiful piece of wall art. It's a simple yet dramatic DIY project that will add some colorful pizazz to your home.
Video of the Day
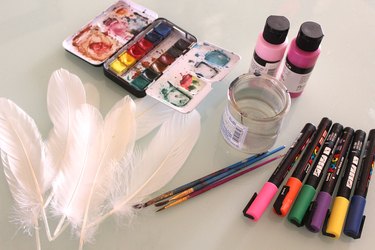
Things You'll Need
Water
Brushes
Acrylic paint
11 x 14-inch paper
11 x 14-inch mat
Hot glue gun
Tape
Watercolor Painting
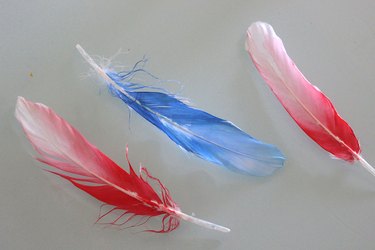
Painting feathers with watercolors is an easy technique that creates a color-washed effect in which the colors can vary from muted to intense. Colors can also blend into each other beautifully.
Video of the Day
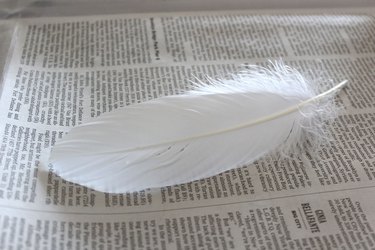
Step 1: Position the Feather
Line your workspace with some old newspaper. Place your white feather on the newspaper and identify which side of the feather is the front. Real goose feathers have a natural curve to them, and the front side is convex, meaning it curves with the tips going inward while the center of the feather bows outward. You can choose to paint both sides, but painting the front is sufficient, especially for this wall art project.
Step 2: Add Water to the Pigment
Wet your brush with water and dip the wet brush into the pigment.
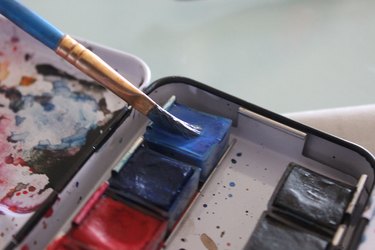
Step 3: Apply the Watercolor
Holding the feather by the quill flat against the newspaper, apply the paintbrush to the feather. Paint in the direction of the barbs – the "hairs" of the feathers. By pressing the feather against the newspaper with the brush, you'll be able to get better leverage in applying the paint. Oh, and those wispy parts of the feather at the bottom? Paint those as well.
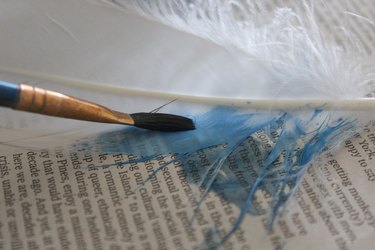
You can paint the entire feather with one color, but let's create a painterly tie-dye effect by using several colors. Select random sections of the feather to apply your first paint color.

Then, continue adding additional colors. With watercolors, you can overlap the colors, and they will blend wonderfully. The beautiful feathers become miniature canvases for impressive abstract art.

The watercolor painting technique is also a perfect way to create an ombre effect on the feathers, and ombre is always on trend for fashion and decor ideas. Start at the bottom of the feather and apply the watercolor at full intensity to the bottom third.
Rinse the brush to remove any pigment and dip the brush in plain water. Position the wet brush at the bottom where the paint is and move the tip of the brush upward. As the brush moves up, diluted paint travels upward as well. Keep dipping the brush in plain water as you go. By the time you've reached the tip of the feather, hardly any pigment remains.
These ombre-colored feathers have a great boho feel to them.
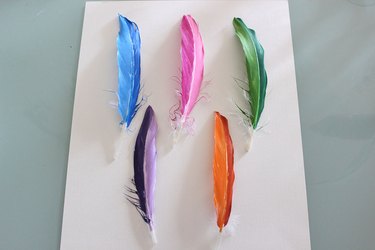
Acrylic Painting
For more solid coloring on the natural feathers, acrylic paints do the trick. To demonstrate the ease of using acrylics, we'll create a two-tone effect on the feathers that gives them a snazzy, modern flair.
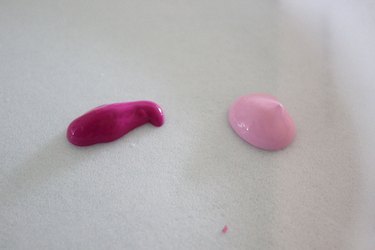
Step 1: Choose Your Colors
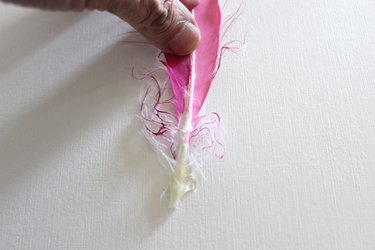
Start with two paint colors that are different shades of the same color. Here we have a light pink and a dark pink.
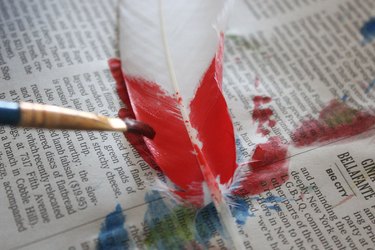
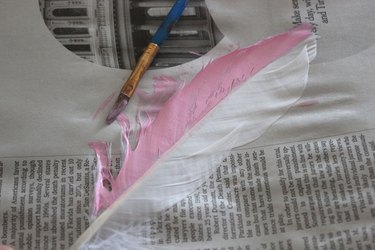
Step 2: Paint Half the Feather
Dip a paintbrush in the lighter color and paint half of the feather. Depending on how thick your paint is, you may want to add a drop of water to the acrylic to make it more spreadable. As with the watercolor, paint in the direction of the barbs. Paint all the way to the edge of the feather and be sure to paint those wispy hairs at the bottom.
Step 3: Paint the Other Half
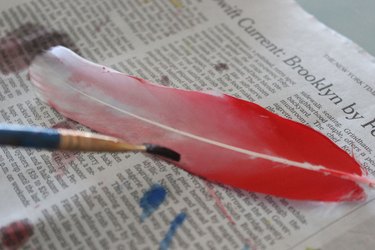
Now, paint the other side of the feather with the darker color. You can paint over the center spine, called the rachis, or leave it white. With watercolors, the paint beads off the rachis, but acrylics are able to cover it. I like the clean look of painting over it so that just the two colors are featured.
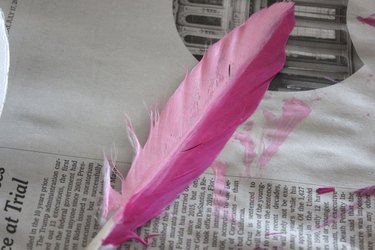
Paint several feathers, each in two shades of different colors. They almost look like paint swatches you'd see in a paint store.
Acrylic paints are also great for drawing patterns on the feathers. Here I've painted animal prints, which are so easy to achieve because the opaque nature of the acrylics allows layering of colors. Imagine how fierce these feathers would look on jewelry, like a feather necklace, feather earrings or hair accessories.

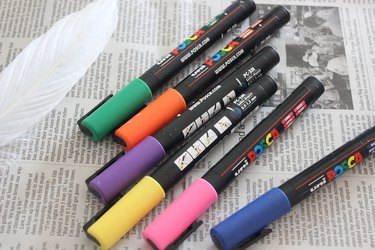
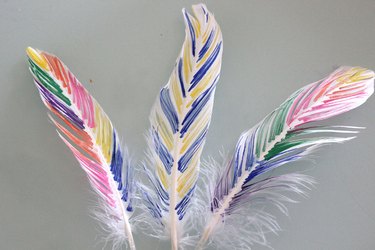
Paint Markers
Paint pens, like Posca Markers, offer both ease of use and the rich, opaque colors of acrylics. For people who are afraid of painting, these paint pens are a real game changer. They are also perfect for kids' crafts. There are two drawbacks to keep in mind with paint pens, though. It is very difficult to achieve full paint coverage with the pens, meaning some of the feather will remain white. This is not necessarily a bad thing, and in fact, the white helps accentuate the colors. The other possible disadvantage is that the pen strokes can separate the barbs of the feather. Again, this could also be seen as a plus, as the separated barbs result in an expanded and more dimensional feather.
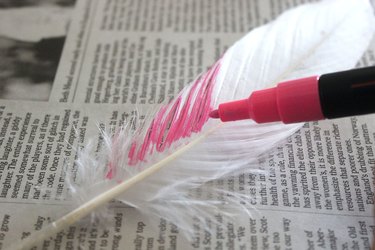
Step 1: Start With Your First Color
To paint the feather with markers, place the tip of the marker at the center spine and move the pen out toward the edge, following the angle of the barbs. Painting the downy parts of the feather is more difficult with the markers, so you can choose to skip those.
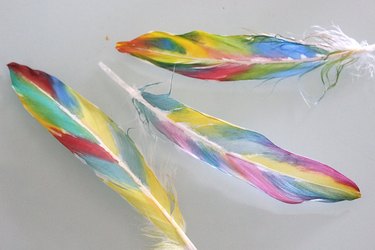
Step 2: Continue With Other Colors
You can use this technique to create a rainbow pattern or stripes in the colors of your favorite sport team.
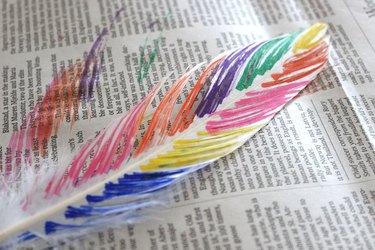
The markers give you flexibility, and the effect is dramatic. The best part is that this is one of the easiest feather craft ideas for the beginner. Because these feathers can be painted so quickly with markers, you can create a whole assortment of them. I can see these rainbow feathers strung together in a feather garland.
Framing Your Feathers
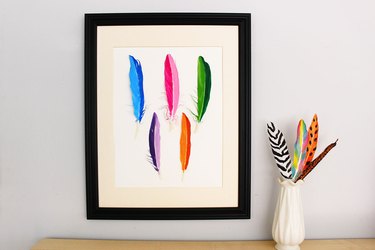
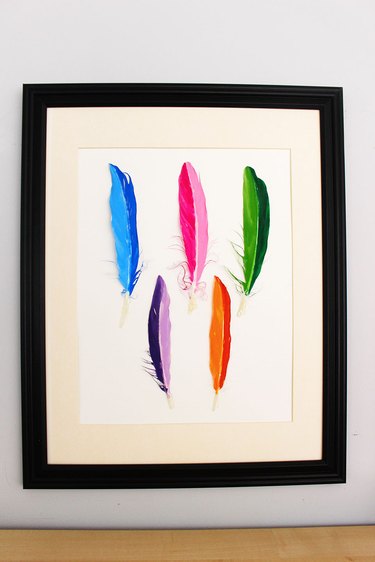
By arranging your DIY painted feathers on paper and framing them, you'll be creating an eye-catching piece of wall art that looks like it was purchased from a gallery or a top art store on Etsy.
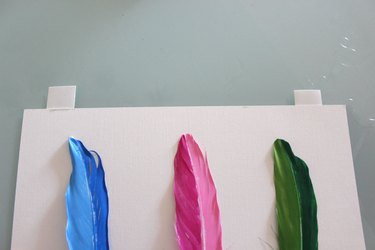
Step 1: Arrange the Feathers
On a piece of poster paper, arrange the feathers in a configuration that pleases you. I chose an 11 x 14 piece of paper. I decided to frame five of the duotone feathers painted in acrylic and chose a simple arrangement with the feathers displayed vertically on the paper. A radial pattern with the feathers looking like spokes of a wheel would also have been beautiful. Even a random arrangement that looks like they had naturally fallen into place would have been fine for your feather art.
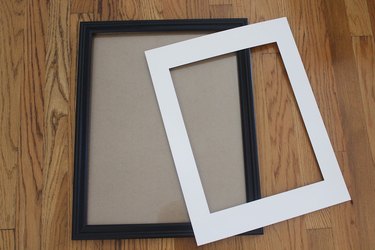
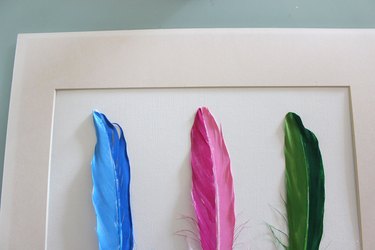
Step 2: Select a Frame
Because I was using an 11 x 14 piece of paper, I selected a larger frame that was 16 x 20 and included a mat with an 11 x 14 opening. The mat not only makes the finished feather wall hanging more gallery worthy but it creates a space between the artwork and the glass, which is helpful for accommodating the extra thickness of the feathers.
Step 3: Glue the Feathers
Apply a dab of hot glue to the back of the bottom of the shaft.
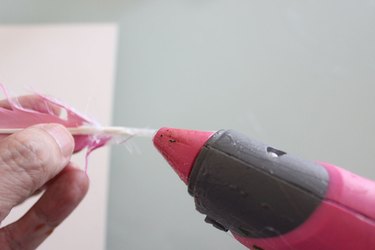
Press the shaft against the paper. Then, repeat this with the rest of the feathers.
Step 4: Add the Mat
Apply two strips of tape to the back of the artwork at the top edge. The adhesive side of the tape should be facing upward.
Place the mat on top of the artwork, allowing the tape to adhere to the back of the mat.
Slip the mat and art in the frame and you have a piece of room decor that's quite the feather in your cap!
And how about all your extra decorated feathers? Besides using these beautiful feathers for wall decor or jewelry, you can simply place them in a bud vase and display them like flowers.
