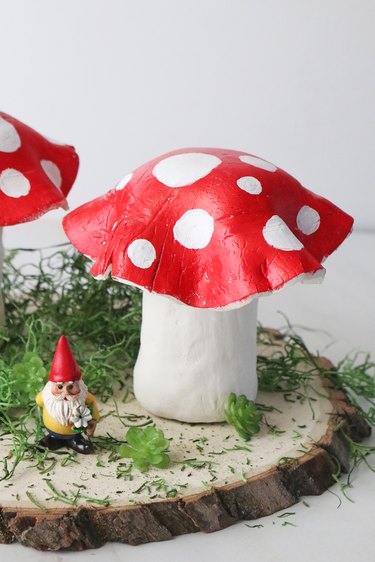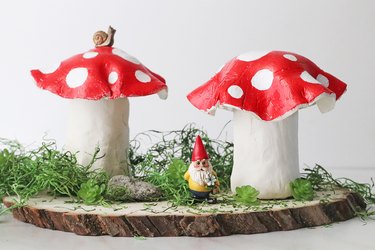
Mushrooms are having a moment right now. This is especially true in the world of home decor and Etsy, where you can find toadstools in artwork, fabric prints and more. However, if you're looking for a budget-friendly way to take on the trend, you'll want add this DIY project to your to-do list.
This adorable mushroom jar calls for an old spice jar wrapped in air dry clay. The spice jar's lid is also topped with a clay "mushroom cap," which is coated in red paint and adorned with white spots. The result is a charming upcycled piece — no mushroom garden or mycology degree required.
Video of the Day
Video of the Day
What's more, this project involves beginner-friendly clay modeling skills, so it's ideal for all levels. Are you ready to make your own mushroom jar? Check out this step-by-step tutorial.
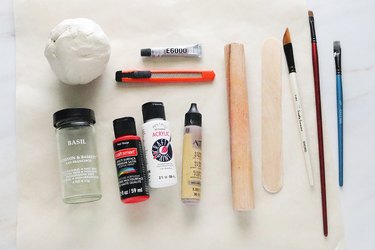
Things You'll Need
Parchment paper, vinyl placemat or clay mat
Clay rolling pin
Air dry clay
Empty spice jar
Clay or craft knife
Cup of water
Small bowl
Wood popsicle stick
Paintbrushes
Red acrylic or chalk paint
White acrylic or chalk paint
Tan acrylic or chalk paint (optional)
E6000 glue
Tip
If you are using red acrylic paint, use white chalk paint for the toadstool spots if possible. The chalk paint will better adhere to the slick surface of the red acrylic paint. You can find acrylic and chalk paints at craft stores or on Amazon.
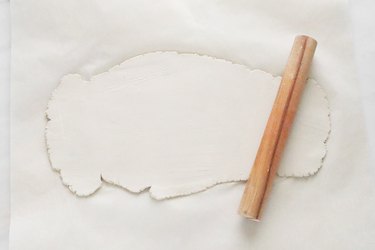
Step 1
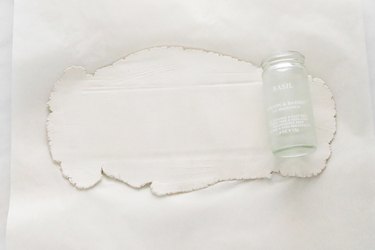
On the sheet of parchment paper or mat, roll out a large strip of clay.
Step 2
Roll the spice jar across the strip so that it leaves indentations. This will serve as a cutting guide.
Step 3
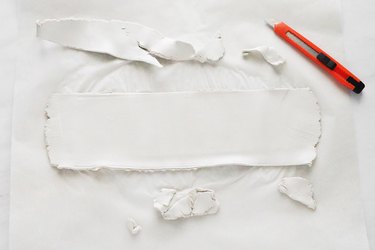
Using a clay knife or craft knife, trim the clay along the indentations. You'll be left with a wide clay rectangle.
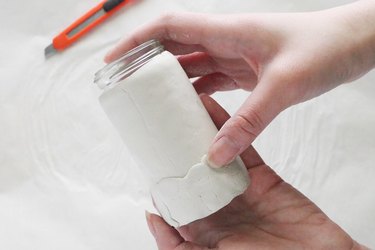
Step 4
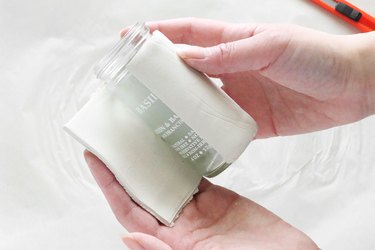
Wrap the clay rectangle around the spice jar, trimming the excess as needed.
Step 5
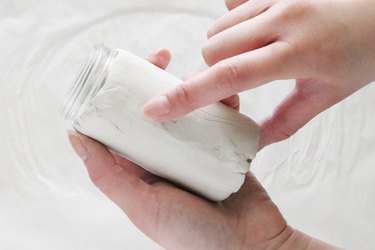
To seal the "seam" around the jar, dip your finger into water and smooth the clay together.
Step 6
To give your DIY jar a wide base (just like real mushrooms), wrap a narrow strip of clay around the base.
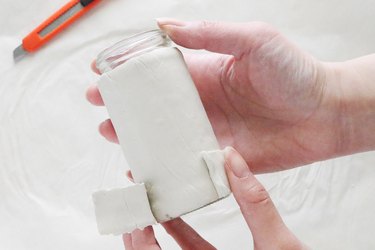
Step 7
Using a wet finger, smooth the narrow strip into the existing clay.
Set it aside to dry. Most brands of air dry clay take two to three days to dry completely. However, be sure to check your clay's packaging for specific instructions.
Tip
Air dry clay shrinks as it dries. This can cause cracking, especially if it’s wrapped around an object like a spice jar. This is normal and fixable. As soon as you notice cracking, simply fill in the crack with a small piece of clay and wet fingers. You may need to do this once or twice before it’s fully dry.
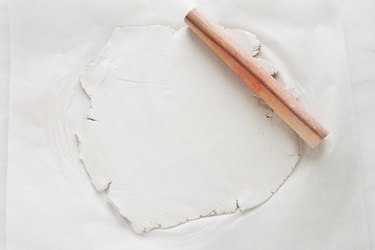
Step 8
On the parchment paper or mat, roll out a large circle of clay.
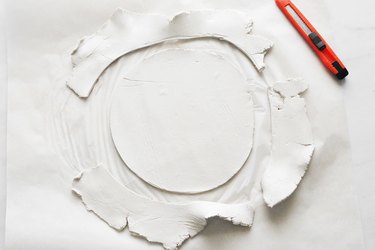
Step 9
Cut out a circle about 6 inches wide.
Tip
If you’re using Crayola Air Dry clay, the top of the bucket can be used as a stencil.
Step 10
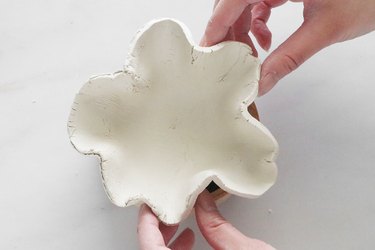
Place the circle on top of a small bowl. Using your fingers or a wooden popsicle stick, gently push in the center to create an upside-down dome shape. You can also cup the sides of the dome to help the center "cave" in.
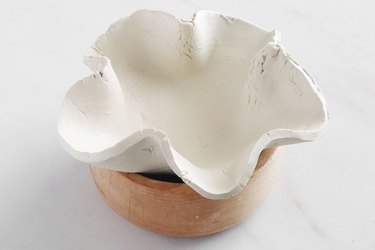
The mushroom cap can be left as a simple dome, but if you'd like to add wavy details, use your fingers to mold the sides. Set it aside to dry.
Tip
This doesn’t have to be perfect or look a specific way. Remember that you’re making a DIY mushroom jar inspired by nature!
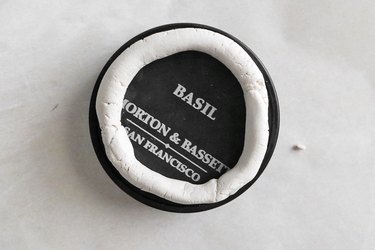
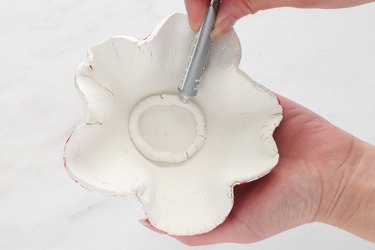
Step 11
Finally, using the spice jar lid as a guide, create a ring of clay. You'll glue this underneath the mushroom cap later. Set it aside to dry.
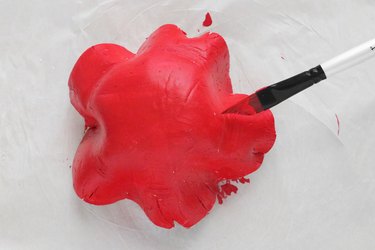
Step 12
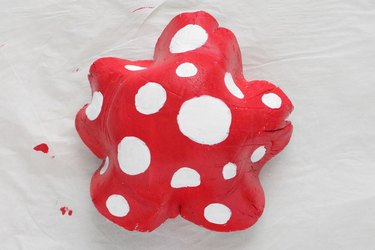
Once all the clay pieces are dry, paint the mushroom cap red. Let it dry.
Step 13
Next, paint white spots on the mushroom cap. Let it dry.
Tip
At this point, you can lightly brush the mushroom base with tan paint. This is optional.
Step 14
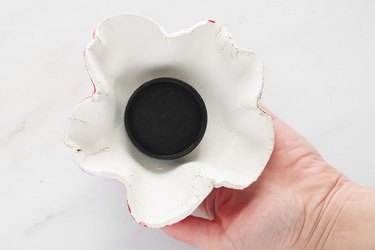
Glue the clay ring on the underside of the mushroom cap, pressing down gently. Next, apply glue on top of the ring.
Tip
Always use E6000 glue or any type of super glue in a well-ventilated area. You can also use hot glue, but the bond might not be as strong.
Step 15
Stick the flat side of the spice jar lid to the ring. Press down gently and let it dry in a well-ventilated area.
Once dry, your DIY mushroom jar is ready to store items like paper clips, bobby pins and more. Another idea is to create several toadstool jars and display them in your garden as decor.