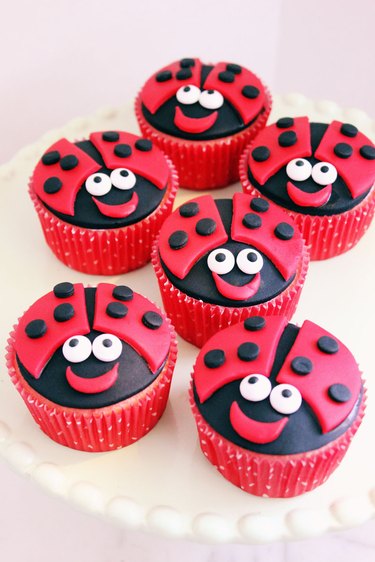
The ever-popular ladybug is believed to bring good luck. Seeing one, or having one land on you, could mean finding true love, financial success or winning the big game. But while the jury is still out on the ladybug's ability to grant your wishes, these adorable ladybug cupcakes are sure to bring you luck—because they're easy to make and yummy to eat. With their spotted red wings and happy smiles, they're perfect for Valentine's Day, birthday parties, showers or any springtime occasion.
Video of the Day
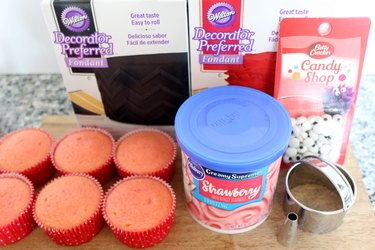
Things You'll Need
Cupcakes
Frosting
Black fondant
Red fondant
Rolling pin
2 1/2-inch round cookie cutter
Small round pastry tip
Candy eyeballs
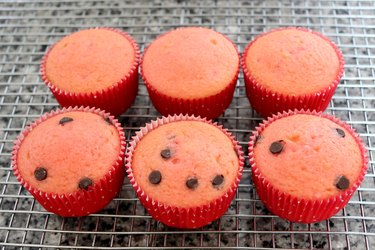
Step 1: Bake Cupcakes
Using a homemade recipe or a cake mix, bake cupcakes. I made strawberry cupcakes from a cake mix, as the pink color works so well for the ladybugs. If you're feeling extra ambitious, add some chocolate chips to the batter so the cupcakes will be spotted just like ladybugs. The trick in keeping the chocolate chips from sinking to the bottom of the cupcake is to use the miniature-sized chips and coat them in flour before adding to the batter.
Video of the Day
Tip
Don't fill the cupcake wrappers with too much batter, as you don't want the cake to be too rounded on top. A flatter cupcake makes a better ladybug.
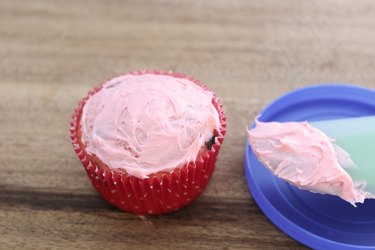
Step 2: Lightly Frost Cupcakes
Apply a very thin layer of frosting on the cupcakes. The main purpose of the frosting is to hold the fondant that will go on top of it, so you need very little. If you overdo the frosting, it may seep out the side when you add the fondant. Because the frosting isn't the main attraction of this cupcake, I used store-bought frosting instead of making it from scratch.
Step 3: Add the Black Layer
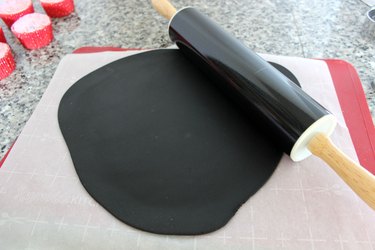
The base layer of the ladybug will be the black fondant. Fondant creates a smooth, professional look and is as easy to work with as Play-Doh. While you can make fondant and color it from scratch, it's easiest to buy pre-colored fondant from the crafts or kitchen supply store.
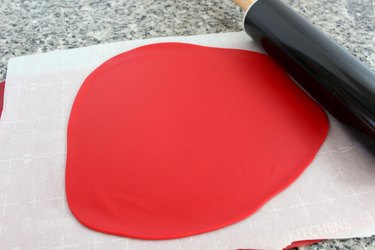
Start by rolling the fondant flat with a rolling pin to about 1/8 inch, and no thicker than 1/4 inch. If your rolling pin sticks to the fondant, sprinkle some confectioner's sugar on top of it.
With a 2 1/4-inch diameter round cookie cutter, cut circles in the fondant. Depending on the size of your cupcakes, you may need a larger cookie cutter, so experiment with different sizes.
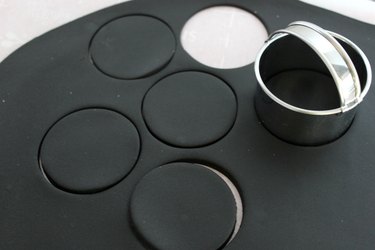
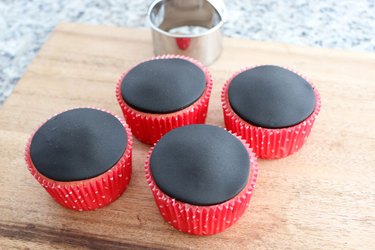
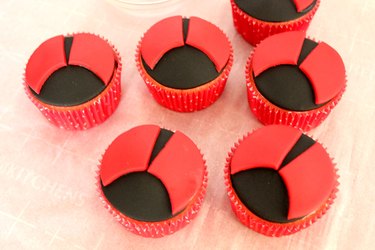
Place the black fondant circle on the cupcake, allowing the frosting to hold it in place. Hold on to the excess black fondant. You'll need it later for the dots on the ladybug wings.
Step 4: Add the Wings
Roll out the red fondant into a thin layer as you did the black fondant.
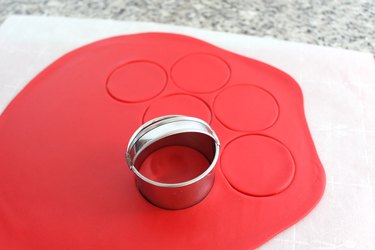
With the round cookie cutter, cut red circles out of the fondant. Save some rolled fondant for the ladybug's mouth, which we'll make at the end.
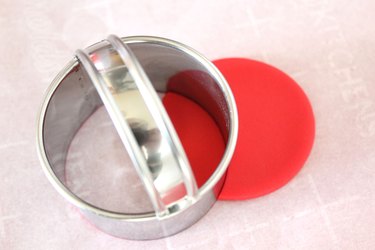
To make the wing shape, we need to remove a segment of the red circles. Position the same cookie cutter over the red circle, overlapping about one inch in, and press down. You're left with what looks like a moon that's been partially eclipsed.
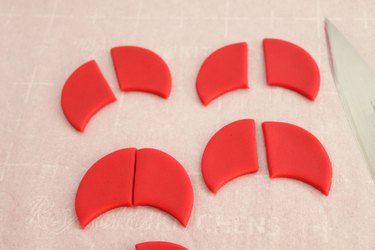
Cut each of these red wing shapes in half with a knife.
Dab the backs of the red wings with a little water, and position the red wings on top of the black layer of fondant, splaying the wings outward. The water will hold the two layers together.
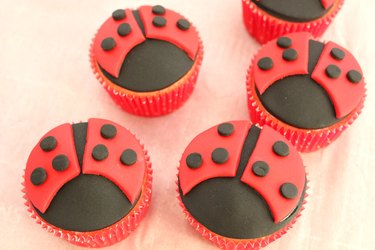
Step 5: Add the Dots
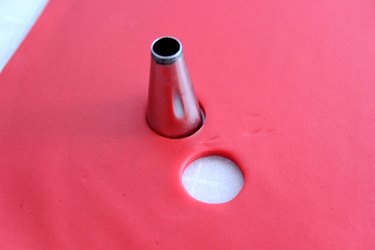
With a small round pastry piping tip (I used a no. 12 tip), punch holes in your extra rolled black fondant to make dots for the wings. The fondant can get stuck in the tip, so just pop it out with a skewer or toothpick if that happens.
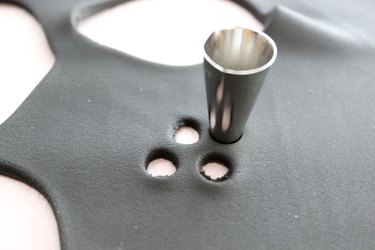
Apply the dots to the wings, moistening the backs of the dots with a little water to help them adhere. Add three dots per wing.
Tip
You need very little water to make the fondant attach to itself. In fact, if there's too much water, it will get messy. To control the amount of water, I moistened a small piece of a paper towel and used that to apply the water.
Step 6: Add the Eyes
Moisten the backs of two candy eyeballs and apply them to the front section of the ladybug, directly on the black fondant. Press down firmly to strengthen the hold. You can find candy eyeballs in the cake decorating aisle of the supermarket or crafts store.
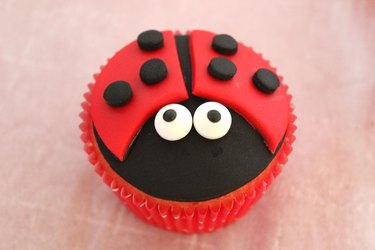
Step 7: Make It Smile
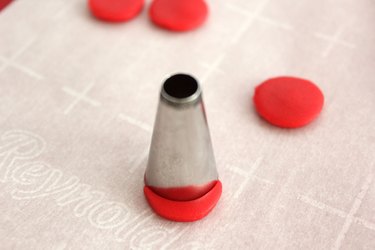
As you can tell, our ladybugs are not anatomically correct. So in the spirit of anthropomorphism, let's give them a nice, big smile. With the larger end of the round pastry tip, cut out circles from the leftover rolled red fondant.
Use the same end of the pastry tip to remove about three quarters of the red fondant circle, leaving a smile shape.
Moisten the back of the smile with a little water, and apply it to the "face" of the ladybug under the eyes.
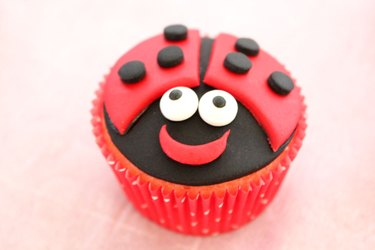
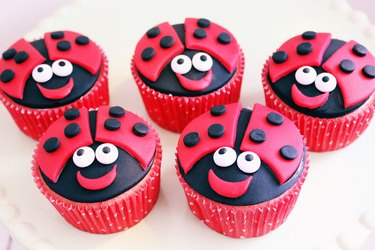
With cupcakes this adorable, people will be swarming for them.