Create a self-concealed storage system, perfect for wrangling and charging all of your go-to electronics. Using a favorite container, such as a metal box, wine crate or toolbox, you'll be able to create a storage solution that will help you organize and conceal all of your gadgets in one neat space.

Video of the Day
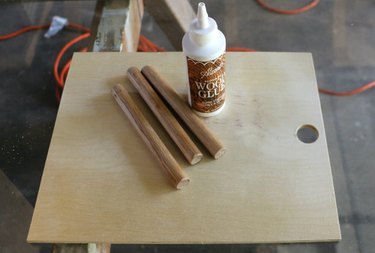
Things You'll Need
Power drill and hole-saw bit
Wooden dowels, ½ inch thick
Small sheet of plywood, ¼ inch thick
Wood glue
Power strip
Step 1
To get started you'll need a wooden wine crate or other box of your choosing. We love wine crates for their bold graphics, rustic appeal and decorative storage capabilities. (Ask your local wine store if it has any extra crates.)

Step 2
Measure the inside length and width of the box to determine the size of plywood you'll need to serve as the ledge. Most hardware stores will cut wood exactly to size for you right at the shop. Similarly, measure the depth of the box to determine the size for four supporting wooden dowels. You'll want the dowels to be cut at least two inches (depending on the size of the gadgets you're hoping to conceal) smaller than the overall depth of the box. The dowels' length needs to allow enough room for the height of the tallest charger plugged into the power strip.
Step 3
Using your hole-saw drill bit, drill a hole in the back of the crate where the main electrical cord will emerge. We used a 1 ½-inch round drill bit.
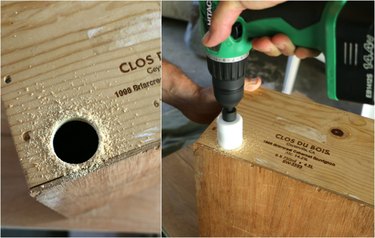
You should be able to thread the main power strip cord through the hole in the crate, so the power strip rests securely on the bottom.
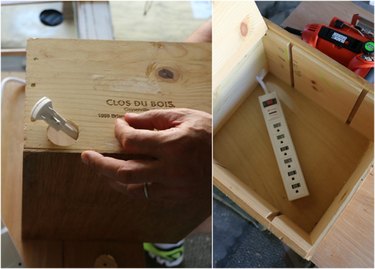
Step 4
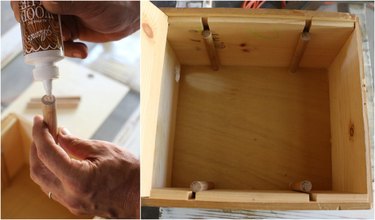
Using wood glue, affix each of the four wooden dowels evenly around the inside perimeter of the crate. The dowels will act as supports, holding up the plywood board ledge.Allow the glue to dry for at least two hours.
Step 5
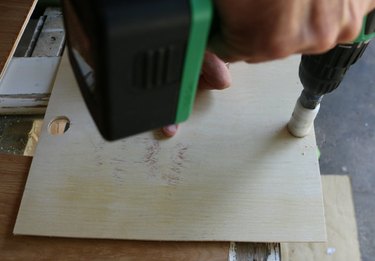
While the glue is drying, drill two equidistant holes in the plywood ledge, one on each side. For these interior holes, we used a 1-inch round bit. These holes will allow for threading of the gadget chargers through the board and can be used to pull the board up and out when changing out the cords.
Step 6
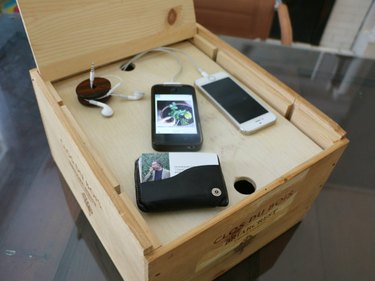
When the glue is completely dry, it's time to put all the pieces together. Reinsert the power strip into the base of the wine crate, plug the various gadget chargers into the power strip, and then thread them through the holes in the wooden plywood sheet before sliding the ledge into place inside the crate.
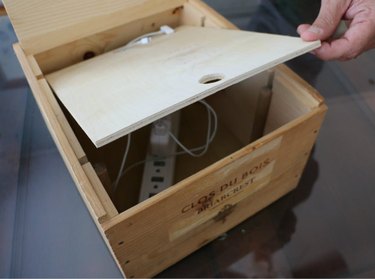
Plug each each of your go-to gadgets into their respective charging cords and delight in how they effortlessly charge with other odds and ends you'd rather keep hidden out of sight. You can even store additional treasures in the larger cavity underneath the ledge if you like.
At this stage, all you need to do is find the perfect place to plug in and display your new concealed gadget charging station. You decide whether or not to keep the top open or closed — it's that simple!