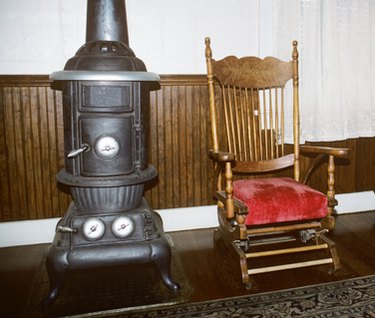
A Franklin wood burning stove adds a vintage charm to a living room, family room or kitchen. If you are planning to use your Franklin stove to heat the room, there are some important safety requirements that must be met. Although a wood burning stove should be installed by a professional, you can do the installation yourself. Follow installation guidelines carefully, comply with local building codes, and check your homeowners insurance to make sure you are covered.
Stove Installation
Video of the Day
Determine where the stove will be placed. A Franklin wood burning stove must be installed at least 36 inches away from any combustible surface. Combustible surfaces include drywall, wood paneling and furniture.
Video of the Day
The stove must sit on top of a nonflammable surface as well. It cannot be placed directly on carpeting or wood floor. Since Franklin stoves often have very short legs, you may need to provide extra floor protection. If the legs on the stove are less than 6 inches high, a platform of hollow masonry with a covering of 24-gauge sheet metal should be installed to provide adequate floor protection. Extend the nonflammable protective floor surface at least 12 inches beyond the sides and back and 18 inches beyond the front of the stove.
Install a noncombustible protective surface on the walls around the stove. The stove can be placed 18 inches away from the walls if they are covered with 1/4-inch asbestos millboard hung 1 inch away from the wall, or nailed to the wall if it is covered with 28-gauge sheet metal. Use 28-gauge sheet metal with 1 inch of dead air space between it and the wall to safely place the stove 12 inches from the wall. A brick wall will also allow you to place the stove 12 inches away as long as there is 1 inch of dead air space between the brick and the wall.
Chimney Installation
Vent the stove through only UL-approved double or triple wall chimney pipe. Use chimney pipe that is the same diameter as the flue collar on the stove. Follow the installation instructions supplied with the chimney pipe very carefully. Install the chimney inside the house straight up through the roof rather than through the wall and up the outside of the house if possible. Chimneys on the outside of the house tend to get excessive creosote buildup due to quick cooling. Limit the angles in the chimney for a more effective draft and less creosote buildup.
Use a UL-approved thimble where the chimney passes through the wall or ceiling with at least 4 inches of nonflammable material between the thimble and any combustible surface. The chimney must be 3 feet above the roof and 2 feet above any part of the roof that is within 10 feet like a dormer window. Top it off with a good chimney cap to keep rain, snow, and birds out.