Things You'll Need
Putty knife
Hand saw
Scrap wood
Rubber mallot or 3-lb. hammer
Hand sander
Meausring tape
2-by-4-inch boards
Saw
Hammer
Nails
Sheetrock
Sheetrock cutting blade
Drywall screws
Drill with Phillips head bit
Seam tape
Mud
Trowel
Primer
Roller
Roller pan
Paint
Level
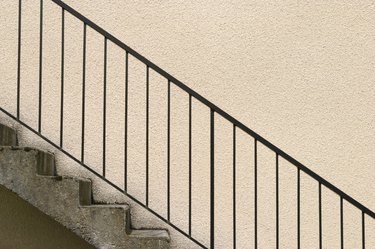
An open stairwell has many advantages, such as enabling you to look into the room as you enter and allowing you to lift furniture over the banister to make a tight turn when carrying it upstairs. But there are also good reasons for wanting to enclose a stairwell, such as increased privacy and providing more protection from inclement weather. You also create wall space both within the stairwell and in the outer room by enclosing the stairwell. You can use this area to place furniture, to create storage under the stairs or for display purposes.
Removing the Banister
Step 1
Measure the area next to the stairs to determine if there is enough space to put in a new wall without blocking a doorway. The new stud wall will be slightly greater than 4 1/2 inches wide when completed.
Video of the Day
Step 2
Cut through the old paint between the banister and the stair treads using a putty knife.
Step 3
Cut through the bottom of each spindle flush with the wood step with a saw. Pull the spindle out from the bottom; it should simply slide out from under the rail. You can leave the rail and the newel posts in place to serve as a handrail if the stairs are sufficiently wide.
Step 4
Examine the underside of the rail near the newel post to check for a modern rail mounting that might need to be unscrewed. If you see none, or you don't care to repurpose the handrail, place a scrap board under the rail and strike upward on the scrap board until the handrail is loosened or broken.
Step 5
Examine the newel post for screws near the bottom or under the stairs; remove them. Cut through the bottom of the newel post, flush with the ground, to remove it. Sand the area flat.
Building a Stud Wall
Step 1
Measure along the area to be enclosed, divide the distance by 16 and add 1 to determine how many vertical studs to cut. This is also the length of your header and footer.
Step 2
Measure the distance from the floor to the ceiling and subtract 3 inches for the length of the vertical studs. Cut the studs to measure from 2-by-4-inch boards. Also cut the header and footer boards from the 2-by-4-inch boards.
Step 3
Lay the header and footer boards on their narrow edge on the floor and space the studs evenly between them. Nail the studs in position using 2-inch nails.
Step 4
Finish one side of the stud wall with Sheetrock while it's lying on the ground. Finishing it in place is difficult if you left the railing of the stairwell intact. Cut the Sheetrock to fit. Secure the Sheetrock in place with Sheetrock screws.
Step 5
Apply mud to all the seams on the wall. Run drywall tape over the wet seams. Smooth the tape over the seams with the trowel. Sand the mud smooth after it dries. Apply a second, thin coat of mud over the whole wall; sand it when dry.
Step 6
Clean the surface of the drywall of any dust. Vacuuming with a brush head works well, or use a dust cloth.
Step 7
Prime and paint the drywall. Wait until the primer has dried, typically 4 hours, before top-coating.
Step 8
Stand the stud wall upright and position it against the side of the stairs. Check that the wall is vertical. Nail the stud wall in place at the ceiling and floor.
Step 9
Finish the outside wall with Sheetrock. Tape, mud, prime and paint the wall.
Tip
You can panel rather than Sheetrock your stud wall stairwell enclosure.
You can build a 1-by-2-inch wall enclosure if quarters are tight and local ordinances allow.
Warning
Tie back loose clothing and hair before operating power equipment. Wear safety goggles when using power equipment.
Check local ordinances before making any structural changes to the house. Check with local authorities to see if you have to have a permit to make the changes you desire.
Video of the Day