Things You'll Need
Hammer
Push broom
Waterproof underlay material
Roofing knife
1/2 inch roofing nails
Tape measure
Metal drip edge flashing
Metal shears
Chalk box
Drill
1/2 inch galvanized metal screws
2 inch galvanized metal screws
Bend down tool
Rubber boot kits
Roofing caulk
Caulking gun
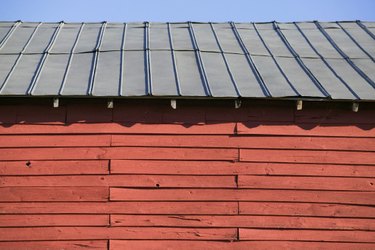
Everlast metal roof panels are lightweight, durable and long lasting. The metal panels are pre-coated with a corrosion inhibitor to guard against rust while the interlocking ribs provide a watertight seal on the roof. The light colored metal reflects heat and reduces outside noise. Available in a wide range of colors, metal roofing is energy efficient and could save the homeowner a substantial amount of money on energy costs. The cost savings and long lifespan expectancy of Everlast roofing appears to make it a smart choice.
Step 1
Inspect the existing roof for damaged areas. Make any needed repairs before installing the metal panels. Hammer down all raised nails. Remove all unused vents, pipes and protrusions.
Video of the Day
Step 2
Sweep the roof clean of all dirt and debris using a push broom.
Step 3
Apply waterproof underlay material to the flat area of the roof. Overlap each row by 2 inches. Use a roofing knife to trim the material to fit around all vents and protrusions. Secure the material using a hammer and 1/2-inch roofing nails.
Step 4
Measure the length of the roof edge using a tape measure. Cut metal drip edge flashing using metal shears. Secure the flashing along the edge of the roof using a hammer and 1/2-inch roofing nails.
Step 5
Snap a vertical chalk line 1/4 inch from the low edge of the roof using a chalk box. Begin laying Everlast metal panels on the low edge of the roof and work towards the peak. Install the first metal panel square to the eave. Leave 1 inch of the panel to overlap the edge of the roof. Use a drill and 1-1/2-inch galvanized metal screws to secure the metal panel. Install the metal screws through the peak of the rib in 12-inch to 16-inch intervals.
Step 6
Align the second panel above the previously installed panel. Overlap the edge of the panel by 12 inches. Use a drill and 1-1/2-inch galvanized metal screws to secure the metal panel. Install the metal screws through the peak of the rib in 12-inch to 16-inch intervals. Continue to align and install panels until you reach the peak of the roof. Measure the length needed for the final top panel and mark the panel using a pencil. Trim the panel to fit using metal shears and install the panel using the drill and galvanized metal screws.
Step 7
Install the next row of metal panels beginning at the low edge of the roof. Align the first rib on the left side of each panel to fit over the last rib on the right side of the previously installed panels. Repeat Step 6 for each row until all metal panels have been installed. Trim the panels to fit around pipes and in valleys using metal shears.
Step 8
Snap a chalk line vertical to the ridge line along the peak of the roof. Install the foam closure strip that came with the ridge cap metal along the chalk line.
Step 9
Install the first metal ridge cap end piece on one end of the ridge line. Allow 6 inches to overhang the edge of the roof. Press the metal ridge cap down firmly onto the foam closure strip. Secure the ridge cap using a drill and 2-inch galvanized metal screws. Drill a screw through the metal cap and foam closure strip at each rib. Continue until metal ridge cap has been installed completely across the peak of the roof. Use metal shears to trim the last ridge cap to fit the end. Leave a 6-inch overhang. Bend the overhanging edge of the end caps down using a bend-down tool. Secure the metal using a drill and 2-inch metal screws.
Step 10
Install rubber boot kits to all vent pipes. Push the rubber boots down over the vent pipes firmly. Apply a generous bead of roofing caulk around the base using a caulking gun.
Warning
Use extreme caution when working with sharp metal edges. Use roof anchors and a harness when you work on a roof.
Video of the Day
- Koser Building Materials: Everlast Metal Roofing
- Roofer 911: Roof Underlayment
- Yellow Pages: How to Apply Metal Roofing Over Plywood
- YouTube: How To Measure And Install Multi Rib Or Armour Rib Metal Roofing Part 3
- YouTube: Home Repair & Maintenance : How to Snap a Chalk Line
- Metal Sales Manufacturing: Metal Roofing, Metal Roof, Standing Seam Metal Roofing