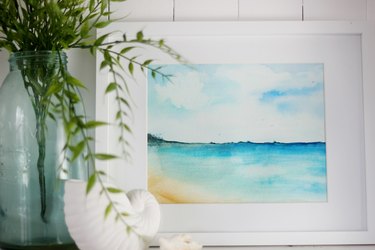
Painting a watercolor beach scene is an easy beginner's exercise because you can add as many or few details as you wish. The wet-on-wet technique required achieves beautiful, soft results that mimic the soft lines of water and sand.
Things You'll Need
Video of the Day
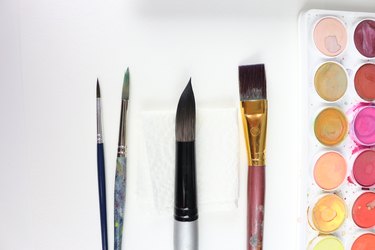
Brushes No. 20 flat straight-edge brush
No. 6 round pointed brush * No. 3/0 fine brush
Video of the Day
Other supplies Watercolor paper (cold press) Watercolor paint set Water basin Paper towel * Palette
Note: The paint colors used in this project are Cobalt Blue, French Ultramarine, Raw Sienna and Burnt Sienna.
Step 1
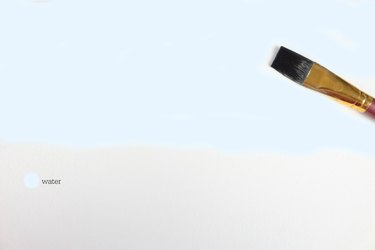
Using a No. 20 flat brush, paint the top half of the paper entirely with water.
Note: The clear water has been tinted in the photos for demonstration purposes only.
Step 2

Dip your No. 20 flat brush in Cobalt Blue and paint over the water while the paper is wet to allow the paint to spread easier.
Step 3
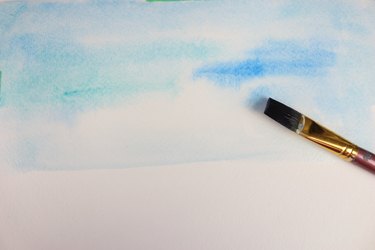
Still using your No. 20 flat brush, dip it in French Ultramarine and paint over the previous paint color.
Step 4
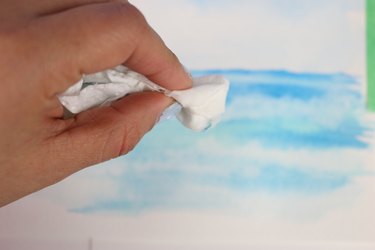
Absorb some of the wet paint by scrunching up a piece of paper towel and dabbing it onto the wet paint to form clouds.
Step 5
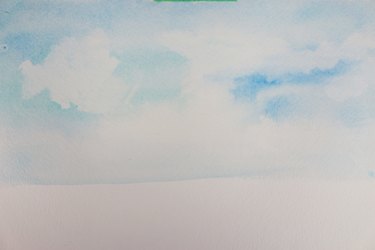
Place clouds across the sky in random order and shapes by continuing to dab the paper towel on the wet paint.
Step 6

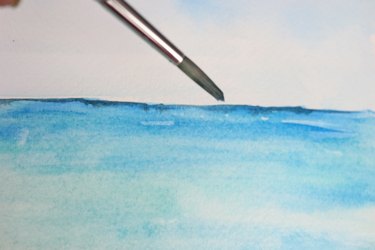
Clean the No. 20 flat brush and then use it to paint the bottom half of the paper with water.
Step 7
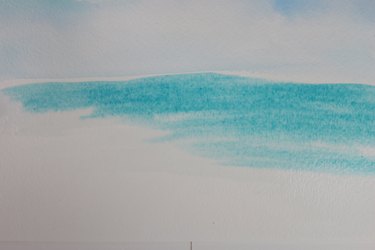
Dip your No. 20 flat brush in French Ultramarine and brush it onto the wet paper. Leave a white edge between the skyline and the water.
Step 8
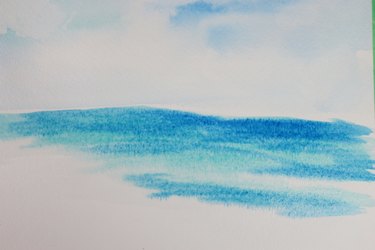
While the paint is still wet, dip your No. 20 flat brush in Cobalt Blue and paint over the French Ultramarine. Allow the two colors to bleed into each other.
Step 9
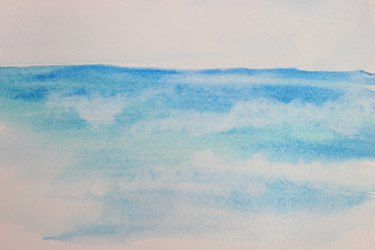
Using the same dabbing method as in Step 4, lift some of the paint with a paper towel to form waves. Manipulate the shape of the paper towel in such a way that you achieve irregular markings when dabbing. Some waves will stretch along the water and be longer than others. To highlight the waves a little more, you can go back and paint underneath the paper towel marks with a darker shade of your blue paint.
Step 10

Clean your No. 20 flat brush and then dip it in a very diluted Raw Sienna. Paint the left side of the paper to form sand, leaving a white area between the water and the sand.
Step 11
Make a 2:1 mixture of Cobalt Blue and Burnt Sienna on your palette. Dip the No. 6 round brush in the mixture and fill in the white horizon line. Use soft, organic lines to give the illusion of land off in the distance.
Step 12
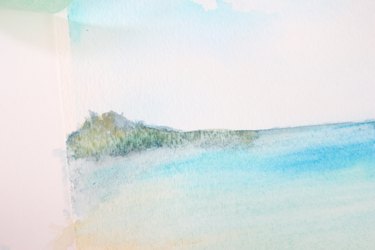
Make a 1:2 mixture of Cobalt Blue and Raw Sienna on your palette. Use the No. 6 round brush to paint an irregular mound on either side of the coastline to represent a mountain.
Step 13
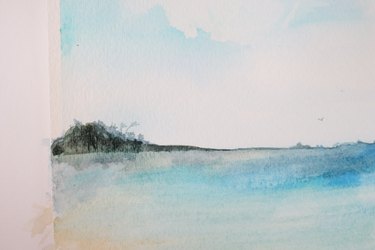
Use the 2:1 mixture of Cobalt Blue and Burnt Sienna and your No. 3/0 round brush to paint irregular lines to fill in the mountain. You can also paint a few organic lines on top of the mountain to represent trees.
Step 14
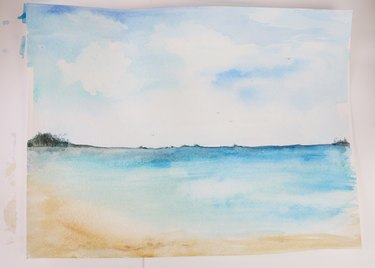
Use the same mixture and brush from Step 13 to paint a few V-shaped figures in the sky to represent birds.