Things You'll Need
Two-liter bottle
Scissors
4 tablespoons of sugar
1 cup of water
Circular saw
1 piece 1 x 6 wood (8 ft. long)
Measuring tape
Hammer
24 small nails
Adhesive
Drill
1/2 inch drill bit
3 feet of twine
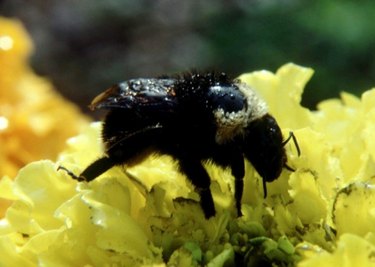
Carpenter bees can ruin your home one hole at a time by drilling small holes in the home's exterior. These bees make holes in almost any piece of wood and use the holes as burrows or nests. Carpenter bees look very similar to bumble bees; they are approximately the same size and shape. The most obvious difference is that the carpenter bee's abdomen is black and the bumble bee has yellow hairs on its abdomen. One way to keep these bees from damaging your home is to make a trap to catch the bees.
Step 1
Hold the two-liter bottle with one hand while using the scissors to cut off the top quarter of the bottle. Turn the top piece of the bottle upside down and place it back on the bottom piece. The top piece will fit upside down in the bottom piece, without falling through, and act as a funnel.
Video of the Day
Step 2
Mix one cup of water and three tablespoons of sugar in the bottle. Pour the sugar through the funnel piece first, then add the water. Adding the water last will help wash any sugar off the inside of the funnel. Shake the bottle gently to mix the solution.
Step 3
To make the walls and roof, use the circular saw to cut five 10-inch pieces from the 8-ft.-long piece of 1 x 6. Cut one 7-inch piece for the trap's floor. Use the measuring tape to make sure the pieces are the correct length.
Step 4
Use the hammer and nails to create four walls from the 10-inch pieces of wood by nailing each piece's edge to another piece's edge.
Step 5
Place the four completed walls in a standing position. Place the 7-inch piece on top of the four standing walls, covering the opening in the top. Nail the 7-inch piece to the top of the four standing walls by hammering nails along the edges of the wood.
Step 6
Turn the trap upside down, putting the newly attached "roof" on the ground. It will serve as the floor of the trap. Place the two-liter bottle with solution inside the four walls.
Step 7
Place the final 10-inch piece over the top of the trap, making the roof. The two edges of the roof will extend out over two sides of the trap. Use the hammer and nails to secure the roof to the trap.
Step 8
Use the drill and 1/2 inch drill bit to drill a hole at an upward angle into the two sides where the roof extends out over the side. The carpenter bee will enter the hole that is drilled, enter the funnel-type trap for the sugar/water and not be able to leave.
Step 9
Tie one end of the twine around the base of the trap's roof. Tie the other end to the corner, or peak, of the roof nearest the areas that are experiencing the carpenter bee problem.
Warning
Use extreme caution when operating the circular saw. Misuse could result in serious injury.
Wear safety glasses when operating the circular saw.
Video of the Day