Things You'll Need
Wooden pallet
Pry bar
Hammer
4 wooden posts, 4-by-4-inch, 120 inches long
8 lag screws
Screw gun
Tape measure
Pencil
Miter saw
Hammer
Box, 10d nails
Post hole digger
Gravel
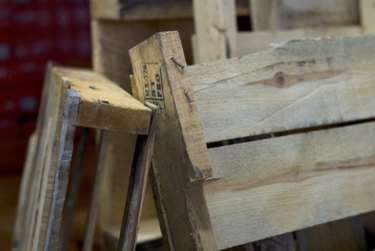
You can build an arbor using a reclaimed wooden pallet and four posts. Wooden pallets are readily available and are often free. The pallet can be used to form the top of the arbor and the posts are used as supports. Leave the pallet and posts natural and allow the wood to weather over time to add a rustic element to your outdoor space. Select a pallet with top and bottom cross supports. The bottom supports will be removed to use as side supports. The top supports will provide a shaded area under the arbor.
Step 1
Place the wooden pallet on a work surface with the bottom side facing up. Slide a flat bar underneath the cross supports at each end and pry them up. Lift up on the ends and pry the supports off of the center supports of the pallet and set them aside.
Video of the Day
Step 2
Remove any nails that may have remained in the center supports using the claw end of the hammer to pry them out.
Step 3
Place one post in the four corners of the pallet on the inside edge of the outer center supports. These are the legs. Drive two lag screws from the outside of the outer center supports into each post to secure them to the pallet. Ask someone to help you support each post as you drive the screws in.
Step 4
Measure the distance between the legs on the sides of the pallet with a tape measure. Lay out the removed cross supports on a work surface. Remove any nails in them with the claw end of a hammer. Measure and mark the supports to the measurement from step three using a tape measure and pencil.
Step 5
Cut the cross supports to length using a miter saw. Lay each board flat on the table of the saw and guide the saw through the wood to complete each cut. Divide the cross supports into two equal piles.
Step 6
Lay out one pile of supports on one side of the pallet and one on the other side. The supports go between the legs on each side of the pallet. Space the supports every 12 inches along the legs starting 6 inches down from the edge of the pallet. Hammer the boards in place using two 10d nails at each joint.
Step 7
Turn the arbor assembly upright and move it to the selected location in the yard. Mark the location of the legs with a stick. Move the arbor aside. Dig an 18-inch deep hole at each leg marking with a post hole digger. Place the removed dirt beside each hole.
Step 8
Put three to six inches of gravel into each hole. Lift the arbor up and center the legs over the holes. Lower the arbor legs into the holes. Fill around the legs with the removed dirt and pack it down with your feet.
Tip
Plant climbing plants along each side of the arbor.
Warning
Wear eye protection when building an arbor.
Video of the Day