Things You'll Need
Old newspapers
Protective mask
Protective gloves
Black spray paint
Stencil
Waterproof tape (2 inch width)
Dark gray spray paint
Silver metallic spray paint
Gloss finishing spray
Ruler
Cardstock
Drafting pencil
Circle template
Sharp paper scissors
Cardboard
Heavy cardstock (optional)
Craft-knife
Cutting mat
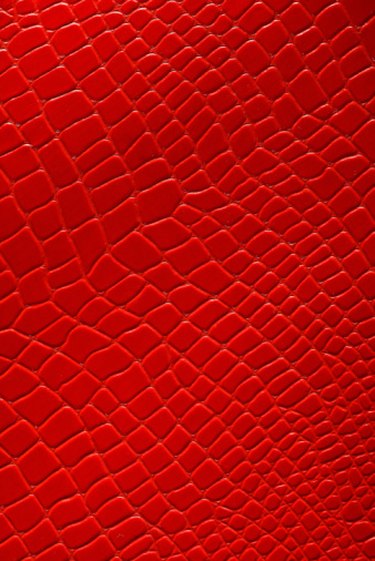
Replicate exotic skin textures onto different surfaces using spray paint. Exotic skins like snakeskin have a patterned surface with shading and distinct breaks within the colors. A photo of the pattern for duplicating serves as a guide. Applying spray paint in layers creates the snakeskin surface. A stencil covers the first painted layer, protecting the surface as subsequent added layers are applied. A gloss finishing spray seals the spray paint and adds a layer of sheen, which becomes apparent as light hits the snakeskin effect.
Creating the Snakeskin Effect
Step 1
Spread old newspapers on your work surface to prevent damage while spray painting. Wear a protective mask and gloves. Read your spray paint brand for spraying coverage dimension. The farther you hold the can from the surface, the wider the spraying coverage. Read the brand's surface recommendations as well. For instance, fabric spray paint is not the same as metal spray paint.
Video of the Day
Step 2
Hold black spray paint approximately 12 inches from the desired surface. Spray the entire area with the black color paint. Let paint dry, using your brand's recommended time. If the black color appears uneven or is a light shade of black when dried, repeat this step by spraying another coat over the surface and let dry.
Step 3
Place a grid-like stencil over the black painted surface. The thickness of the stencil's border prevents the next spray paint layer from painting over the black surface. For example, recycle plastic soda can holders for a wide circle snakeskin effect or old fishnet stocking for a narrow look. Tape the plastic holder or stocking onto the surface with 2-inch width waterproof tape to prevent from shifting during spraying.
Step 4
Hold the dark gray spray paint can approximately 12 inches away from the stencil. Spray a coat of the paint in a side-to-side motion. Pull back the can approximately 16 inches from the stencil as you continue to spray. The spray coverage spreads as you pull back, resulting in an uneven snakeskin surface for a realistic effect. Alternate the 12- to 16- inch distance spraying pattern to cover the entire stencil. Let dry.
Step 5
Spray a layer of silver metallic spray paint, holding the can approximately 18 inches away from the stencil. Spray in a swift side-to-side motion to ensure the silver metallic spray appears like an airbrushed surface. Let dry.
Step 6
Remove the stencil carefully from the surface to reveal the snakeskin effect.
Step 7
Seal the snakeskin texture with a gloss finishing spray. This produces a sheen over the texture as the light hits the surface.
Making the Snakeskin Stencil
Step 1
Measure the width and length for the snakeskin scales with a ruler. For instance, for a small surface, measure a 1-inch-by-1-inch shaped square.
Step 2
Draw a basic square shape on cardstock with drafting pencils using the measurement from this section, step 1 for the scale. Shape the corners with a circle template to soften the square's corners.
Step 3
Draw a border around the shaped square. The thickness of the border dictates the spacing between each snakeskin scale. A narrow border produces a small-scale snakeskin effect.
Step 4
Cut out the shaped square with sharp paper scissors to avoid jagged edges.
Step 5
Trace the shaped square onto a piece of cardboard or heavy cardstock with a drafting pencil. Draw the shaped square in an aligned or random pattern. Continue to draw the shaped square, covering the entire area until a grid pattern appears.
Video of the Day