Things You'll Need
Cotton canvas tote bag
Rubber bands
1 cup soda ash
Gallon of
Newspaper
Latex gloves
Pre-mixed fiber-active tie-dye dyes in assorted colors
Plastic bag
Tie-dye is a method of dying fabric that creates unique designs by tying and bunching the fabric to keep sections of it dye-free. It's common to tie-dye T-shirts and shawls, or fabric to sew such items as pillows. A canvas tote bag is an excellent first tie-dye project. The low cost makes experimentation affordable, and the size keeps the folding and tying process easy to manage.
Step 1
Fold, crumple, twist and bunch up the tote bag however you desire.
Video of the Day
Step 2
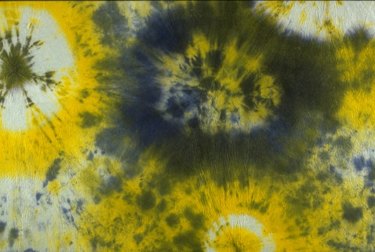
Bunch sections of the fabric tightly with rubber bands. The position of the bands and the folds in the fabric determine the pattern of the tie-dye design. The dye permeates exposed areas of the fabric, but not where the rubber band is cinching the fabric, often creating circular patterns.
Step 3
Fill a sink with 1 gallon of water. Dissolve 1 cup of soda ash, also known as sodium carbonate, into the water.
Step 4
Soak the canvas tote in the soda ash solution for up to 15 minutes. Squeeze out enough water so that the tote is thoroughly damp but not dripping wet.
Step 5
Put on the latex gloves to protect your hands from the dye.
Step 6
Spread out several sheets of newspaper to cover and protect your work surface.
Step 7
Squirt several dye colors onto the tote bag. Use any colors you like. Press the nozzles of the squirt bottles deep into the folds and creases of the tote to avoid large areas of undyed fabric. Let the folds and creases, rather than dye placement, determine the tote's design.
Step 8
Remove the rubber bands on the tote. Then fold, crumple and twist it in a different way before retying it and adding more dye. Repeat this process until the dye saturates as much of the tote as you want to have the tie-dye design.
Step 9
Place your dyed tote in a plastic bag to keep it damp for six to 24 hours. Longer sitting times result in more vibrant colors.
Step 10
Remove the tote from the plastic bag and untie it. Wash it in your washing machine in warm water to remove excess dye. Dry the tote on your dryer's hottest setting to set the dye.
Tip
Dyes take best to natural fibers like cotton and wool. Pre-washing the fabric helps it accept the dye. Avoid placing opposite colors next to each other, as they'll create a muddy brown if they mix. Opposite color pairs are red and green, blue and orange, yellow and purple. Colors made from red, like purple and pink, turn muddy next to green as well.
Apply dye to folds and creases in the fabric.
Use a relatively light touch. Puddling is a sign that you're applying the dye too heavily.
Warning
Wash the tote by itself in the washer, or the dye could spread to other items.
Video of the Day