Things You'll Need
Soft brush
Vacuum cleaner
Seam ripper
Fabric adhesive sheet
Scissors
Sewing machine
Pins
Liner fabric
Iron and board
Scrap cotton fabric
Lampshade glue
Bulldog clamps
Needle and thread (optional)
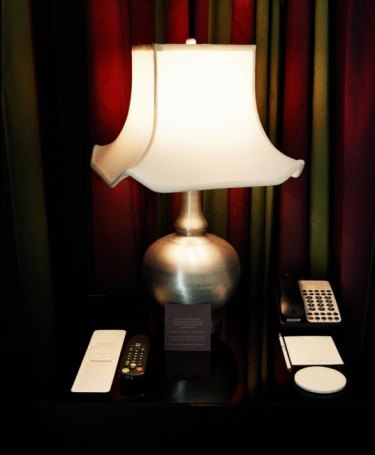
Restoration of a lampshade depends a lot on the condition of the shade and the type of material. Many lampshades are conical, with fabric on both top and on the lining. Often the lampshade will be off-white in color, and the fabric of the shade and the liner will be a close match, even if the exterior fabric is shirred or pleated to give it volume. If the outer fabric is fragile and has holes, it may need to be replaced. If the outer fabric is still in good shape but the liner is torn, replace the liner without working on the outer shade. In some rare cases it may be worthwhile to remove a fragile fabric and attach it to a stable fabric.
Step 1
Unscrew the finial and remove the lampshade. Use a soft brush and vacuum cleaner to clean the shade thoroughly. This will give you the best visibility of the shade's current color if you are matching the lining and trims. Most shades and linings are not bright white but a softer off white, and there are many variations of off white, making matching colors more difficult.
Video of the Day
Step 2
Examine the front fabric of the shade. If the shade is in good condition, don't remove it. If the shade is fragile with small areas of damage but you want to keep the fabric, it should be carefully removed and attached to a stable new fabric.
Step 3
Remove the decorative tape around the top and bottom edges of the shade. Often this is glued on and the tape will peel off without difficulty. If the tape is sewn on, use a seam ripper and carefully remove the stitches. Set the tape aside in case you want to re-use it.
Step 4
Remove the tape that loops under the top framing cross members. This tape will be about 2 inches long and 1/2 inch wide. It is usually glued at the top. Set these aside. Lift and peel the lining fabric where it overlaps the front decorative fabric. Again, the lining is probably glued on and can be lifted with care. Slide the liner out of the frame from the bottom. If you are trying to save your existing decor fabric, remove that fabric from the shade. It may be glued or sewn to the frame.
Step 5
Open the two seams of the lining fabric and iron the fabric to establish as much of the original shape as possible. Open the seam on the decor fabric. If the decor fabric is shirred or pleated, try to flatten the edges of the seams and areas where the fabric wraps over the frame. Peel the back off an iron-on fabric adhesive sheet. Place the decor fabric face down. Place the sticky side of the sheet over the decor fabric. Place scrap cotton fabric over the sheet and iron the adhesive sheet to the back of the decor fabric.
Step 6
Place decor fabric face side down. Peel the backing off the adhesive sheet. Position the lining fabric face side up. Cover the lining fabric with scrap cotton fabric and iron the fabrics to join the decor fabric to the stable lining fabric. The fabrics should be tightly bonded when you are finished. Cut the lining fabric to match the edges of the decor fabric.
Step 7
Turn the decor fabric face sides together and sew the seam back together. The new fabric will help make the seam strong. Fit the fabric over the frame and line up the seam with one of the frames. Apply a bead of glue to the top of the wrapped frame and bend the fabric into its former position. Use bulldog clamps to hold the fabric tightly to the frame. Repeat along the bottom edge. Allow the glue to dry completely.
Step 8
Place the old liner over the new liner material and pin the fabric together. Cut around the old liner for each piece. Place the new liner pieces face sides together and sew your seams. Trim the seams short to 1/8 inch. Slide the liner into the frame with the seam side toward the back of the decor fabric. The finished side of the seams should face the light bulb.
Step 9
Fit the top of the liner by gluing over the decor fabric at the top edge of the frame. Use bulldog clamps to hold the fabric in place while the glue dries. Repeat along the bottom edge of the frame. Allow the glue to dry completely. Position the short pieces of tape under a framing cross member so the raw edges are over the liner and glue the tape ends into place. Glue the trims back into place or replace them with new trims.
Tip
The inner liner should be stretched so you cannot see the frame except as a distant shadow. This will leave an air pocket between the inner and outer shade that will diffuse the light and soften its look.
Video of the Day