Things You'll Need
Measuring tape
Construction marking paint
Chalk string line
Level
Hammer
Wood stakes
Shovel or bobcat
Shovel or trenching machine
Tamper
Plywood
2-by-4 lumber
2-by-12 lumber
Carpentry nails
Gravel
Plastic sheeting
Rebar
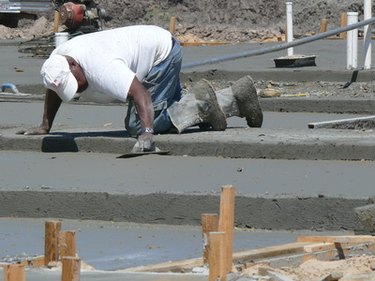
Pouring a concrete slab for your new home addition can save you money if you do the job yourself. Forming the concrete slab is the most important part of the task, making sure it is level and has a solid base. This takes some concentration and planning; however if you have basic do-it-yourself skills the job should be manageable. Participating in the building of your new home addition can be rewarding in both cost savings and the pride of having gotten your project off the ground yourself, literally.
Step 1
Contact your local building department for a building permit and any requirements for adding a slab addition to your home. It will want the building plans for your addition and the dimensions of the slab you are pouring.
Video of the Day
Step 2
Call the local utility authority such as Miss Dig to have any utilities located in the ground, such as cable and sewer, marked so you don't damage them during the job.
Step 3
Prepare the bed for the slab by grading the soil by hand or with a machine such as a bobcat. This is done before final measurement of the area so that the measurement lines and stakes are not disturbed when set. Grade a larger area than is required for your slab so you have ample space with which to work and the ground is well prepared.
Step 4
Measure the area for your slab addition. Hammer wood stakes at the outer corners of the site for your new slab. Use the chalk string line or spray marking paint to mark your outline and a level to make sure your lines are square with the existing slab. You can either paint the lines between the existing slab and the wood stake or tie the chalk string line to the stakes and the existing slab, checking it for square as you go. You will follow these lines to set your forms so getting them right is important.
Step 5
Measure the area for your footings. Footings are generally required under a concrete slab by building code and your local municipality will have standard depth and width measurements required for your size concrete slab. Follow these guidelines when measuring the width and depth to trench for your footings.
Step 6
Dig the slab bed out by hand or with a bobcat, taking care to carefully follow the outline of the measured area. You can hand dig along the outer measurement lines to keep them in place.
Step 7
Trench your footings using a hand shovel or a rented trenching machine. Dig them to the depth required, adding in the depth of gravel drainage you will need, and check them for level as you go. Tamp down the trench at the bottom with a board or hand tamper and add the amount of gravel required by your building code in the bottom of the trench. Place plywood boards along the sides of the trench, nailed together with a 2-by-4 every two feet for support and at the joints where boards join together. Line the inside and outside of the trench with these forms and check them for level. Pour the concrete when the forms are set and allow it to cure, then remove the forms.
Step 8
Using your corner stakes as a guide, place your first outer form 2-by-12 boards in place along the outside end of the slab bed, laying the board lengthwise on it's edge. Check it for level and square and pound a 2-by-4 wood stake on either side of the board to hold it in place. If 12 feet is not long enough, splice boards together by overlaying a 4-foot board over the outside of the joint where the two 2-by-12 boards come together. Cut this end board to the exact length of the slab. The outer side boards should be 3 inches longer than the length of the slab.
Step 9
Set the side 2-by-12 form boards in place. Check them for level, make sure the form is square and nail them in place against the end board. Support them with 2-by-4 stakes pounded in on either side of the board as you did the end form. Use the shovel to adjust level by hand when placing form boards if necessary.
Step 10
Cut 2-by-4 sections to use as kickers and braces. Lay your chalk string line across the top of the form as you begin to brace to keep it in line as you work. Pound a 2-by-4 wood stake into the ground as a brace every 2 feet. Add a kicker or a 2-by-4 section placed against the brace at an angle and wedged into the ground to support it.
Step 11
Fill in your gravel base inside the forms with a wheelbarrow and shovel. The gravel should be at least 6 inches deep; check your building code to see if there are exact requirements in your area. Level it by hand with the shovel, getting it as close to exact level as possible.
Step 12
Lay the plastic sheeting over the gravel. This is a moisture barrier to keep ground water from seeping into the slab.
Step 13
Install the rebar in a grid pattern on top of the plastic. For reinforcement, drill into the existing slab with a masonry bit a hole 3 inches deep and insert the rebar to tie it into the home. Check your building codes to be sure this is applicable and acceptable if you choose this method. Once rebar is laid your forms are ready for the pouring of the concrete slab for your addition.
Video of the Day