Things You'll Need
Washing machine
Material
Pencil
Ruler
Rubber bands
String
Tie dye colors
Newspaper
Plastic squirt bottles
Water
Tie dying is the process of tying material so that certain portions of it are not dyed and then dying the remaining material a variety of colors. In tie dying, an entire garment can be dyed or specific patterns can be made on the material. It usually takes some time to develop tie dying techniques. A butterfly pattern is a popular tie dye shape that can be made on t-shirts, bags or even bedspreads. Making tie dyed butterflies is a craft that can be accomplished by parents and children easily working and learning together at home.
Preparation of the Fabric
Step 1
Wash and dry and material that you will be tie dying to remove any dirt or chemicals that may affect the dying process.
Video of the Day
Step 2
Lay the material on a flat surface.
Step 3
Outline your butterfly on the material. Use a pencil and lightly draw the form of the butterfly on the material. Don't forget to draw in the body of the butterfly.
Step 4
Place small dots about every two inches throughout the pattern with your pencil. Start by making the dots just inside the outline of the wings and then work your way into the body. Then do the body of the butterfly.
Twisting the Fabric
Step 1
Pinch the material at each dot and twist the material tightly.
Step 2
Wrap rubber bands around the twisted material. The number of rubber bands you use will depend on how many colors you want on each twisted portion of the butterfly, as well as how much material you are working with at each dot.
Step 3
Wrap the twisted material with string if you do not wish to use rubber bands.
Dying Your Fabric
Step 1
Purchase tie dye colors in a kit. These are available at craft stores and are pre-mixed so that you do not have to be concerned with mixing chemicals. Moreover, unlike store-bought fabric dyes, they do not have to be heated.
Step 2
Cover your table with newspaper to catch any drips or spills.
Step 3
Fill plastic squirt bottle containers with the dyes. Use one squirt bottle for each color.
Step 4
Squirt each section of the twisted material with the colors that you want on that section. Use one color at a time, squirting down to the rubber band, then changing colors and squirting down to the next rubber band. Continue with this process on each section of twisted material throughout your entire pattern.
Complete Your Project
Step 1
Rinse the entire piece of material with cold water to set the colors on your butterfly.
Step 2
Rinse the entire piece of material with warm water to rinse out any excess dye.
Step 3
Remove the rubber bands from the material.
Step 4
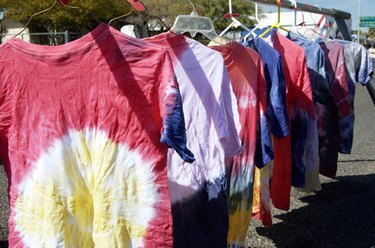
Hang the material to dry.
Tip
Once the material has completely dried, wash the material alone in the washing machine and dry. This will ensure that any excess dye has been removed from the shirt and that the shirt will be safe to wash with other clothing later on.
Video of the Day