Things You'll Need
Stretched canvas or canvas board
White gesso
Paintbrushes
Fan brush
Rag
Jar of water
Pallet
Acrylic paint colors:
Titanium white
Ultramarine blue
Cerulean blue
Payne's gray
Alizarin crimson
Burnt umber
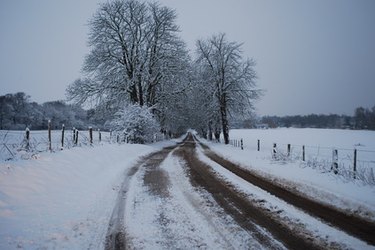
Painting a snow scene in acrylic can be a good exercise for beginning painters, depending on the simplicity of the composition. In a snow scene there are fewer colors and less detail to worry about than in other seasonal landscapes. Distance can be easily established with a few brush strokes on the horizon line to suggest a clump of trees or a looming mountain. Depending on the base colors and highlights you use for the snow and sky, time of day and weather can be effectively evoked. Snow scene landscapes are popular seasonal paintings, but for those who come from northern climates, they are appreciated year-round.
Step 1
Paint a coat of white gesso on the canvas to prepare the surface and to diminish or eliminate the canvas texture. Acrylic paint glides much more easily over a surface prepared with gesso, and covers the surface more effectively. Allow to dry overnight.
Video of the Day
Step 2
Establish the horizon line of the snow scene with a light pencil line. If you are painting a gray, wintry day, blend titanium white with Payne's gray and perhaps a touch of burnt umber. Use wide brush strokes across the canvas to paint in the sky above the horizon line. As you approach the horizon, add slightly more white to suggest distance.
Step 3
Paint the snow below the horizon line. Mix a small amount of ultramarine blue with titanium white and vary the shade as you paint to suggest the land's underlying contour, occasionally adding a tiny bit of alizarin crimson to add a touch of purple in the shadows. Use a clean fan brush to blend in the strokes.
Step 4
Use a fan brush dipped in burnt umber to suggest clumps of dead grass coming up through the snow. You can paint a forest-covered mountain in the distance using a dry-brush technique to create the illusion of trees. Use a very small, pointed brush to paint in the bare branches of deciduous trees in the mid-distance.
Step 5
Paint in a line or two of fencing. If the fencing goes from the foreground to the background, it will give more perspective to the painting. Remember that snowdrifts may partly conceal the fence in places, as well as any rock formations you include. Use a slightly deeper ultramarine and crimson to paint in the trough of a frozen stream.
Step 6
Paint in muddy or slushy tire tracks from the foreground to the background if you want to add more perspective and vary the white field of snow.
Step 7
Add highlights in pure titanium white to make the snow sparkle and to add more contour to drifts. Add snow accumulation along the fence, on rocks, and along tree branches that are close enough to show this kind of detail.
Step 8
Step back and examine your painting. Make small adjustments as necessary. Don't forget to sign your work!
Tip
Before you begin your painting, study snow scenes other artists have painted and note how they handled color, mood, perspective, weather, clouds, trees and the texture and contours of snow.
Video of the Day