Things You'll Need
Scissors
Fabric squares
Needle
Thread
Fiberfill
Backing
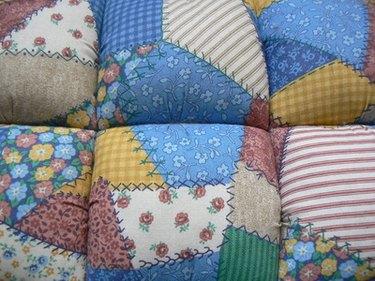
Puff, or biscuit quilts, were generally done in satin or velvet around 150 years ago. The use of biscuit quilts died down over the years until a quilt collector and historian, Jonathan Holstein, renewed an interest in the quilts in the 1970s. Puff quilts, coined puffy or pillow quilts, became the rage when families were reusing fabric in the 1970s and patchwork styles were desirable. Women would use nylon stockings to stuff the biscuit squares instead of fiberfill. Puffy quilts don't have to remain square. Sections can be round or diamond. You can create your own puffy quilt design.
Step 1
Establish a layout or a color plan for the quilt on graph paper before you begin. This will help you to determine how many biscuits you will need of each color in each row.
Video of the Day
Step 2
Cut all of the squares in two sizes. Cut square pieces in four inch and five inch squares. The five inch square is the top square. It is a bit larger to give room for the filling to be stuffed inside. Place one four inch square and one five inch square back to back. You will need 115 squares for a 60 x 84 inch quilt.
Step 3
Line up the corners. Gather each side using a basting stitch, spacing the stitches evenly around the five inch square. Pull and gather stitches to fit flush against the four inch square as you baste the squares together at three edges, using a one-eighth seam allowance. The basting stitch will be removed later when you stitch the permanent stitch into the square. Turn the square gently inside out. Pull out each of the corners using the needle. Continue until all of the squares have been stitched and turned inside out.
Step 4
Stuff the squares with the fiberfill. Do not over-stuff them so that you will have difficulty stitching the open end closed. However, place enough stuffing within the biscuit so that it will be fluffy and will not break down so easily over a short amount of time.
Step 5
Stitch the ends closed, using an invisible slip stitch.
Step 6
Sew all of the squares together by using a slip stitch, a ribbon or a braid to join them.
Step 7
Cut the backing material and line it up with the quilt, back to back. Slip stitch the backing to the quilt on three sides, leaving one end open. Pull the quilt from the inside, through the open end, being careful to pull the corners out appropriately. Lace, ruffle or edging may be added around the quilt, if desired.
Video of the Day
- Karens Variety: How to Make a Biscuit or Puff Quilt
- Patchwork-Quilt-Patterns:Get 206 Quilt Patterns and Step-by-Step Instructions from America's Foremost Quilt Designer
- My.Home With God: Biscuit or Pillow Quilt: Sometimes Called Puff Quilt
- Women Folk: Quilt Patterns Through Time: Those Peculiar Biscuit and Puff Quilts