Things You'll Need
Propane tank
Petroleum jelly
Soapy water
For backyard barbecues or everyday cooking, it's hard to beat the convenience of a gas grill. With the turn of a knob and the press of a button, you can be grilling in minutes without the hassle of charcoal briquettes and lighter fluid. About the only thing you need to get cooking is a ready supply of propane gas. Getting propane for your grill is easy because a variety of different sized tanks are available at many locations, including grocery and hardware stores.
Portable Grills
Step 1
Ensure that the regulator and control knobs are in the "off" position. Inspect the regulator and propane cylinder threads and all hoses for damage.
Video of the Day
Step 2
Lubricate the threads of the propane cylinder with a light coating of petroleum jelly.
Step 3
Slide the propane cylinder onto the regulator stem and turn the cylinder clockwise until it's hand-tight.
Step 4
Check for leaks by coating the connection with a mixture of equal parts liquid soap and water. Check for growing bubbles in the mixture that would indicate escaping gas. Retighten the connection if leaks are detected.
Step 5
Disconnect the propane cylinder and contact customer service if leaks are detected that cannot be repaired by hand-tightening the connection.
Step 6
Turn the control knob to "High" only when you are ready to light the grill and if no leaks are detected.
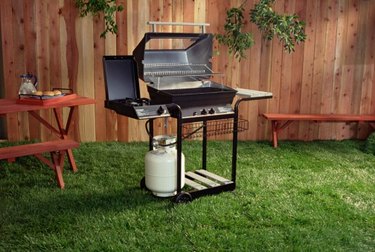
Nonportable Grills
Video of the Day
Step 1
Ensure that the regulator and control knobs are in the "off" position. Inspect the regulator and propane cylinder threads and all hoses for damage.
Step 2
Place the propane tank on the tank scale or holder in the cabinet under the grill. Swing the locking bar down onto the propane tank and tighten the wing nut until it's hand-tight.
Step 3
Remove the dust cap from the threads of the propane tank. Install the regulator by screwing the coupling clockwise onto the propane tank threads. Hand-tighten the coupling.
Step 4
Open the propane tank by turning the knob on top of the tank counterclockwise. Check for leaks by coating the connection with a mixture of equal parts liquid soap and water. Check for growing bubbles in the mixture that would indicate escaping gas. Retighten the connection if leaks are detected. Leave the propane tank open if no leaks are detected.
Step 5
Close and disconnect the propane cylinder and contact customer service if leaks are detected that cannot be repaired by hand-tightening the connection.
Warning
Never attempt to use a grill with damaged or leaking connections.
Do not use wrenches or other tools to tighten the couplings, as this can cause damage and leaks.