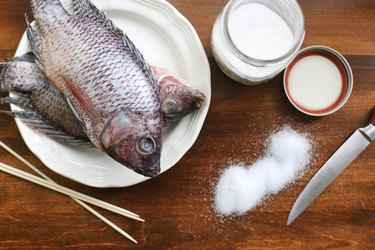
Things You'll Need
Butcher's knife
Deboning knife (optional)
Large cutting board
Large bin or cooler
Hose (optional)
Drainage racks, screens or clean cloths
Long-handled spoon
Fish-drying racks or wooden skewers and string
Plastic wrap
Salt-curing your own freshly caught fish not only saves room in the freezer, but it also connects you to an age-old preservation method. Use table salt or sea salt as your curing medium before air-drying the fish. When working with large quantities of fish, however, you may find rock salt the most economical. You'll need enough outdoor space to set up fish racks or sturdy tree branches on which to hang the fish. Gutting, washing and salting the fish outdoors makes cleanup easier.
Air-Cured
Step 1

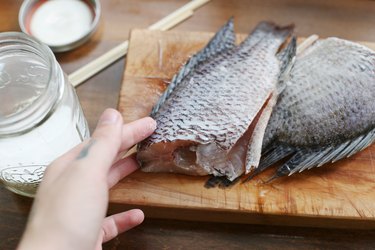
Clean the fish. Start by removing their heads. Carve a slit in each fish's belly and remove its internal organs; then spread the fish open. Open the fish like a book to gain access for loosening and removing its bones.
Video of the Day
Step 2
Wash the fish by dunking each in a bin of water, swishing it to remove blood and oil, then setting it to drain. Rinse out the bin thoroughly after you wash all the fish.
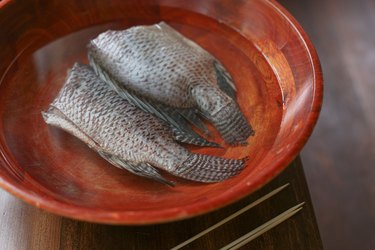
Step 3
Fill the bin with enough water to cover the amount of fish. Add 1 part salt to 16 parts water, and stir to combine the salt and water.
Step 4

Add the fish and let them soak for at least 30 minutes. Larger fish may require a longer brining time.
Step 5
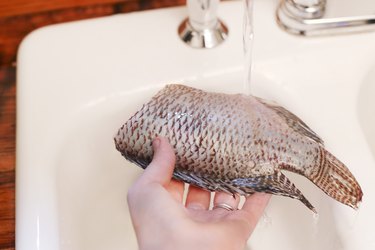
Remove the fish and rinse them to remove some of the surface salt.
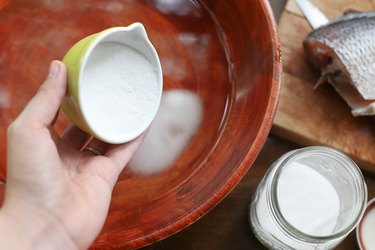
Step 6
Rub the fish on both sides with salt. If desired, add seasonings to the salt rub. Note that this step is optional; some cooks rely only on the brine soak.
Step 7
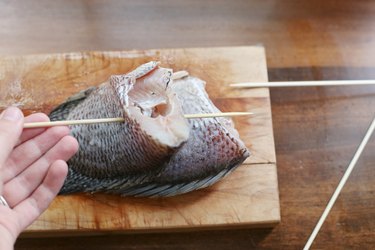
Set the split, salted fish on wire-mesh fish-drying racks, also known as "flakes," or on neatly arranged chopped tree branches. Alternatively, run skewers through the widest end of the fish near the original position of the head. Tie strings to the skewers. Hang the fish from tree branches or from horizontal poles that are positioned several feet above the ground.
Step 8

Leave the fish to dry for about seven days, bringing the fish inside during rainy weather. The drying process is complete when all moisture is removed and each fish is board-stiff. Wrap them in plastic and store them in a cool, dark place.
Tip
For shorter storage times, lightly salt the fish instead of soaking it in a brine solution prior to drying it. In this case, simply spread the salt evenly over both sides of the fish before setting it out to dry.
If you don't have a place to air-dry fish, you can salt-cure them in insulated coolers or ice chests, in which they create their own brine as time passes. Alternate layers of salt and salted fish until all the fish are in the cooler. Cover the last layer of fish with a layer of salt, and leave the fish to cure for at least 1 week. Then rinse them, return them to the cleaned-out cooler, and cover them with salted water for at least 2 weeks. The fish will keep in the brine.
Warning
As you might guess, salt fish is not suitable for consumption without processing it before cooking it. Begin by rinsing your salt fish, then soaking it in the refrigerator for about 24 hours. Change the water at least once during this soaking time. At the end of this period, the fish will be softened and de-salted enough for cooking.
Video of the Day