Things You'll Need
Empty, clean plastic drink container
Aluminum foil
Knife
Pipe cleaners
Pencil
Glue
Google eyes
Sequins or rhinestones
Black permanent marker
Bottle caps
You don't have to have metal parts to create an awesome robot for kids. Use common items you already have on hand to create different robotic looks, and have your kids wage a robot war or make a play with your robots. Aluminum foil is a key robot ingredient. Make sure you have plenty on hand to make your new robot shine.
Step 1
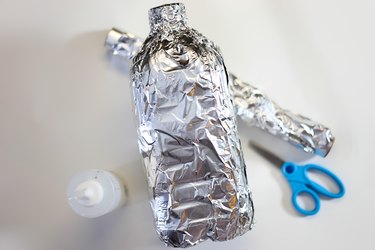
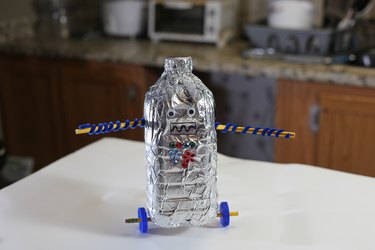
Glue foil strips onto the plastic container. Make sure the container is covered entirely in foil. Take the scissors and insert them into each side of the plastic to create small holes. These holes will hold the robot's arms.
Video of the Day
Step 2
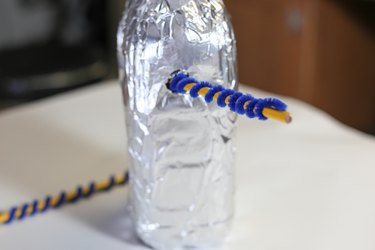
Make robot arms by taking a pipe cleaner and wrapping it around a pencil to create a springy shape. Repeat the process with the second pipe cleaner, and put one spring into each hole on the robot's sides.
Step 3
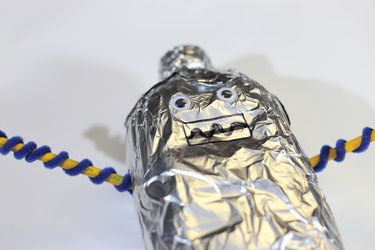
Bring your robot's face to life with some glued on googly eyes and a black marker smile.
Step 4
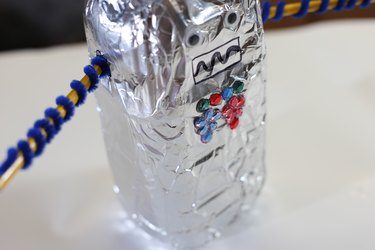
Simulate a robot's electronic chest by attaching sequins or rhinestones to the front of the robot.
Step 5
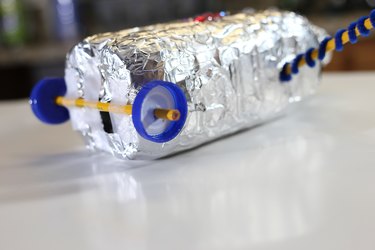
Make your robot mobile by gluing a few bottle caps to its bottom to create wheels.
Video of the Day