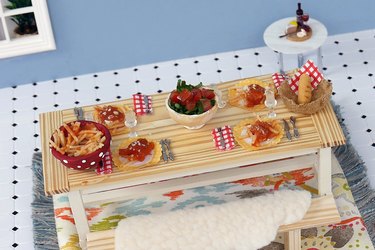
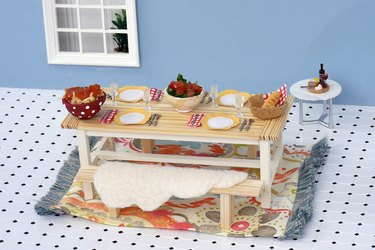
Farmhouse tables are trending in DIY circles these days. And no wonder: They are inexpensive and can be built with a minimum of experience and a few hand tools. We used miniature scale lumber to build a "tiny" version, but you can increase the dimensions given here by a factor of 10 to create a full- sized table.
Video of the Day
Things You'll Need
Miniature lumber: one 4 x 4, four 2 x 4s, five 2 x 8s, one 2 x 10
Miniature screws
Wood glue
Tape measure
Square
Pocket-hole jig
Pipe clamps
Portable drill
Circular saw
Sander
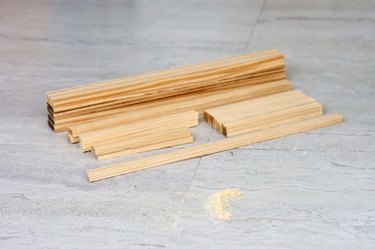
Step 1: Cut The Lumber
Cut the following pieces of lumber:
Video of the Day
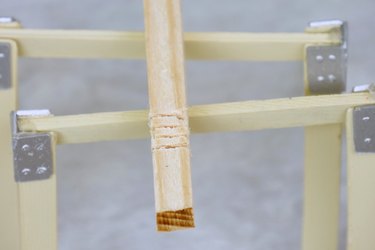
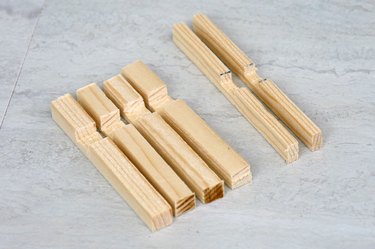
4 - 4 x 4, 2.9 inches (Legs)
2 - 2 x 4, 6.7 inches (Long aprons)
2 - 2 x 4, 2.7 inches (Short aprons)
1 - 2 x 4, 7.4 inches (Stretcher)
2 - 2 x 4, 3.4 inches (Stretcher supports)
4 - 2 x 8, 7.05 inches (Table top planks)
1 - 2 x 10, 7.05 inches (Center table top plank)
2 - 2 x 8, 3.8 inches (Breadboards)
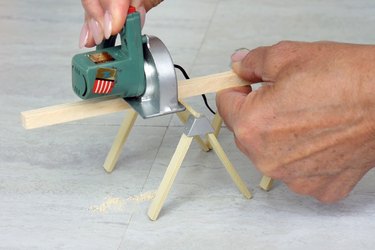
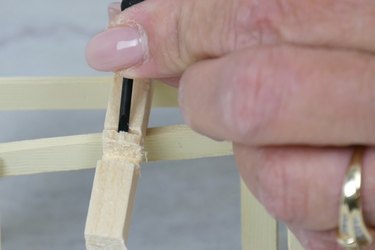
Step 2: Cut the Notches
Set the saw to cut .15 inches deep. Measure down .6 inches from the top edge of the 4 x 4 legs. Make a second mark .35 inches further down the leg. (This is the nominal size of the 4 x 4 timber.)
Make a cut with the circular saw at the top mark, at the bottom mark, and several cuts in between.
Using a chisel, remove the material between the top and bottom cuts.
Repeat for all four legs. Cut notches in the center of the 2 x 4 stretcher supports.
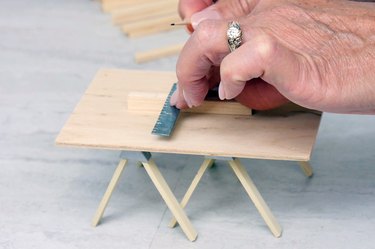
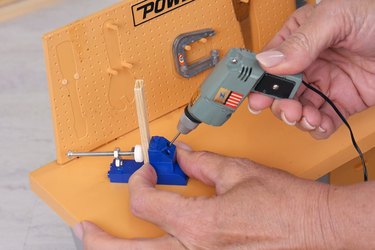
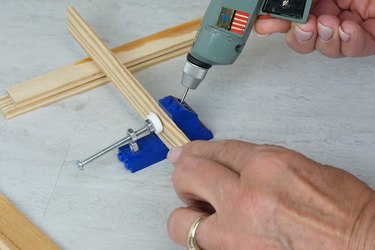
Step 3: Cut the Pocket-holes
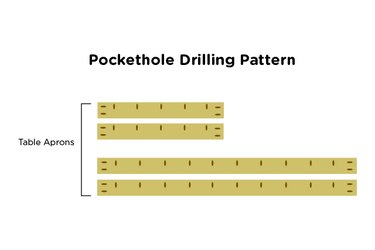
Using a pocket-hole jig, cut pockets on each end of the short aprons and the long aprons. Additionally, cut pocket-holes along the top edge of all four apron pieces.
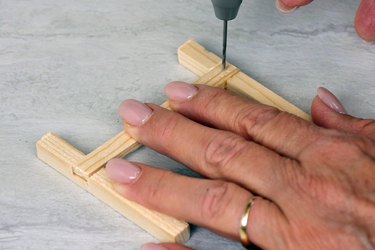
Step 4: Assemble the Base
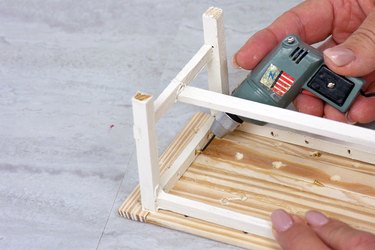
Lay out the table ends by placing a notched stretcher support in the notches between two of the 4 x 4 legs. Drill pilot holes and drive screws to attach the stretcher support to the legs. (These screws will show. If you plan on staining the base, place them accordingly. Repeat for the opposite end.)
Attach the short apron to the table leg ends, making sure the pockets are facing toward the inside and the top edge.
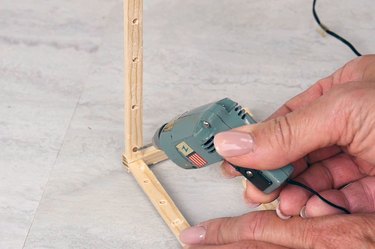
Check to make sure the assembly is square.
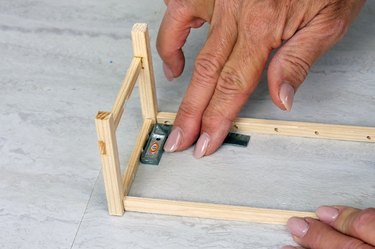
Attach the long aprons between the two end pieces, check for square again and make adjustments if necessary.

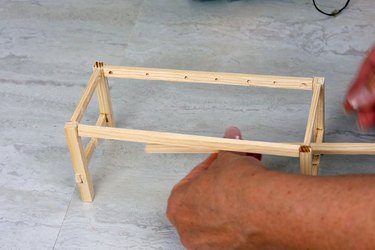
Attach the long stretcher between the two ends. Drill pilot holes and drive screws to attach the stretcher to the end frames.
Step 5: Assemble the Table Top
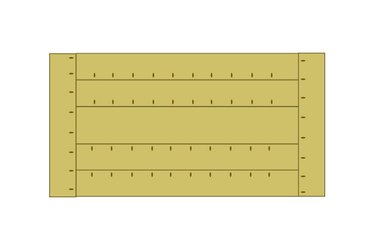
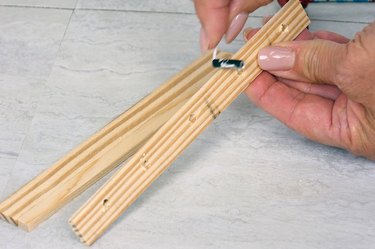
Lay out the table top planks. Drill the pockets in the back side of the planks following the diagram.
Place the 2 x 10 plank in the center. Apply a layer of wood glue to the edges of both planks. Lay the planks on a flat surface and clamp them tight. Drive the pocket screws into place.
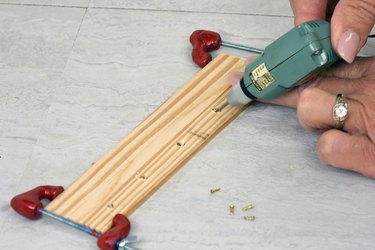
Keep adding planks to each side of the 2 x 10 until you have the tabletop assembled.
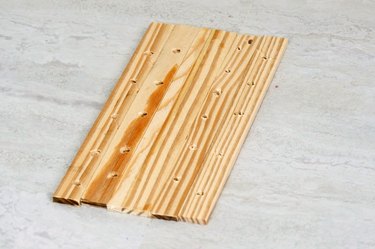
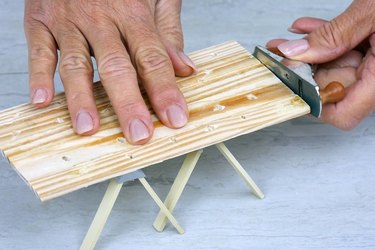
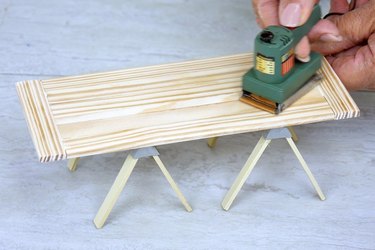
Sand or plane the ends of the tabletop to be create a straight, flat surface.
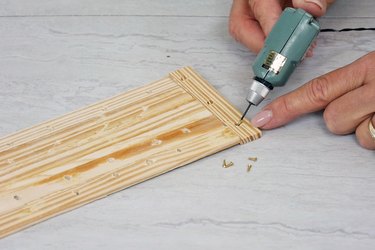
Measure the width of the tabletop and cut the two breadboards from the remaining 2 x 8. Drill the pocket-holes and attach the breadboards to each end of the table top in the same manner you used to create the tabletop.
Sand the table top and the table base.
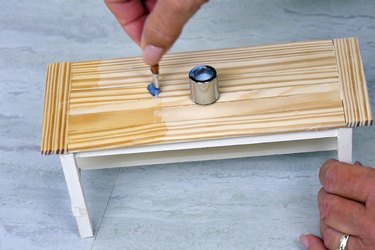
Step 6: Finish the Farmhouse Table
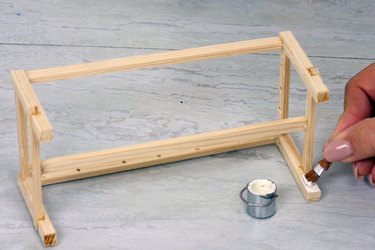
Paint or stain the frame in a color of your choice.
Attach the table top to the table base by driving pocket screws through the apron pockets and into the table top.
Turn the table upright and apply a finish of your choice.
Enjoy your favorite meal on a table you made with your very own hands!