A mini sewing machine is a little machine that packs a lot of power. There are many different manufacturers of the mini machines. The average price for one will cost you about $20 or less, as of 2010. The mini sewing machine works much like a regular size machine. One perk of the machine is that it is so small that you can take it with you when you are traveling. This will help you take care of any “sewing emergency” that may arise. You can also use it to work on small sewing projects without having to tote along your larger machine.
Video of the Day
Things You'll Need
Foot Pedal
Batteries
Scissors
Fabric
Bobbin
Thread
Step 1
Place your mini-sewing machine on a flat and stable working surface. Insert batteries into your mini machine if you intend to use battery power. Otherwise, insert the power cord into the machine. Plug the power cord into a nearby electrical outlet.
Video of the Day
Step 2
Connect the foot pedal to your mini sewing machine by inserting the end of the pedal into the designated jack on the sewing machine.
Step 3
Place a spool of thread onto the thread spindle (holder) that is located on the side or top of your machine. The exact location of the thread spindle may vary by manufacturer.
Step 4
Take the end of your thread and insert it through one of the top holes in the bobbin spool. The end of the thread should now be coming out of the top of the bobbin.
Step 5
Place the bobbin onto the “Bobbin Winder” of your mini machine. The bobbin winder should be located near the thread holder that is holding your spool of thread.
Step 6
Use one hand to hold the end of the thread that is coming from the top of the bobbin.
Step 7
Press the power switch for your sewing machine to turn it on. While still holding the bobbin thread in your hand, press the foot pedal of the mini sewing machine. As you do so, your bobbin will thread itself using the thread from the spindle.
Step 8
Allow the bobbin to continue threading itself until you are satisfied with the amount of thread that is on the bobbin.
Step 9
Use scissors to cut the thread that is connecting the bobbin to the spool of thread. Remove the bobbin from the bobbin winder.
Step 10
Insert the threaded bobbin into the bobbin holder of your mini sewing machine. For some machines, the bobbin holder will be located near the metal plate that is underneath the needle of your machine. For other machines, you will access the bobbin holder by opening the side compartment that is near the needle. The exact location of the bobbin holder will vary by manufacturer.
Step 11
Thread your mini sewing machine. The exact method to thread the machine will vary by manufacturer. However, you will generally pull the end of the thread that is on the spindle through the designated slots and insert the thread through the eye of your needle.
Step 12
Press the foot pedal of your mini sewing machine so that the thread on the spindle is intertwined with the thread from the bobbin.
Step 13
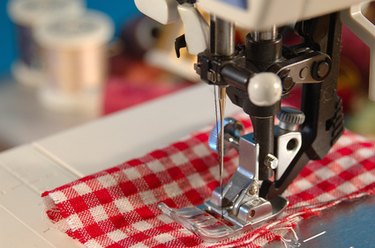
Place your fabric underneath the needle of the mini sewing machine. Press the foot pedal to begin sewing.
Step 14
Release the foot pedal to stop stitching. When you are finished stitching, cut the excess thread from your clothing item. Remove the item from the sewing machine. Turn off your machine.