Things You'll Need
Paper
Pencil
Black-ink pen
Kneaded eraser

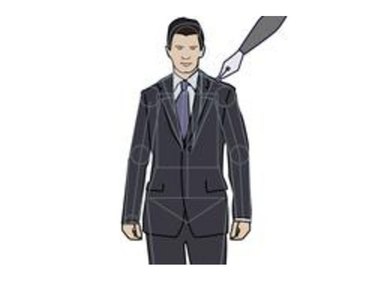
Any illustrator will eventually need to draw a man in a suit. Even comic-book illustrators draw a large number of men in suits. Bosses, business executives, mobsters, villains or wealthy heroes can all be drawn wearing suits. Learning to draw a human figure in a suit is a great step to increasing your illustration vocabulary. Once you have mastered the basic steps here, you can use this knowledge to add convincing realism to your modern and contemporary illustrations.
How to Draw a Man in a Suit
Step 1
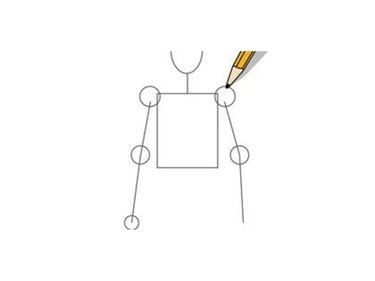
Draw the torso for the main with a large rectangular shape. Attach the head to the torso with a small vertical line for the neck and an oval shape for the head. Inside the head, draw a cross shape for the facial guidelines. Attach the shoulder guidelines with circles on the right and left upper corners of the man's torso. Connect a straight line to the shoulder and add a small circle for the elbow. Add a straight line that is perpendicular to the upper arm guideline. Draw hand guidelines with small circles at the end of the forearm.
Video of the Day
Step 2
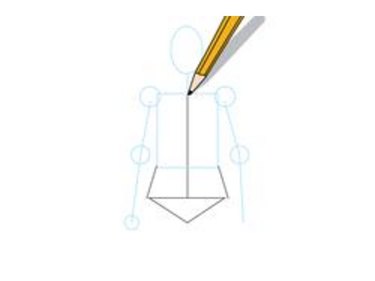
Create the hips by drawing a spine guideline with a vertical line coming down from the chest. The hips can be connected to the spine by drawing a wide upside-down triangle. Attach two slightly diagonal vertical lines coming out of the base of the triangle to create the hips.
Step 3

Draw the neck of the man with two short vertical lines coming down from the bottom left and right sides of the head. Attach diagonal lines that connect the neck to the top of the shoulder guidelines. Add parallel lines around the arm guidelines to create the sleeves of the suit. Draw parallel lines around the leg guidelines as well to create pants.
Step 4
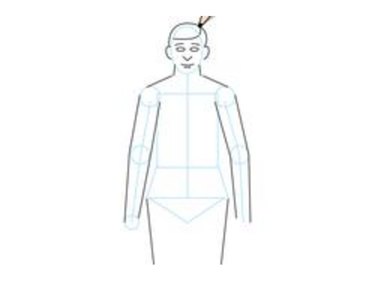
Add details to the face by drawing small ovals for the eyes, curved lines above the eyes for eyebrows, a small "V" shape for the nose and a curved line for the mouth. You can create the bottom lip with a curved line just under the mouth. Draw the hair of the man with a curved line across the forehead of the man. Draw a curved line just above the top of the head to finish the man's hair. Add ears with two small curved lines.
Step 5
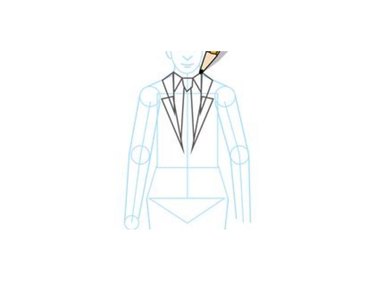
Draw the collar of the shirt with two triangles attached to the left and right side of the neck. Add a small upside-down pentagon shape for the knot of the tie. Place this between the collar triangles. Add two diagonal lines coming down from the left and right of the knot. Create the lapels of the suit with a small triangle-shaped band running across the chest to the left and right sides of the collar. Attach another, larger triangular band to the end of the first. Let the right-side lapel overlap the left. Draw a diagonal line at the end of each lapel.
Step 6
Add two buttons diagonally and to the right of the bottom section of the right-side lapel. Add sideways "V" shapes to the elbows and to the area between the hips and torso. This will create folds in the fabric of the suite. Ink all of the lines that you wish to keep with a black-ink pen. Let the ink dry, then carefully erase the pencil lines.
Tip
Draw a vertical line down each pant leg to create a pleat in the pants.
Warning
Let the ink dry completely before erasing the pencil lines or the ink will smudge.
Video of the Day