Things You'll Need
Original art
Scanner
Computer
Printer
Transparencies (optional)
Projector (opaque or overhead)
Canvas or large paper
Wall
Table
Soft-lead pencil or paint and brush
Using a projector to enlarge artwork saves time and effort over the usual grid method, and results are generally much more accurate. The projection method is most useful if the end-result will be 16"x20" or larger - any smaller, and the details may be blurry and difficult to duplicate, so the grid method would work better for smaller projects. There are two main types of projectors used for enlargement, the opaque projector and the overhead projector. They both work well, use the same principle, and are comparable in cost, so it is only a matter of what you have access to.
Enlarging Your Art
Step 1
Scan the original into a computer. If the original is too large to fit a home scanner, many copy centers that handle large-format work will scan the work for you.
Video of the Day
Step 2
Resize the scanned file digitally to fit the projector. Opaque projectors take originals between four and ten square inches, depending on the model. Overhead projectors usually work best with an 81/2"x11" page.
Step 3
Print the scanned file. For an opaque projector, printing onto regular printer paper is fine. For an overhead projector, you must print onto a transparency film. Printer-compatible transparency film can be found at most office-supply stores.
Step 4
Hang your canvas or large paper securely on a wall. Secure at all four corners to be sure it does not move at all while you are working.
Step 5
Set up the projector on a sturdy, level table. If the surface is not level, the projection can be distorted.
Step 6
Insert the print-out of the artwork into the projector. Opaque projectors have a little compartment for it to fit into, either on top of the machine or underneath, depending upon the model. Overhead projectors simply require you to lay the transparency on the glass.
Step 7
Turn the projector on, and turn out the lights. The darker the room is, the clearer the projection will be.
Step 8
Move the table with the projector away from the wall until the projected image is at the appropriate size and location on the canvas or large paper. Overhead projectors have a hinged mirror on the top that can be positioned to move the projection up or down as necessary. Opaque projectors lack this feature, and must be boosted by a sturdy stack of books or other objects.
Step 9
Focus the projector by turning the appropriate knob until the image is crisp and clear. It is helpful to look at the image from about arm's length and adjust appropriately, because although the image may look clear from the projector's location, tiny details may be blurry or lost when viewed up close.
Step 10
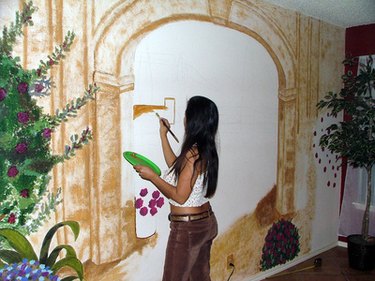
Trace the projected image onto the canvas or large paper. Some people use a soft-lead pencil to lightly sketch the image, while others prefer to block it in roughly with paint. While the entire tracing must be done in one sitting to avoid loss of alignment, the actual filling in of colors, shadows, and highlights should not be done in the dark because colors don't appear true without adequate light, and the final work will be "off".
Tip
When digitally resizing the artwork, keep the aspect ratio locked to avoid distorting the image.
Warning
Once the projection is aligned and the tracing has begun, the slightest movement of either projector or canvas can knock it out of alignment. Once alignment is lost, it is difficult to get back.
Video of the Day