Things You'll Need
Putty knife
Water
Bucket
Large sponge
Dropcloths
Flat-head screwdriver
Hawk or paint tray
Floater
Large paintbrush
Ladder
Popcorn ceilings are used in many homes, especially older homes where there is a desire to hide flaws in the ceiling. Popcorn ceilings have a rough texture--from far away, it looks like kernels of popcorn. Usually, the rough texture is created with a paint roller with a medium or long nap. It is essentially a very thick paint, with a toothpaste-like consistency that maintains the texture created by the roller. If a roller is not available, a paintbrush can create the popcorn effect--though the job will take much longer because the paint must be applied, and then the texture is created, while the paint roller applies the paint and creates the popcorn texture in one step.
Preparing the Room and the Ceiling for Popcorn Paint
Step 1
Move furniture out of the room or arrange the furniture in a cluster and cover with plastic dropcloths to protect the furniture from paint drips.
Video of the Day
Step 2
Place plastic dropcloths on the floors.
Step 3
Scrape away any loose ceiling paint with a putty knife.
Step 4
Fill a bucket with warm water and don protective goggles.
Step 5
Wipe down the entire ceiling with a damp sponge to remove dust. Rinse out the sponge when it becomes soiled with gray dust. Removing the dust will prevent poor adhesion, which can cause chunks of popcorn paint to fall. Allow the ceiling to dry.
Step 6
Perform "the finger test" by swiping your finger across the ceiling's surface. If your finger appears gray or white, wipe the ceiling again and repeat the test until it comes up clean.
Painting the Ceiling
Step 1
Open the can of ceiling paint with a flat-head screwdriver and mix the paint with a wooden stirring stick. Mixing may not be necessary; read the directions on the label to determine if mixing is recommended.
Step 2
Pour the popcorn ceiling paint--a thick, toothpaste-like paste--into a paint tray or slather onto a hawk--a horizontal metal board with a handle. Immediately replace the cover on the paint can, as the paint is already thick and drying will cause it to thicken even more, making it difficult to handle.
Step 3
Slather an even layer of paint--approximately 1/4 inch thick--onto a 2-by-2 foot area of ceiling, using a floater. You can use a paintbrush, but it will take much longer and it will be more difficult to apply an even, uniform coat.
Step 4
Dab the paint with the tip of a large paintbrush, which should be held in a perfectly vertical position during the process to provide maximum contact between the tips of the bristles and the ceiling. This will create the popcorn finish. Create the texture in the center of the painted area, leaving a 2- to 3-inch border of untextured paint around the edges. When you apply the next area of paint, blend the new area of paint with the first 2-by-2-foot patch. If you were to texture the entire area, the edges would be flattened out when you blend the first area of paint with the second 2-by-2-foot area of paint.
Step 5
Repeat steps 3 and 4 until the ceiling is complete. When working on the area of ceiling near where it meets the wall, it's best to work facing the wall. Working with your back up against the wall can be awkward and lead to neck-cramping.
Tip
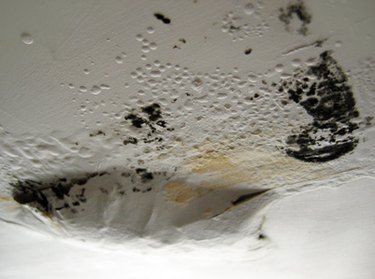
If you have a water stain, mold, and/or areas of bubbled paint, this indicates a leak from the roof or a pipe. Fix the leak before painting the ceiling.
If water stains are present, seal the stain as it will soak through the new layer of paint, eventually becoming visible. Seal the stain with a couple coats of clear polyurethane.
You may wish to place a strip of painter's tape on the wall, at the point where it meets the ceiling. If there are light fixtures or ceiling fans present, you may also wish to tape around the fixtures. Using care while painting can be just as easy and if you accidentally contact the wall with the popcorn ceiling paint, simply wipe the spot with a damp sponge or rag.
Work slightly in front of you; avoid working directly overhead, as this will cause neck-cramping.
Work in small 2-by-2-foot areas. If you work in a larger area, the paint will start to dry before you create the popcorn texture; this can result in variances in the ceiling's appearance.
A "softer" popcorn finish can be created with a damp sponge to dab the paint instead of the paintbrush.
When dabbing the paint, avoid working in a distinct pattern (such as rows or a spiral), as this will give the ceiling a strange non-uniform appearance once it's completed.
Hawks are typically used for mortar, but the thick nature of popcorn ceiling paint makes the hawk perfect for holding the extra paint while working on a ladder.
Warning
Always wear safety goggles while cleaning and painting the ceiling, as popcorn ceiling paint is very prone to dripping in tiny globs. If you get dust, paint chips or paint in your eye, immediately flush with water.
Video of the Day