Things You'll Need
Eye protection
Ear protection
Gloves
Respirator
Measuring tape
Tarps
One sheet 1/2-Inch plywood (at least 2x8)
Chop saw
Skill saw
Extension cord
1x2 Furring strips
Drill
1/4-inch drill bit
Drywall screws
Screw bits
1/4-inch wall anchors
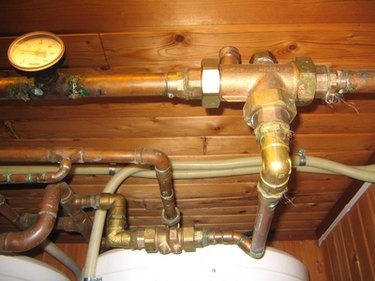
You may find yourself with some ugly, exposed pipes in your laundry room. This may be due to relocating your washer, dryer or even a water heater. Or, perhaps you never had any kind of enclosed space for these appliances or the plumbing pipes themselves. The most common method to hide plumbing pipes are to "box" them in, which means to build a small box around them.
Step 1
Measure the width, depth and height of all the exposed plumbing pipes. The "box-in" method works best when all the exposed pipes are grouped together, in one location. The idea here is to build a small box, going from floor to ceiling to cover the exposed piping. Boxes may run vertically or horizontally.
Video of the Day
Step 2
Cut out pieces of 1/2-inch plywood using a chop saw or electric circular saw. Cut four pieces that will form a box.
Step 3
Cut four pieces of 1-by-2 furring strips to match the height of the plywood box. Screw these furring strips to the edges of two of the box sides in order to give you a way of securing the entire box together.
Step 4
Screw the back of the box right into the wall studs. Most plumbing pipes are located next to studs. If you don't seem to have any studs in the area you are building the box, then install wall anchors and secure drywall screws into those anchors.
Step 5
Remove the plywood back, place the anchor in the hole that you just drilled though the plywood and into the drywall, and tap it in place with a hammer. Then insert the screw through the plywood and into the wall anchor, using a drill and bit.
Step 6
Attach the two sides of the box, using drywall screws into the furring strips. Check to see that all pipes are behind the plywood, so when you put the front of the plywood box on, there is no interference. Attach the front piece of plywood, using the method described above. Your box is now complete.
Tip
For large areas that contain piping, you may want to add a couple of hinges to the top of the front plywood panel, so it can be lifted up or swung to the side for easy pipe access. This is especially important if there are any connections or valves on the pipes. Paint or drywall the piping box if you choose to do so.
Video of the Day