Things You'll Need
Linoleum/vinyl repair kit
Clear tape (such as packing tape)
Iron or heat gun
Replacement vinyl
Utility knife
Putty knife
Vacuum with hose attachment
Resilient flooring adhesive
Vinyl seam sealer
Paint brush
Sponge
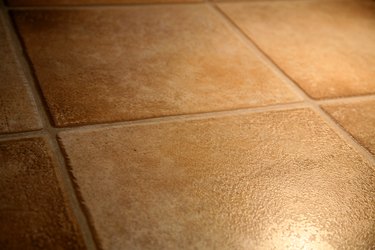
Linoleum and vinyl are types of resilient flooring known for their durability and easy maintenance. Despite their strength, however, both of these materials are susceptible to tears or scratches when subjected to high levels of abuse. Depending on the extent of the damage, homeowners can repair these floors using vinyl and linoleum repair kits. For larger or more noticeable areas of damage, it is often easier to remove and replace a section of flooring.
Fixing Small Scratches and Marks
Step 1
Place clear tape around the scratched or damaged area.
Video of the Day
Step 2
Mix the paint from your repair kit and test different color combinations on the clean tape that you placed on the floor. When you find the right color combination to match your floor, it will blend in with the surrounding vinyl or linoleum.
Step 3
Cut away excess vinyl or linoleum from the damaged area. Use a utility knife to remove flaps or crumbled pieces. Sand the floor smooth to remove any bumps or raised spots on or around the damaged area.
Step 4
Vacuum the damaged area using a hose attachment to remove all dust and debris.
Step 5
Paint the scratch using the color combination that best matches your floor. Wipe away any paint that gets in the undamaged areas around the scratch.
Step 6
Pour the filler powder from the repair kit into the hole or scratch. Add a bit of powder at a time until the damaged area is level with the surrounding floor surface.
Step 7
Drip single drops of the bond finish from your repair kit onto the patched area. Gently brush this bond finish over the filler powder to seal off the repaired spot. Allow the area to dry for a few hours before walking on it.
Fixing Larger Scratches or Tears
Step 1
Find a new piece of replacement flooring that is slightly larger than the damaged spot. If you don't have extra flooring stored in your home, try cutting a piece from a non-visible area, such as under a piece of furniture.
Step 2
Hold the replacement section of flooring flat over top of the damaged area. Use a utility knife to cut around the edges of the replacement piece. Press the knife into the existing floor so that the damaged area is cut away.
Step 3
Use a putty knife to scrape away the damaged piece of flooring. Be careful not to damage the surrounding floor. If you see any bumps or excess glue on the floor once the vinyl has been removed, use your knife to scrape this glue away, as well.
Step 4
Clean the floor using a vacuum with a hose attachment to remove excess glue, dust and debris.
Step 5
Use a putty knife or trowel to apply a layer of resilient flooring adhesive to the floor. Set the replacement piece of flooring onto this adhesive and line up the edges so that it fits in with the rest of the floor surface. Clean any excess glue that seeps through the seams onto the floor surface.
Step 6
Apply a vinyl seam sealer to the edges of the patched area. Many of these sealers come with an integral applicator. If yours does not, use a small paint brush to complete this task.
Step 7
Clean excess sealer from the surface of the floor using a damp sponge. Allow the sealer to dry overnight before walking on the floor.
Video of the Day