Things You'll Need
Paper towel
Plate
Plastic bag
Seeds
Pots
Potting mix
Starting your own seeds is an inexpensive way to grow plants for your garden. When using old seeds or those you have saved from your own garden plants, you may need to check if they are viable by first germinating a few in paper towels. If you like, you can then plant these germinated seeds in soil instead of throwing them away. Germinating seeds outside of the soil is also a way to illustrate the sprouting process to children. Help them plant their sprouted seeds so they can see them grow into plants.
Germinating Seeds
Step 1: Fold a Paper Towel
Fold a paper towel in half, then in half again. Set it on a plastic plate.
Video of the Day
Step 2: Water the Paper Towel
Sprinkle water on the paper towel until it is evenly moist but not soggy. Add just enough water to wet through but avoid using so much that the water collects on the plate.
Step 3: Sow the Seeds in the Paper Towel
Sprinkle seeds between the layers of the paper towel. Space them approximately ½ to 1 inch apart so the sprouts do not become tangled once they germinate. Pat the top of the paper towel so the seeds are in contact with the moisture on both sides.
Step 4: Provide Heat for the Seeds
Slide the towel into a zipper-top bag and seal closed. Place in a 65 to 75 F room to germinate. Germination usually takes between three and seven days depending on the seed type.
Step 5: Check for Germinated Seeds
Check the seeds after three days for signs that the germinated seeds are sprouting, then every day thereafter until they do.
Planting Sprouts
Step 1: Prepare a Planting Pot
Fill a seed starting pot with a quality soil-less potting mix. Soil-less mixes drain well and are sterile, which helps prevent disease in young seedlings.
Step 2: Water the Soil
Water the soil until it is evenly moist throughout. Water until it just begins to drip from the bottom drainage holes to ensure there is moisture in the bottom of the pot where the roots will spread.
Step 3: Poke a Hole in the Soil
Poke a ½-inch deep hole in the soil in the center of the pot. Check that the soil is moist in the hole and not soggy. If it is soggy, allow the excess water to dry out overnight.
Step 4: Set the Sprouted Seed Into the Hole
Grasp the germinated seed by the attached split seed coat or the leaves if it has already shed the seed coat. Set it in the soil with the root down in the hole. The root is the long sprout that emerged from the seed first.
Step 5: Plant the Sprout
Fill the hole in around the root loosely. Firm slightly but avoid packing the soil tightly around the seedlings as it may damage them.
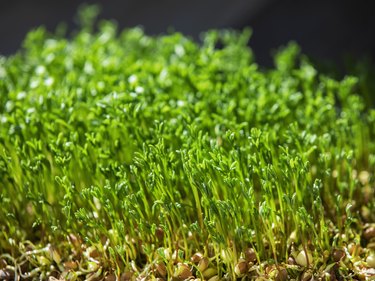
Step 6: Set the Pots in a Sunny Window
Place the pots in a sunny window. Keep the soil moist but not soaking wet at all times until ready to transplant the seedlings outdoors or to their permanent pot.
Tip
Plant only one seed per pot so the roots don't become tangled.
Warning
Seedlings need a warm room and the proper amount of light to survive. Temperatures between 65 to 75 degrees Fahrenheit are best, and use grow lights if you don't have a suitable window.
Video of the Day