Things You'll Need
Mousetraps
Toy car wheels
Nails
Hammer
Straight edge
Tongue depressors or Popsicle sticks
Wood glue
Clothespins or clamps
Scrap wood blocks (1 inch x 1 inch x 1/4 inch)
Power drill and assorted bits
Wood dowel
Handsaw
Utility knife
Milk jug lids
CDs or plastic CD toppers
Rubber bands
Hot glue and glue gun
Fishing line
Pliers
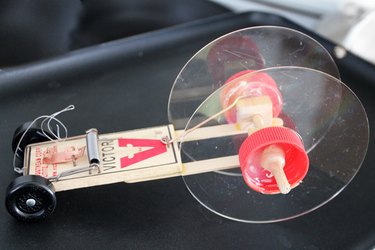
Making a mousetrap car is a fun way to experiment with materials around the house while learning about physics.
Step 1

Use a nail to press a hole in each side of the mousetrap. (These holes act as guides and help keep the wood from splitting.) Nail the toy wheels to the sides of the mousetrap at the front of the trap. Leave a little space between the trap and the wheel when you hammer in the nail, so the wheels can rotate freely.
Video of the Day
Step 2
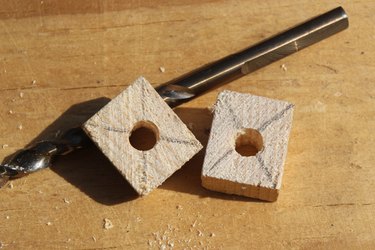
Draw two Xs on the 1-inch wood blocks, using a pencil and straight edge. At the intersection of each X, drill a hole slightly larger than the wood dowel.
Step 3
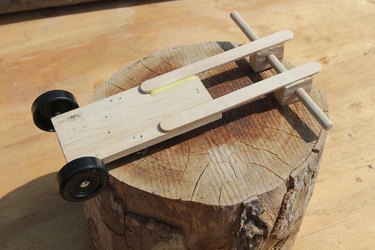
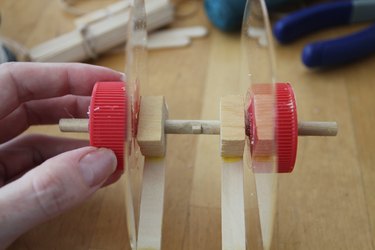
Glue two Popsicle sticks to the bottom of the mousetrap, aligned with the sides of the mousetrap and extending from the end opposite the wheels. Glue the wood blocks on top of the Popsicle sticks. Hold the Popsicle sticks in place while they dry, using either clamps or clothespins. Allow the glue to cure completely (about 6 hours).
Step 4
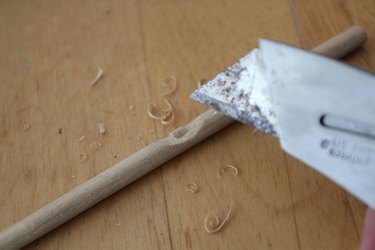
Cut a length of wood dowel about 3 inches longer than the width of the mousetrap. Carve a small notch in the center of the dowel.
Step 5
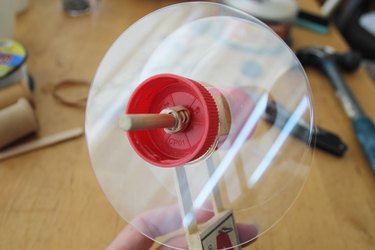
Slide the wood dowel through the holes in the wood blocks. Drill a hole in the center of the milk jug lids, then slip the CD toppers and milk jug lids onto the dowel. Wrap rubber bands around the dowels to secure the assembly.
Step 6
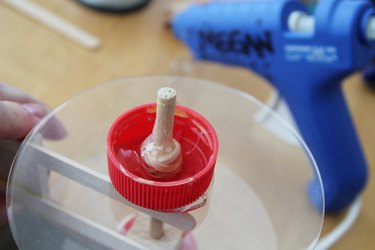
Apply a generous amount of hot glue inside the milk jug lid and around the rubber band. This will secure the "wheel" to the "axle." Be careful not to glue the CD topper to the wood blocks. You want these "back wheels" to spin freely.
Step 7
Check to make sure both wheels spin freely. Pry away any stray glue, if necessary. Cut a piece of fishing line about 6 inches long and tie one end to the metal bar of the mousetrap.
Step 8
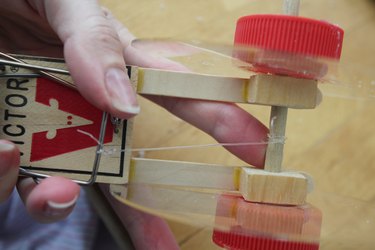
Pull the trap bar back toward the back wheels, and wrap the fishing line around the center of the axle and the notch. Gently place the car on a hardwood or linoleum floor, and release your hand from the trap. The car should propel forward and roll for several feet.
Tip
Using CD toppers is a way to reduce the friction between the wheel and floor. Friction will cause the car to slow down quickly, and therefore travel a shorter distance.
Warning
Be very careful when working with the mousetrap. If you look away from what you are doing during this project, you could snap your finger in the mousetrap.
Video of the Day