Things You'll Need
Background fabric in white or cream muslin
Calico or colorful solid fabric
Scissors
Thread to match background
Quilting needles
Iron
Pins
Sewing machine
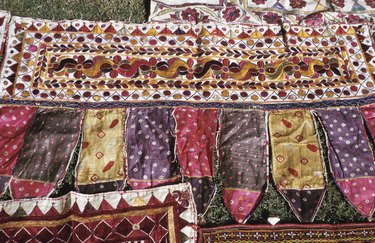
An old-fashioned patchwork design, the cathedral window quilt pattern is an complex folding of fabrics that resembles windows. Traditionally, the background squares were made from white muslin and colorful calico chosen for the windows. When held up to the light, the pattern created a stained glass window effect. The intricate folding of the fabric looks harder than it is. One of the advantages of this pattern is that you can make many squares on a sewing machine and then pick them up at a later date to finish by hand.
Preparing the background square
Step 1
Cut a square 12.5 inches for a 6-inch finished square. Fold square in half with the right sides together. Stitch 1/4 inch from each end.
Video of the Day
Step 2
Open the edges of the folded square and refold, matching the seam lines. Pin and then stitch from each corner to 1 inch of the seam at the center. Leave a small opening through which to turn the square inside out.
Step 3
Trim the corners and press the seam open with the tip of your iron.
Step 4
Turn the square inside out through the opening and press. Hand stitch the opening closed. You have just completed the first fold of the background square.
Step 5
Bring each corner of the square to the center. Keep the outside corners as sharp as possible.
Step 6
Stitch down the center through all the layers and fasten off at the back of the square. The stitches should form a small cross at the back. Repeat the stitches several times to keep the four corners held tightly in the center. The background square is now finished.
Step 7
Repeat steps 1 through 6. You must assemble and sew at least two squares together in order to add the window.
Step 8
Join two background squares together using the whip stitch. Make sure you join the right sides together (the side that looks like an envelope.)
Adding the window
Step 1
Cut a 4-inch square of window fabric. Place the colored square on the center square formed across the joined background squares. Pin the window square in position.
Step 2
Take one of the corners and fold the background fabric down the edge of the window square, stretching the bias edge to form a curve. Stitch the folded edge down with an invisible stitch.
Step 3
Stop stitching 1/4-inch from the corner and bring both bias edges over the windows. Secure them with a double bar tack stitch through all the layers to give the corner added strength.
Step 4
Finish sewing all four sides. The first cathedral window square is complete.
Tip
This pattern is completely geometric. Pieces must be cut perfectly square and all the same size. Seams and folds must be exact. Squares should form right angles at each corner. Ironing is essential since there are so many folds and seams. To calculate the size of of the background square, multiply the desired size by 2 and then add 1/2 inch for a seam allowance.
Video of the Day