Things You'll Need
1-inch schedule 40 PVC pipe, 60 feet
1-inch 3-way PVC connectors, 4
1-inch PVC T-connectors, 16
1-inch 45-degree PVC connectors, 8
Hacksaw or miter saw
100-grit sandpaper
220-grit sandpaper
PVC primer
PVC cement
Warning
Always work with glue in a well-ventilated location. Wear a safety mask and gloves.
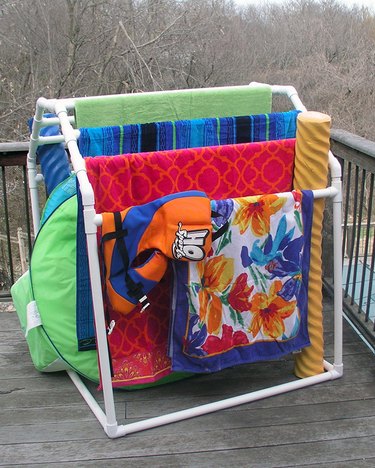
Every pool owner has towels -- lots of towels. And during the warmer months they seem to multiply. To solve the towel-drying problem once and for all, build this handy towel rack from ordinary PVC plumber's pipe. The rack can hold eight full-size beach towels, and, as a bonus, it corrals all the pool noodles and floaties.
You can also watch a video tutorial here.
Video of the Day
Step 1
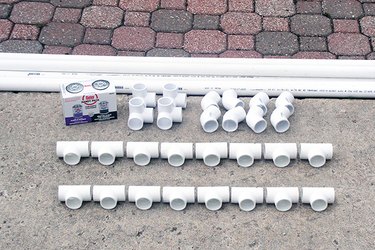
Collect the supplies needed, which you can find at any home improvement store. You will also need a hacksaw or a miter saw.
Step 2
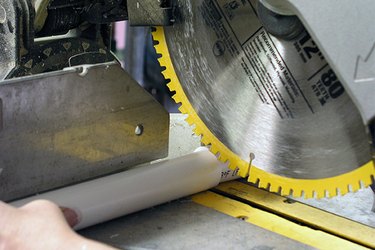
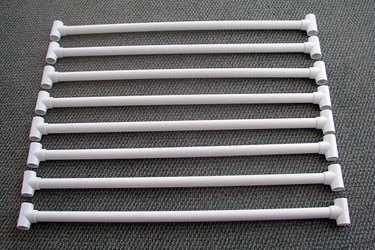
Cut the PVC into the following lengths:
- 30-inch pieces, 4
- 38-inch pieces, 12
- 2-inch pieces, 8
- 4-inch pieces, 14
Step 3
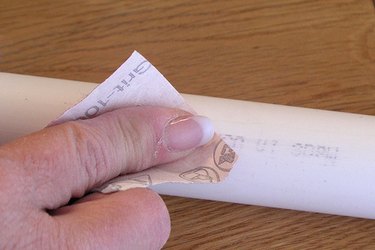
Remove any cutting burrs and the printing on the side of the PVC tubing using 100-grit sandpaper. A couple of quick swipes with the sandpaper should work. Follow up with a few strokes with the 220-grit sandpaper to remove any scratches.
Step 4
Dry fit the towel bars by laying eight sections of 38-inch PVC on a flat surface and placing a T-connector on each end. Make sure the connectors are set at a 90-degree alignment. These T sections will form the towel bars for the rack.
Step 5

Assemble the rack by connecting the T-section towel bars that you assembled in Step 4 in the following order on each end: T section, 2-inch piece, 45-degree elbow, 4-inch piece, T section, 4-inch piece, T section, 4-inch piece, 45-degree elbow, 2-inch piece, T section, 4-inch piece, T section, 2-inch piece, 45-degree elbow, 4-inch piece, T section, 4-inch piece, T section, 4-inch piece, 45-degree elbow, 2-inch piece, T section.
Step 6
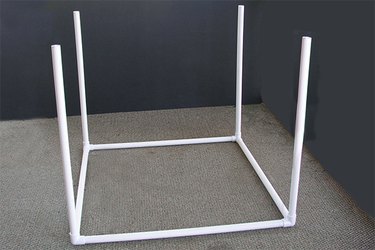
Assemble the base by forming a square with the three-way connectors and four pieces of 38-inch PVC. Put the legs in place by inserting the 30-inch pieces of PVC vertically in each of the four connectors.
Step 7
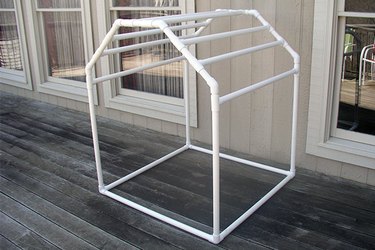
Set the rack section on top of the base section and check all connections for accurate alignment.
Step 8
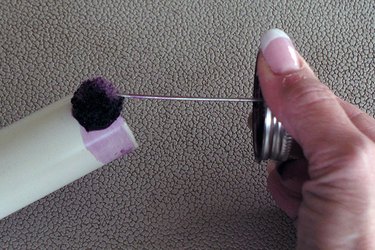
Remove the rack section from the base section, when you are satisfied with the fit. Starting with the base section, remove each joint one at a time, and apply a quick swipe of primer, followed immediately with a swipe of the glue. It is sufficient to prime and glue either the inside of the connector or the outside of the tube; it is not necessary to do both. Be sure the alignment is correct before setting the pieces back together because the glue sets almost instantly. Continue until you have glued all the joints in the base section.
Repeat the procedure for the rack section and then prime and glue the two sections together, completing the towel rack.
Video of the Day