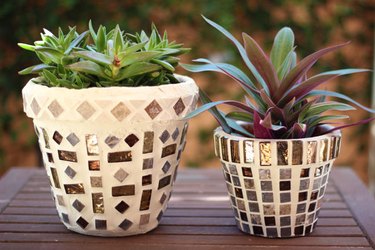
As intricate as mosaic pots look, they are surprisingly easy to make. Starting with a clay pot as a foundation, you glue on tiles in any configuration your imagination takes you and then seal them in place with grout. Begin with basic patterns, and as you gain confidence, experiment with more elaborate designs.
Materials Needed
Video of the Day
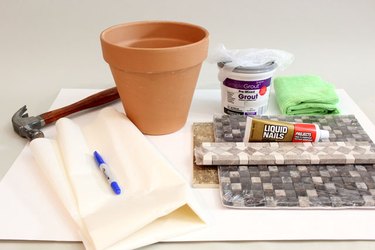
- Clay pot
- Tiles (ceramic, glass and stone)
- Paste adhesive in a tube
- Premixed grout
- Large piece of paper
- Pen
- Rubber gloves
- Towel
- Hammer
- Scissors
Video of the Day
Choosing a Clay Pot

Clay pots come in many sizes and shapes, and you can mosaic practically any of them. However, there are some considerations to keep in mind. Very small pots, like a 4-inch, can be difficult to work with because the tile pieces need to be very small to lay flat around the curved pot. Large planters, like a 10-inch, can also be a challenge because they are so heavy, especially when you add several pounds of tiles and grout. For your first mosaic pot, try a medium 6- or 8-inch planter. They still have plenty of surface area to create a design, but they're much more manageable in terms of how many tiles you'll need and how heavy they get.
Working With Whole Tiles
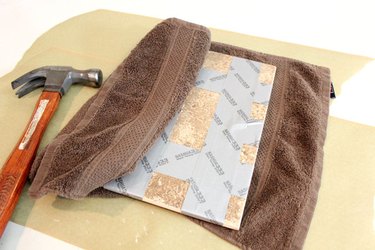
If you are working with whole tiles, wrap each tile in duct or packing tape and then surround the tile with a towel. Wear protective eye covering and break the tile into pieces with a hammer. The tape will keep the broken tile from flying in different directions, and if the tile has a printed design, the tape keeps the tile's design in position. You can also break old dishes and teacups for this type of mosaic.
Working With Precut Mosaic Tiles
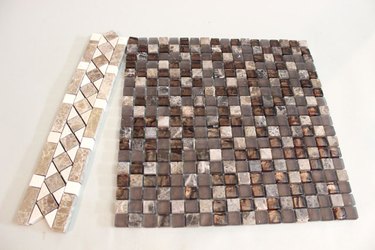
An easier – and less messy – way to gather small tiles is to purchase mosaic tiles that have been precut and prearranged for you. These are tiles typically used for kitchen backsplashes or showers. The tiles are attached to a mesh backing, and they come in a wide array of coordinating colors and textures. The project shown uses these precut tiles.
Step 1: Separate the Individual Tiles

Using scissors, separate the individual tiles by cutting through the mesh backing. Even if you plan to use the design as is, it is still a good idea to separate the tiles to allow yourself more flexibility in their placement on the pot.
Step 2: Make a Template for the Pot
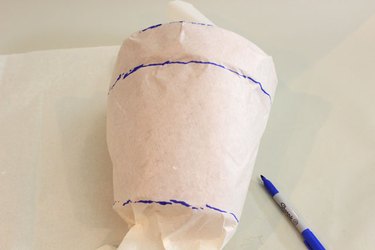
Wrap a large piece of paper around the planter and trace the outline of the top and bottom rims with a pen. Cut along the lines you've drawn to create the template.
Step 3: Create a Design on the Template
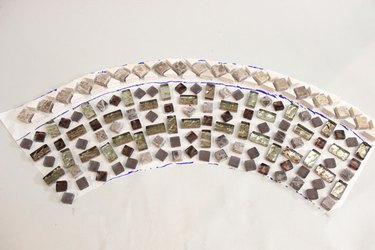
Lay the template flat on a table and decide how you want to arrange the tiles on the planter by placing them on the template. This is a great way for you to experiment with different designs.
Step 4: Apply Glue to the Back of Each Tile
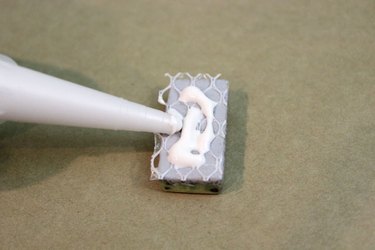
Starting at one end of the template, pick up a tile and apply glue to the back. Any quick-drying glue will work, but thicker paste adhesives are a good choice because they tend to hold the heavy tiles in place better.
Step 5: Place the Tiles on the Planter
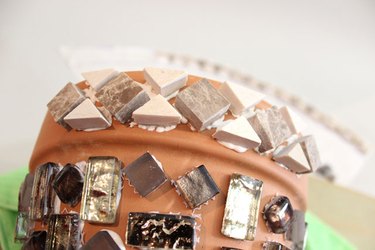
After you've applied glue to the back of the tile, position it on the planter in the same location indicated on the template. Continue to glue and place the tiles on the planter according to your diagram. Tiles may shift a little as you turn the planter while working, but don't worry. Just position them back in place, holding them steady with your fingers until the glue sets.
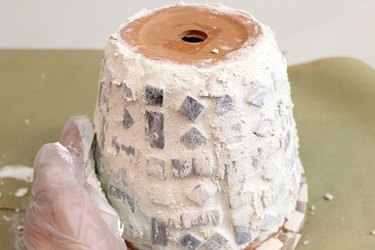
Step 6: Spread Premixed Grout on Top of Tiles

Put on rubber gloves and spread grout all over the top of the tiles – be sure to get in the spaces between the tiles. At this point, work only on the body of the planter and not the rim. You will need the rim to hold the planter and move it around.
Step 7: Wipe Off Any Excess Grout
Turn the planter upside down so you have better access to the bottom. However, do not cover the actual bottom of the planter with grout. Take your glove-covered hand and run it around the planter like a squeegee to remove excess grout. You will be wiping off a lot of grout here, so you can put the excess back in the container to use again.
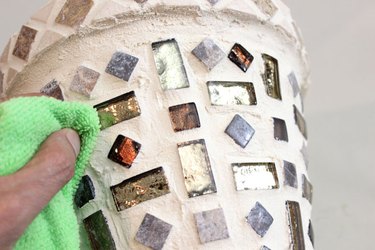
Step 8: Clean the Tops of the Tiles
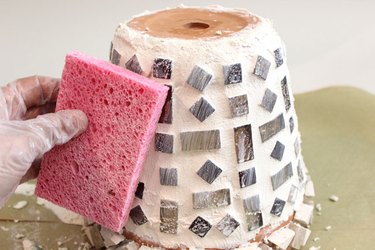
Take a damp sponge and run it around the planter to remove the rest of the grout that's sticking to the tops of the tiles. Keep rinsing the sponge as you work. Sometimes, you may have to really scrub. If you disturb the grout, just smooth it out with your fingers.
Step 9: Spread the Grout on the Rim
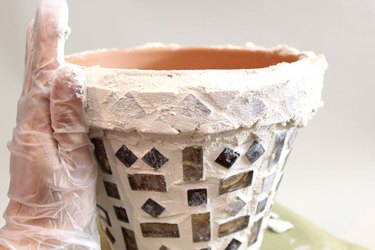
Now turn the planter right side up, holding the planter by the rim and the hole at the bottom. Spread grout on the rim just as you did with the body of the planter. Use your fingers as a squeegee to remove excess grout.
Step 10: Wipe Off the Excess Grout
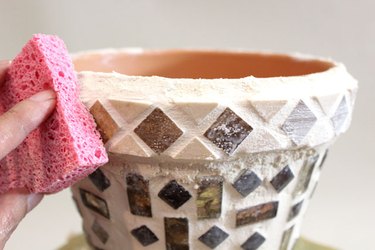
Clean off the excess grout on the rim with a damp sponge. It's important to keep rinsing the sponge as you work. When you're done, allow the mosaic pot to dry for 24 hours.
Step 11: Polish the Tiles
After 24 hours, the grout will have cured. Using a wet towel, remove any remaining grout or milky residue on the tiles. Because the grout is completely hardened, you can scrub hard. With this final polish, the individual tiles will shine.
Hip Tip
Consider making these concrete flowerpots to mix and match with your new mosaic pieces.