Things You'll Need
2 sheets of corrugated cardboard, same size, in dimensions 6 to12 inches larger than the length and width of your art paper
Scissors or utility knife
Pencil
Ruler or metal straight edge
Masking tape
2 to 3 large binder clips
Weight for easel bottom (depending on size and location: 1 to 2 bricks, rocks, jars of water or paint)
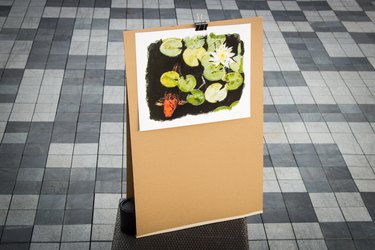
At times, making art means making an easel. A small one is perfect for parking on a patio table to paint a portrait of your garden at its very best. A large one lets you design a poster while seeing how it will look when hung on a wall. A large one also lets the junior artists in your family have the fun of working big—big paper, big brush, big ideas! Here is a design for a quick, inexpensive easel for all kinds of art projects.
Step 1
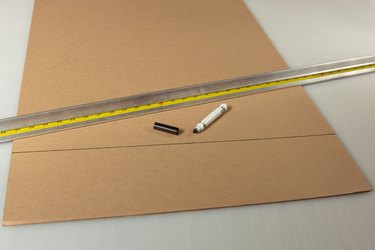
Lay out one sheet of cardboard on a cut-proof surface, and use ruler/straight edge and pencil to mark a straight line 2 to 6 inches above the bottom of the cardboard sheet. Your finished easel will be a tall triangle, with a straight back, a sloped front, and a narrow bottom—the size of your cardboard will determine the width of the line you draw to form the bottom.
Video of the Day
Step 2
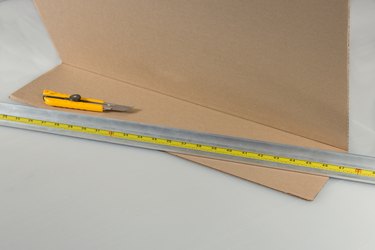
Score the cardboard, following the line with the ruler and using the utility knife or one blade of the scissors. (See Tips for instructions on scoring.) Gently fold scored line to make an angle without tearing the outer cardboard surface. You have now created the easel back and the bottom.
Step 3
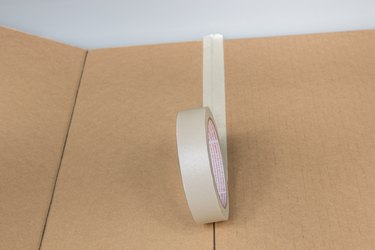
Secure the easel front (the uncut sheet of cardboard) to the back and the bottom with masking tape. Using tape on both sides of the joints will make your easel more stable and durable.
Step 4
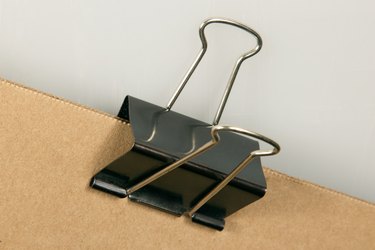
Attach large binder clips to the top of your easel to secure paper.
Step 5
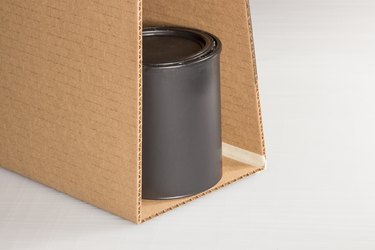
Slide one or more weights inside the triangle to weigh down your easel. A piece or two of masking tape may hold a small easel securely to a table for an adult, but outdoor breezes or the energy of young artists mean you will want more stability. A few wood building-blocks will secure a table-easel for a child, and your youngster will have fun fitting the blocks into the easel opening.
Tip
Scoring corrugated cardboard means cutting through the top surface and enough of the corrugated inside to fold the cardboard smoothly while leaving the bottom surface intact. Do this on a cut-proof surface—even a breadboard works well. At the worst, you may cut all the way through the cardboard and need a little more tape to hold your pieces together.
Video of the Day