Things You'll Need
¾" pine board
¼" pine lattice
Tape measure
220 grit sand paper
Miter saw
Wood glue
Brad nailer
¾" brad nails
Leather straps with buckle
Butane torch (optional)

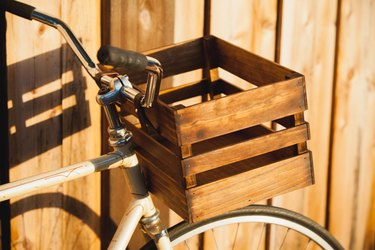
If you're looking to add a touch of style and function to your two-wheel ride, amp up your hip factor with a homemade bike basket. Reminiscent of a vintage crate, this DIY bike basket boasts a nostalgic quality that'll make you the envy of the bike lane.
Cut and Assemble the Basket
Step 1
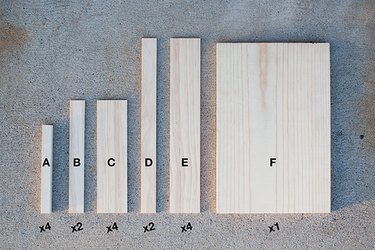
Measure and cut pieces to length using a miter saw: A - ¾" x ¾" x 7 ¼" B - ¼" x 1 ¼" x 9 ¼" C - ¼" x 2 ½" x 9 ¼" D - ¼" x 1 ¼" x 14 ½" E - ¼" x 2 ½" x 14 ½" F - ¾" x 9 ¼" x 14"
Video of the Day
Step 2
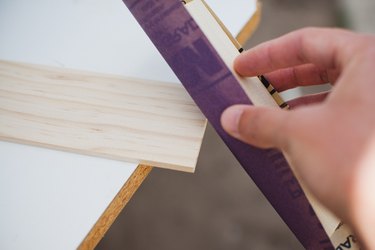
Sand any rough edges using 220 grit sand paper.
Step 3
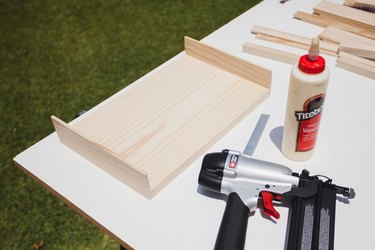
Working on a flat surface, attach "C" and "E" to "F" (the base of the basket) using wood glue and ¾" brad nails, making sure all corners line up. Use your glue sparingly and wipe away any excess.
Step 4
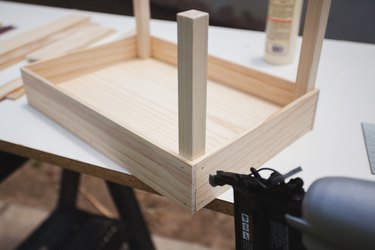
Glue and nail all four "A" pieces in each corner with ¾" nails.
Step 5
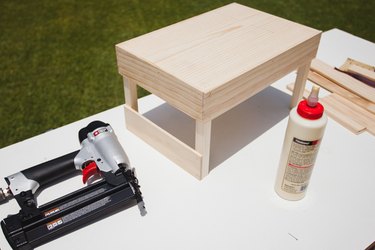
Flip the basket over and attach the remaining "C" and "E" pieces to the top of the posts.
Step 6
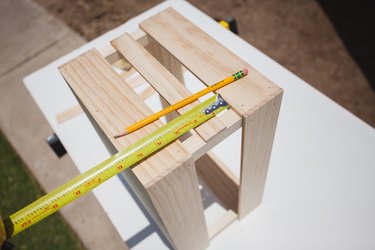
Measure and mark so the middle "B" and "D" pieces are spaced evenly. This will make it easier to line up each piece when nailing.
Step 7
Sand basket with 220 grit sand paper making sure to remove any rough edges.
Burn the Edges for an Antique Look (Optional)
Step 1
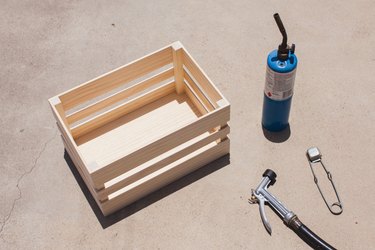
Place your crate on concrete in a safe area. Always have a hose or fire extinguisher near by when working with a blow torch. Follow the directions for your torch and wear proper safety gear.
Step 2
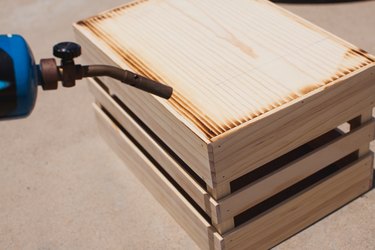
Practice on a scrap piece of wood, working to achieve a look with darker areas toward the edges. I always start on the bottom of a piece before moving to a more visible area. Burn until you reach your desired look.
Step 3
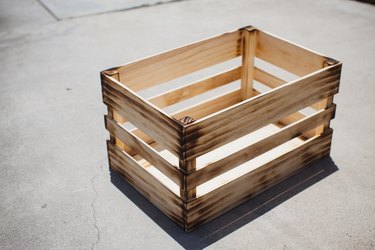
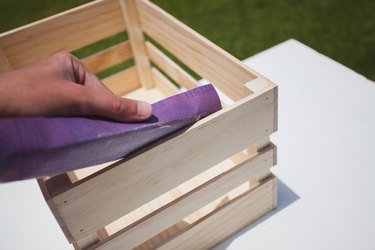
Wipe clean with a damp towel and let dry completely.
Apply Finish and Attach to Your Bike
Step 1
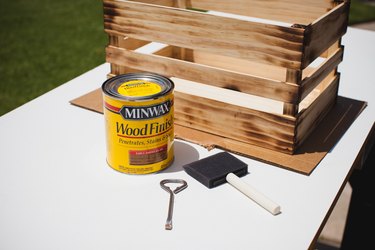
Choose your finish. Minwax Early American stain was used in this project.
Step 2
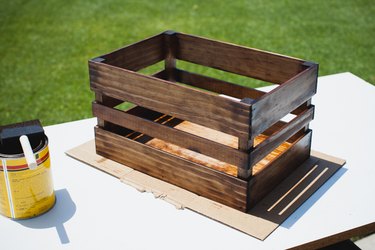
Apply stain evenly, following the directions on the can. Wipe clean and let dry.
Step 3
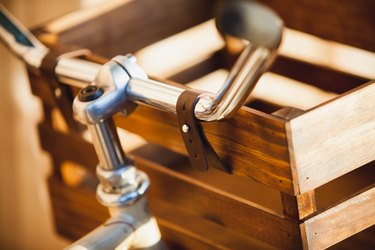
I attached my crate to the handle bars with two leather bracelets that I found at my local craft store but these could be easily substituted with leather belts.
Step 4
Make sure the basket is secure before riding your bike. Take a test ride with a few books in the basket to avoid any unwanted surprises .
Step 5

Toss in your necessities and you're ready to hit the beach or the Farmer's Market or simply ride about town. Don't be surprised if people stop you to ask, "Where did you get that cool basket?"
Warning
Make sure to throughly test your basket before riding your bike.
Video of the Day