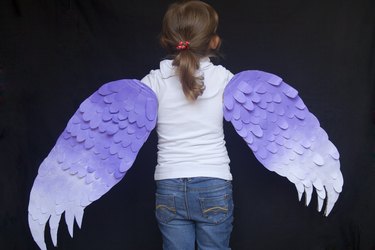
If you're looking for an easy DIY halloween costume idea, you can start your halloween dress up with a pair of wings. Wings are the main component of a bird costume, and an easy element to DIY. The most important parts of a bird wing are the shape and texture.
A feathery element attached to the right shape creates a very authentic cosplay look. Get crafty and look at pictures of the specific bird you are making wings for as inspiration for your colors and shape.
Video of the Day
Video of the Day
Things You'll Need
Cardboard
Scissors
String
Glue
Tape
Paper or fabric
Make the Wings
1. Cut bird wings from cardboard
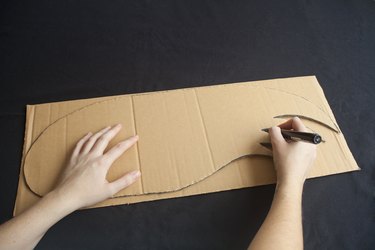
Cut out a wing shape from cardboard. This shape is generally an oval that is elongated and pointed at one end. Determine the size of the wing based on the length of your arm. The wing should extend from your shoulder to 6 inches past your hand. Once you are happy with the wing, lay it on another piece of cardboard, trace and cut out an identical wing shape.
2. Add some string
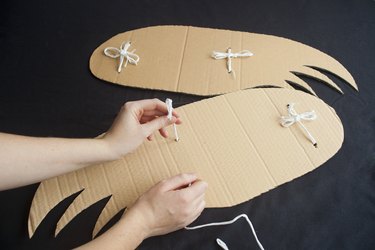
Add two pieces of string to the underside of each wing. The string should be long enough to tie around your arms. Attach the string with a strong piece of tape or glue, or poke holes through the wings and tie the string to it.
One piece of string should be attached at the top, to tie the wing around the armpit area and the other piece of string should be attached to tie the wing just above your elbow. This will allow you to use your hands and bend your arms while wearing the wings.
3. Apply feathers for texture
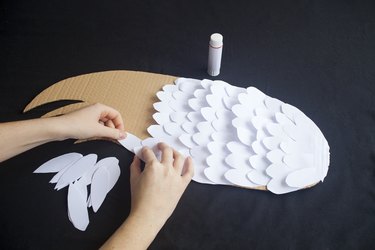
Cut hundreds of white feather shaped pieces of paper or fabric to apply to the back of the wings. You will need to fully cover the wings in these pieces, so the bigger the pieces, the fewer pieces you will need. You can use multiple colors if this would look good with your costume.
Take the feather shaped pieces and glue them to the wings. You can use a hot glue gun for this part if you'd like. Start at the bottom tip of the wing and begin gluing staggered rows.
Once on row is complete, begin 2 to 4 inches above depending on the size of the feather pieces. The rows should overlap each other in the same way a bird's feathers overlap.
4. Spray paint your favorite color
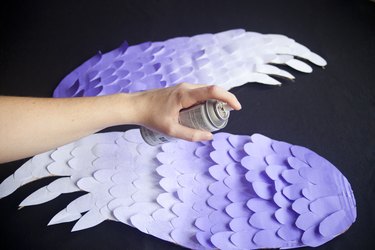
Finish the wings by painting the underside of the wings. If you used a plain paper for the feather pieces, you can also spray paint these to get a different color. Some bird have several colors on the edges of the wings, and you can always use spray paint to achieve this look.
Match the color of the wings to the rest of the costume, this can be done using spray paint after the feathers are attached to the wings.
Tip
This can be made using items from your recycling pile and spray paint.
Whether you're using this tutorial for bird wings, fairy wings, butterfly wings, bat wings, or angel wings, you're ready to fly on Halloween night!