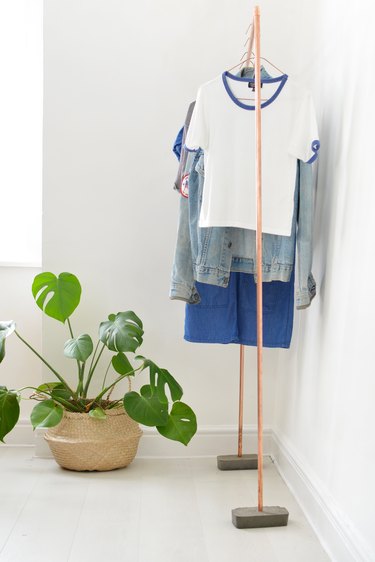
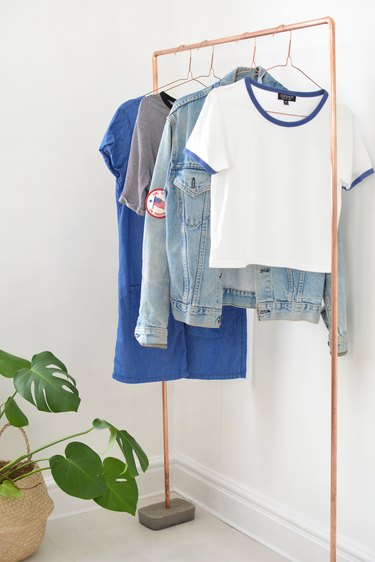
Copper pipe is a really on-trend material, and it's surprisingly versatile to work with and easy to find in hardware stores. This simple tutorial walks you through how to turn some ordinary copper plumbing pipe into a cool industrial clothes rack to display your favorite fashion pieces!

Video of the Day
Things You'll Need
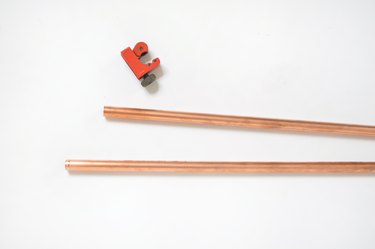
1/2-inch diameter copper plumbing pipe, 10 feet long (2)
Tubing cutter
Dry cement "sand" mix
Large mixing bowl
Tupperware containers or plastic tubs, at least 2 quarts in volume (2)
Level
Parcel tape
1/2-inch diameter 90-degree copper elbow fittings (2)
Strong adhesive, rated for use on metal
Step 1
Use a tubing cutter to cut the three lengths of pipe. Measure and mark two pieces of pipe to cut to 60-inches long (these will become the upright legs of your clothing rack). To cut the copper, slide the tubing cutter over the pipe so the cutting wheel is aligned with the mark. Tighten the adjustment knob on the cutter until it is tight against the pipe, then rotate around the pipe. After each rotation, slightly tighten the adjustment knob, until the pipe is severed. Cut a third piece of pipe to measure 45-inches long (this smaller piece will be the horizontal rail that your clothes will hang from).
Video of the Day
Step 2
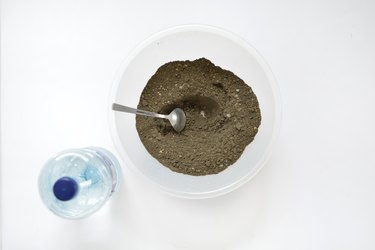
After the pipes are cut you'll need to make the concrete feet to support the clothing rail. Take a large mixing bowl and fill it with dry cement mix.
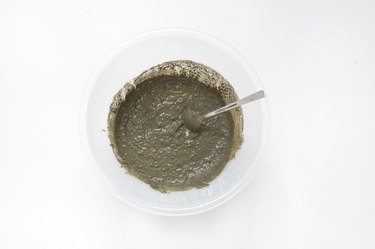
Step 3
Gradually add water to the dry cement until the mixture becomes easier to stir. It needs to be just wet enough to pour (thick and smooth), so don't add too much water at the start!
Step 4
Pour the wet concrete into your plastic mold. Large Tupperware containers or empty ice cream tubs are perfect for this job — the larger the container, the more stable your clothes rack will be. Once the container is filled with wet concrete, take one of the 60-inch long copper plumbing pipes and place it down into the center of the cement, using a level to make sure the pipe is perfectly upright. You'll need the pipe to stay upright as the concrete dries, so wrap some parcel tape around the pipe and over the sides of the container to secure it in place.
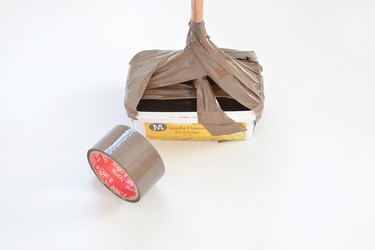
Repeat this step again so you have two concrete blocks with copper pipes embedded in the center.
Step 5
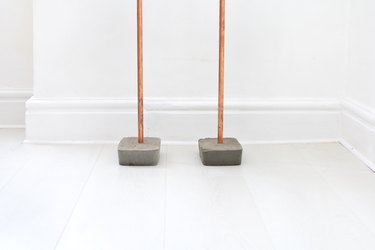
Leave the concrete to cure for at least 24 to 48 hours. When the concrete is set, you can remove the concrete feet from the containers by turning them on their sides and gently pushing from the bottom.
Step 6
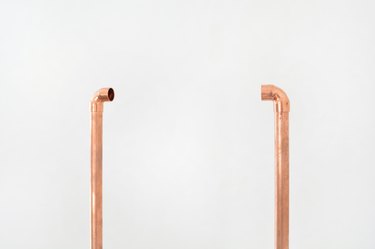
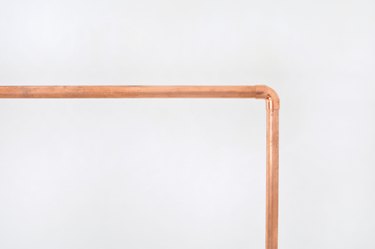
Apply a small amount of adhesive to the ends of the 60-inch pipes, then attach the 1/2-inch 90-degree copper elbow fittings onto the ends so that they face one another.
Step 7
Apply a small amount of adhesive to the ends of the 45-inch long copper pipe, and insert each end of the cross pipe into the elbows to finish the clothes rack structure.
Tip
The copper pipe will oxidize over time, so use some wire wool to buff up the original shine after the rail is constructed. Periodic buffing or cleaning with a copper cleaner will restore the copper to its original luster whenever it becomes tarnished.
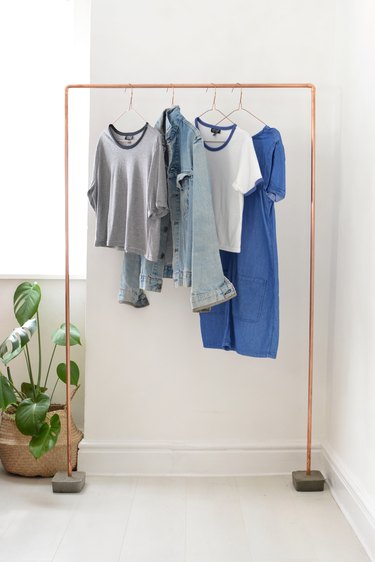
The concrete feet keep the clothes rack freestanding, so you can adjust the lengths of the copper pipes to suit if you would like to build a smaller or larger rack!