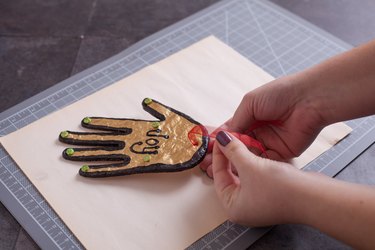
Making homemade handprint ornaments is a simple way to add a personal touch to your Christmas tree. Parents of young kids can look back on them in future years and reminisce about how small those hands once were. Plus, children's handprint Christmas tree ornaments make sweet little holiday gifts for their grandparents and other loved ones. This project requires just a few ingredients that you almost certainly already have in your kitchen and requires no special artistic talent. If you know how to stir dough and use a rolling pin, you already know how to make handprint ornaments.
Things You'll Need
Flour
Salt
Water
Measuring cup
Mixing bowl
Wooden spoon
Rolling pin
Butter knife
Spatula
Cookie sheet
Straw or sharp knife
Acrylic paint and other embellishments
Ribbon or yarn
Scissors
Video of the Day
Making Homemade Handprint Ornaments
Step 1: Heat the Oven
Heat the oven to 250 degrees Fahrenheit. (Technically, salt dough ornaments don't have to be baked, but they'll take several days to fully air dry enough to hang from your tree.)
Video of the Day

Step 2: Make the Dough
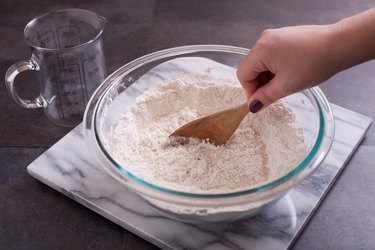
Basic salt dough is the right material for making homemade handprint ornaments. The standard ratio is one part table salt, one part water and two parts flour. Using 1 cup of salt, 1 cup of water and 2 cups of flour will yield enough dough to make several ornaments, but you can cut that by half to make just one or two handprints. Add the ingredients to a mixing bowl and stir to combine with a wooden spoon.
Step 3: Knead and Roll the Dough
Transfer the dough to a clean counter dusted with flour. Knead it by hand for a few minutes, adding more flour if the dough sticks to your hands or more water if it's too dry to form a smooth ball. Once the dough is smooth and has an even consistency, use a floured rolling pin to roll the dough into a sheet about 1/4 inch thick.
Step 4: Cut Out the Ornaments
Once the dough is rolled out, you have two options for how to make handprint ornaments. The first is to make a cut-out ornament in the shape of a hand. Have the child place his hand lightly on top of the dough with his fingers slightly spread apart and use a butter knife to cut out the shape. (Bear in mind that the hand will have to hang from the tree with the fingers pointing down since the cut-out fingers are too narrow to punch a hole through for the ribbon.)
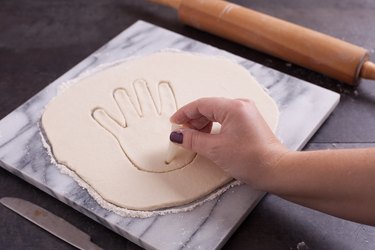
The other option for how to make handprint ornaments, which is easier when you're making children's handprint Christmas tree ornaments with little kids, is to simply have the child press her hand into the dough to create an indentation of the shape. Then, cut a circle around the handprint to make a round ornament. Use an upside-down bowl to cut a perfect circle.
Step 5: Cut Holes for Hangers
Use a spatula to transfer ornaments to a cookie sheet. Use a straw or the tip of a sharp knife to create a hole in each one about 1/2 inch in from the edge of the ornament. Make sure the hole is completely clear all the way through so a ribbon can be tied through it when the ornaments are finished.
Step 6: Bake the Ornaments
Bake the ornaments for about an hour. Use a spatula to flip each ornament and return the cookie sheet to the oven for another hour. Repeat until they feel hard and dry on both sides, which may take three hours or more. The baking time depends on the thickness of the dough.

Step 7: Decorate the Handprint Ornaments
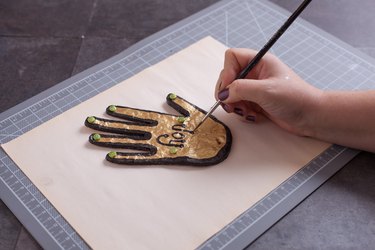
Paint the fully cooled ornaments with acrylic paints or use glue and other embellishments. You might glue a line of sequins all around the edge of a round ornament, for example. If you're making children's handprint Christmas tree decorations, make sure to paint the child's name and the year somewhere on the ornament.
Step 8: Add Ribbon or Yarn Hangers
Cut pieces of ribbon or yarn to about 10 inches long. Feed one through the hole of each ornament. Tie the ends in a double knot and hang your homemade handprint ornaments from your tree.
