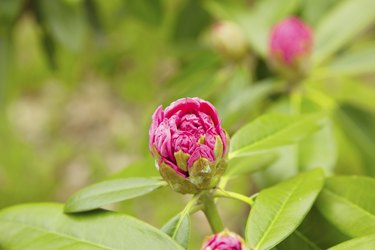
Espaliering camellias (Camellia spp.) compresses the flowering shrubs onto a flat surface through continual pruning. This technique makes it possible to fit a large camellia into a small garden space or use it to create a semi-natural privacy screening. Because espaliering camellias takes about two years, use camellia varieties that are winter-hardy in your location if you intend to keep them outdoors year-round. Two species that do well under the pressure of continual pruning are Japanese camellia (Camellia japonica) and sasanqua camellia (Camellia sasanqua), both hardy in U.S. Department of Agriculture plant hardiness zones 7 through 9.
Select the Site
Video of the Day
The place you choose for espaliering camellias needs organically rich, well-draining soil with a pH level of 5.5 to 6.5. The site's sunlight exposure matters, too. Japanese camellia grows best in partial to full shade while sasanqua camellia can stand full sun when kept watered. Camellias can be espaliered onto walls, but that method's lack of air circulation for plants promotes diseases in them, and masonry walls give off excess heat in summer and cold in winter, leading to possible plant injury. If you don't have an inground spot with the plants' soil requirements, then grow your camellias in large pots filled with commercially made camellia mix; such a mix is available at garden centers. Each pot must have at least one bottom drainage hole.
Video of the Day
Construct the Frames
Normally, only one camellia is grown on one espalier frame because the plant can spread quite wide. Japanese camellia spreads up to 10 feet wide, and so you can espalier it to that width or prune your frame design and the plant to a narrower width. When building an espalier frame, consider how wide and tall you want the plant to be eventually and how big the frame needs to be if you want to use it to hide an object, such as an unsightly wall or pump.
Start constructing a frame by sinking two posts into the ground, spacing them a distance that is the same as your desired width for the frame. If your frame will be near a wall, place the posts 3 feet from it to allow for the camellia's root formation and for air flow. Anchoring the posts ensures they can support the mature plant's weight. Most espalier designs can be achieved by stringing wires horizontally between the posts then training the plant branches in the desired design. The bottom wire should be at least 2 feet from the ground and subsequent wires 8 to 18 inches apart, depending on the chosen espalier pattern, until wires are at the top of the posts. All wires need to be secured so they are taut. In lieu of wire, attach lattice to the posts; then the camellia's branches can be trained to the lattice. Use the same procedure to construct a frame for each camellia you want to espalier.
Train the Plants onto the Wires
A camellia in a 1-gallon nursery container works well to start as an espalier. Plant each camellia about 3 inches in front of the center part of its espalier frame's base. The camellias should be planted the same as they would be planted in your landscape and at the same soil depth they were in their nursery containers. Tie each plant's main trunk to the frame's bottom wire so the plant will grow vertically. Don't prune any of a camellia's branches until you see new growth on the plant. Pruning before a camellia is established in its location could inhibit root growth. As the plants grow, tie their young, flexible branches to the wires with cotton string or twist ties in the direction that creates your chosen design. For example, the branches can be trained horizontally along the wire, in a crisscross fashion or to look like a candelabra. Loosening ties that become tight prevents the strangling of branches. You won't use all branches, only ones suitable for your design. No right way exists to do the project. So experiment.
Shape Your Design
Prune growing branches -- with handheld shears -- every one to two weeks to form each camellia into the desired shape. Not pruning that frequently results in bigger "holes" where branches are finally removed. Don't prune the tips of branches in the design until they reach the desired length, and let side stems on those branches grow at least 12 inches before pruning them back. Branches that grow from a camellia's main trunk and that don't fit on a wire should be pruned back to the main trunk. When pruning, always use shears that were just sterilized with a household disinfectant in order to prevent the spread of plant diseases. Make each pruning cut at a branch or a leaf node, which is a bud from which a leaf will grow. Once you achieve your desired shape for each camellia, maintain the shape by pruning as needed.
- National Gardening Association: How to Espalier a Camellia
- North Carolina State University: Espalier
- The U.S. National Arboretum: Camellias -- Expanding Their Territory
- PlantsGalore.com: Pruning Espaliers
- Garden Clinic: Espalier Camellias
- Floridata: Camellia Sasanqua
- Missouri Botanical Garden: Camellia Japonica