Things You'll Need
Razor blade
Safety gloves
Drill
Safety goggles
Screwdriver or chisel
Sponge
Replacement tile
Tile adhesive
Grout
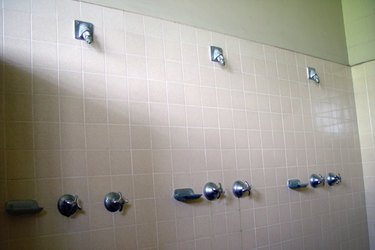
Tile is an attractive and water-resilient material, which makes it ideal for bathrooms, showers and other locations that are frequently damp. One disadvantage of tile is that it cracks if it suffers a severe impact and the grout that holds the tiles in place weakens over time. Repair a broken tile or soap dish in the shower or tub carefully to prevent damage to the surrounding tile while also ensuring the repaired dish or tile won't crack or leak again.
Step 1
Dig out the grout around the tile or soap dish with a razor blade. This helps prevent damaging adjacent tiles when removing the damaged piece since the gout holds the tile and the soap dish in place. Save a piece of the removed grout so you can match color later. Wear safety gloves to prevent injury.
Video of the Day
Step 2
Drill into the damaged tile with a fine drill bit to create a hole. This fractures the damaged tile and makes it easier to remove from the wall. Likewise, drilling into the soap dish helps to detach the pieces from the wall but wear safety goggles to prevent injury from flying debris. A screwdriver or chisel removes tougher to get pieces but be careful to not break adjacent tiles in the process.
Step 3
Clean the area where the tile or soap dish was located with warm water and a sponge to eliminate any additional dust or debris left over from the removal process.
Step 4
Locate a replacement tile or soap dish that is as close a match as possible to the original. Take a piece of the broken tile or dish and a piece of the removed grout to a hardware store to get matches.
Step 5
Set the new tile into the vacant space to verify it fits properly and won't rock back and forth. Remove additional grout as necessary to get the tile to fit appropriately. Likewise, the soap dish should slide into the space left by the old one with minimal difficulty.
Step 6
Add a layer of adhesive to the back of the replacement tile or dish. A putty knife works well for this. Leave a border around the outside of the tile untouched by the adhesive since it will spread when you push the tile or the dish into the wall. Use a little bit of extra adhesive with the soap dish since it is heavier.
Step 7
Press the tile or soap dish into its position in the wall. Hold it there for several minutes to give the adhesive time to dry and to prevent the tile or dish from slipping. Use the dull razor to remove any adhesive that comes out over the sides.
Step 8
Apply replacement gout to the area around the new tile or soap dish after the adhesive has had a day to set.
Video of the Day