Things You'll Need
Fabric
Pillow form
Thread
Invisible zipper
Scissors
Sewing machine
Iron

Throw pillows are a great way to customize a room and change up the decor. There are more color and print options to choose from when you make your own, plus it is less expensive than purchasing new pillows at a store. This project shows you how to measure and sew a throw pillow cover with an invisible zipper.
How to Make a Throw Pillow
Step 1

Choose one fabric, or make a reversible pillow by using two different fabrics. If you want a custom sized pillow, fill your pillow cover with batting or fiberfill, rather than a pillow form. Include a zipper closure for a removable cover for washing, or hand sew the seam for an easy finish. See final slide for an itemized materials list.
Video of the Day
Step 2
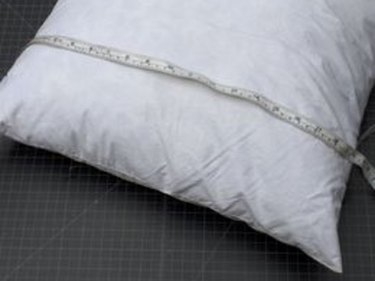
Measure the pillow form across the front from seam to seam. Use this measurement to cut out a square of fabric. Do not add seam allowance for a tighter fitting cover.
Step 3
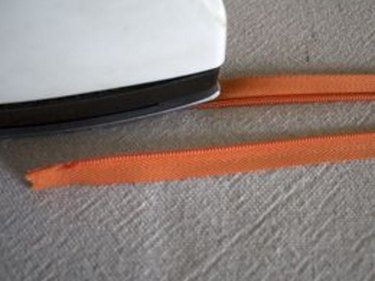
Press the coils of the invisible zipper open with an iron. This will allow you to stitch closer to the edge of the coil.
Step 4
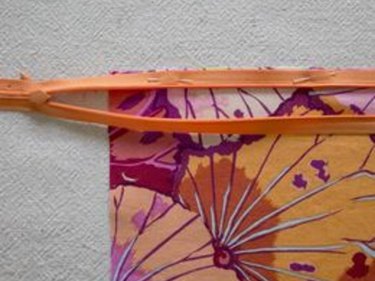
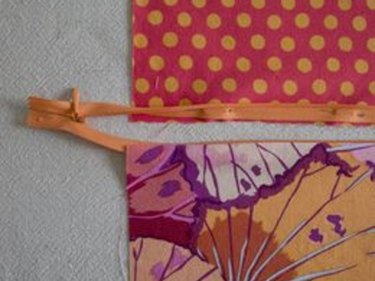
Pin the right side of the zipper to the right side of the fabric. Place the coils along the seam allowance 1/2 inch from the edge, coils facing inward.
Step 5
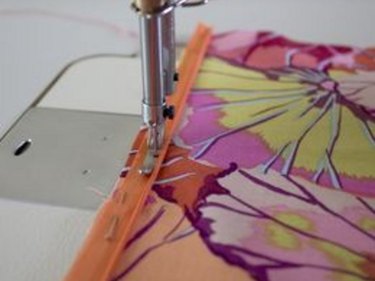
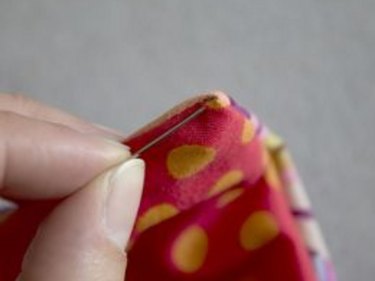
Stitch as close to the coils as you can with a zipper presser foot. Start and stop your stitch at least 1 inch from the edge on both ends of the zipper.
There are two types of presser feet to use for an invisible zipper. One has an open edge (shown), allowing you to stitch close to the side of the coil. The other has a groove in the presser foot, which guides the coil through the groove while you stitch.
Step 6

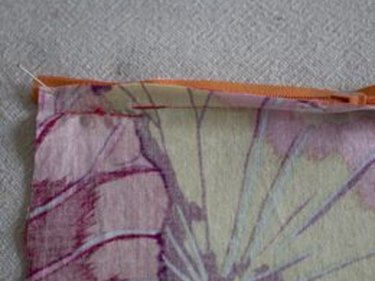
Close the zipper to check your stitch. Fold under the seam allowance of the opposite side and place it on top of the zipper as shown. Place one pin to mark the correct placement of the zipper.
Step 7
Unzip the zipper and pin the length of the zipper to the seam allowance, coils facing inward. It is easy to twist the zipper in this step, so double check your placement by closing the zipper to see if it is funcional before you sew. Open the zipper and stitch along the coil. Iron the seam.
Step 8
Stitch the ends of the zipper seam closed by placing right sides together and sewing up to the end of the zipper's stitch line. It is ok if the stitch lines do not match up perfectly. Finish fabric edge with pinking shears, or iron under edge 1/4 inch and stitch down to prevent fraying.
Step 9
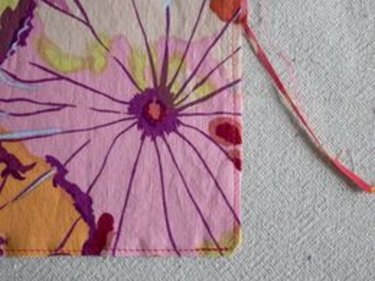
Finish the other three sides of the pillow with a french seam for a clean and enclosed edge. Pin pattern pieces together right side out and stitch 1/4 inch from the edge. Trim seam allowance and cut the corners at a 45 degree angle.
Step 10
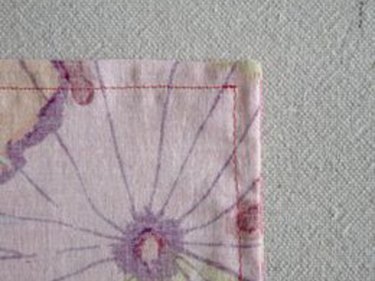
Turn your fabric inside out and press the seam flat. Sew 1/4 inch from the edge to finish the french seam.
Step 11
Turn fabric right side out. Use a pin to pull the fabric at the corners for a pointed finish. Iron seams.
Step 12
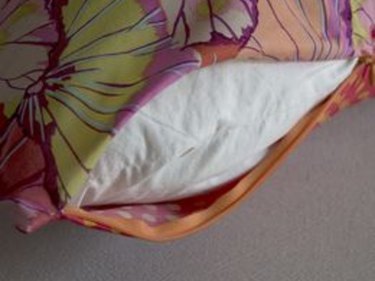
Insert the pillow form into the pillow cover. Close the zipper and enjoy your new throw pillow.
Tip
Make several pillows in a few different sizes for a great arrangement on a couch or bed.
Video of the Day