Things You'll Need
Fabric
Compass with pencil
Piece of cardboard, 6 inches square or larger
Fabric marking pen or pencil
Scissors
Hand-sewing needle
Thread
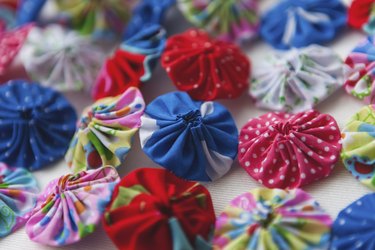
Yo-yo quilts are not traditional quilts because they do not have a layer of batting and a fabric backing. The yo-yo, a rosette made from a circle of fabric, makes its own backing and creates dimension that mimics the effects of a light batting. The ability to use small scraps of fabric to make yo-yos made these quilts popular in the Depression-era 1930s. They were thrifty to make, yet pretty and utilitarian. Today, yo-yo quilts are a favored quilt-on-the-go project because the rosettes can be made and stitched together by hand.
Make Yo-Yos
Step 1
Set the radius of the compass to 2 1/2 inches. This will give you a 5-inch circle.
Video of the Day
Step 2
Draw a 5-inch circle on the piece of cardboard.
Step 3
Cut out the circle. This is your yo-yo template.
Step 4
Smooth out fabric, printed side down. The unprinted, or "wrong" side of the fabric, should be facing you.
Step 5
Trace the circle shape onto the fabric, using a fabric pen or fabric marker. Leave about 1/2-inch between circles that you trace onto the fabric.
Step 6
Cut out the fabric circles.
Step 7
Thread a needle. Even both ends of the thread and knot together, giving you a double strand of thread with which to sew.
Step 8
Fold 1/4-inch of the edge of the fabric circle in toward the unprinted side of the fabric and smooth it down. Use a 1/2-inch running stitch to sew over the fold through both layers of fabric all the way around the circle.
Step 9
Gently pull the needle to gather the edge of the circle until the amount of gathering is to your liking. You should not have to pull very tight. Knot the thread and snip to complete the yo-yo. Gently stretch, pull and flatten the yo-yo to give it the basic shape you want.
Step 10
Continue making yo-yos until you have the amount required for your quilt.
Step 11
Attach the yo-yos by whipstitching the sides to form rows.
Step 12
Connect the rows with whipstitches to complete the quilt.
Tip
A lap-sized quilt will require about 486 yo-yos, while a twin-size quilt will require about 1,452 yo-yos.
Cut plenty of fabric circles ahead and take along with you to sew when you are waiting for appointments or on your lunch break.
Try a variety of fabrics when making your yo-yos, such as cotton, voile, poly-cotton blends, corduroy, denim, tencel, velour, felt, khaki and muslin.
Place different-colored buttons in the center of your yo-yos to make them look like flowers. Sew them to your quilt along with green felt stems.
It is unnecessary to iron the fabric during the process.
Warning
If allowing children to sew, be sure they keep a consistent seam allowance and are old enough to properly take needle precautions.
Video of the Day