Dyeing concrete is a fantastic way to create a minimal, industrial look in you home that is still warm and inviting. In this tutorial, I've used a light pink tone which is commonly seen in modern Scandinavian decor. The hue adds subtle color without overpowering the overall aesthetic, but you can dye your DIY concrete soap dish any color you choose to match your bathroom decor.
Things You'll Need
Cooking oil
Two plastic Tupperware containers to create the soap dish (one large, one small)
One plastic Tupperware container to mix the concrete
White concrete
Mica powdered dyes (often used in soap making)
Fine sand paper
Disposable stirrer
Latex gloves
Video of the Day
Step 1: Secure Two Plastic Containers
Find two plastic Tupperware containers, one smaller than the other. These will serve as molds for your DIY concrete soap dish.
Video of the Day
Step 2: Oil the Containers
Pour a small amount of oil into the larger, spreading it evenly over the whole inside surface. Then, use the excess to coat the outer surface of the smaller vessel.
Step 3: Prepare About Half of the Concrete
Mix up approximately half the concrete you will need for the soap dish in a similarly sized Tupperware container to help you estimate the proper amount you need. Slowly add water until the concrete has a smooth thick consistency. The concrete should be wet, but hold itself in place as you mix.
Step 4: Wear Protective Gear
Wear protective latex gloves and cover your clothes to ensure there are no dyeing mishaps. These dyes are very strong and spread quickly. Use a small amount and seal the packaging immediately after use.
Step 5: Add the Powdered Dye
Add a small amount of mica powdered dye to the concrete mixture.
Step 6: Adjust the Depth of the Color
Mix the dye into the concrete until the color is even. If you want a stronger color add a little more dye to increase the color.
Step 7: Pour the Concrete Into the Molding Container
Pour the concrete into the container that we previously covered with oil. Smooth out the concrete and burst any air bubbles that rise to the surface.
Step 8: Set the Second Container Into the First
Take the smaller container and place on top of the concrete making sure it's in the center of the concrete surface.
Step 9: Allow the Wet Concrete to Dry
Leave the concrete to dry overnight.
Step 10: Prepare the Second Half of the Concrete
Mix up the other half of the concrete. This time do not add the dye. Pour this into the larger container around the outside of the smaller container to create the sides of the soap dish.
Step 11: Dry and Unmold
Leave to dry for 2 to 3 days. Once the concrete is stable ad firm remove from the large container. Carefully squeeze the smaller container at the sides to detach from the concrete, pulling gently out at the same time. If the concrete begins to crack or looks flaky leave it set for another night before completing this step.
Step 12: Sand the Edges
Sand the edges of the concrete smooth.
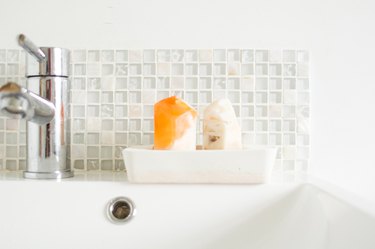
Step 13: Finish the DIY Concrete Soap Dish
Sand the top surface also, if necessary. Once the sides are smooth, your DIY concrete soap dish is ready to use.
- Love, Create, Celebrate: DIY Soap Dish Made With Concrete
- Little Lovelies: 25 DIY Soap Dish Projects That Will Make Your Bathroom Look Good
- YouTube – Sajart: 5 Awesome White Cement Soap Dish Ideas – Cement Craft & home Decor Ideas
- YouTube – Showmake: Terrazzo Concrete DIY – Modern Soap Dish Holder – Cement Crafts